содержание .. 293 294 295 296 ..
Nissan GT-R. Manual - part 295
SATELLITE SENSOR
SR-23
< REMOVAL AND INSTALLATION >
C
D
E
F
G
I
J
K
L
M
A
B
SR
N
O
P
SATELLITE SENSOR
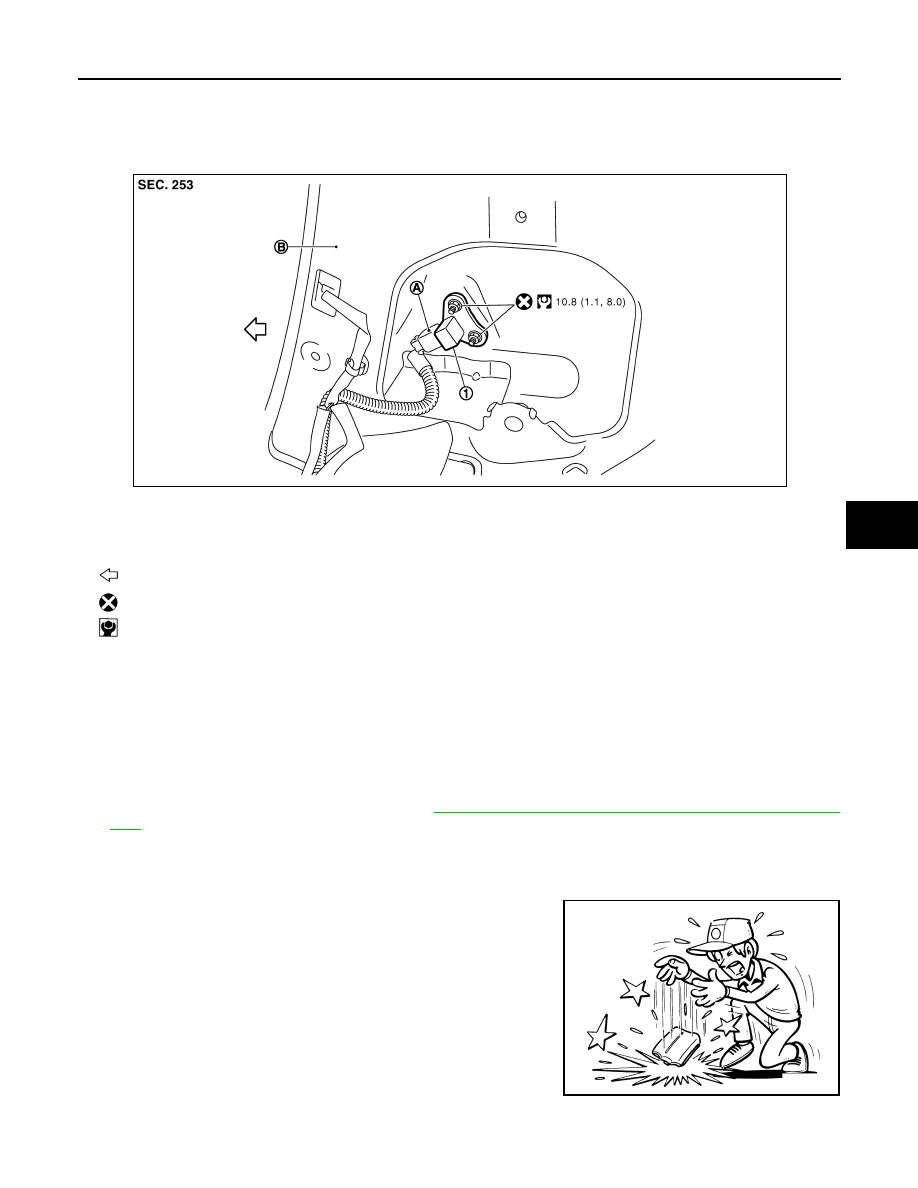
Exploded View
INFOID:0000000009161537
Removal and Installation
INFOID:0000000009161538
WARNING:
• Before servicing, turn ignition switch OFF, disconnect battery negative terminal and wait 3 minutes
or more.
• Never use the air tools or electric tools for servicing.
REMOVAL
1.
Remove the front seat belt retractor. Refer to
SB-6, "SEAT BELT RETRACTOR : Removal and Installa-
2.
Disconnect the satellite sensor harness connector.
3.
Remove the satellite sensor mounting nut, and then remove the satellite sensor.
CAUTION:
• Never impact the satellite sensor.
• Replace the satellite sensor if it is dropped or sustains an
impact.
• Replace the satellite sensor of deployed side air bag module and deployed curtain air bag module.
1.
Satellite sensor
A
: Satellite sensor harness connector
B
: Center pillar inner panel
: Vehicle front
: Always replace after every disassembly.
: N·m (kg-m, in-lb)
NNHIA0013GB
JMHIA0009ZZ