содержание .. 145 146 147 148 ..
Nissan GT-R. Manual - part 147
WINDSHIELD GLASS
GW-11
< REMOVAL AND INSTALLATION >
C
D
E
F
G
H
I
J
L
M
A
B
GW
N
O
P
REMOVAL AND INSTALLATION
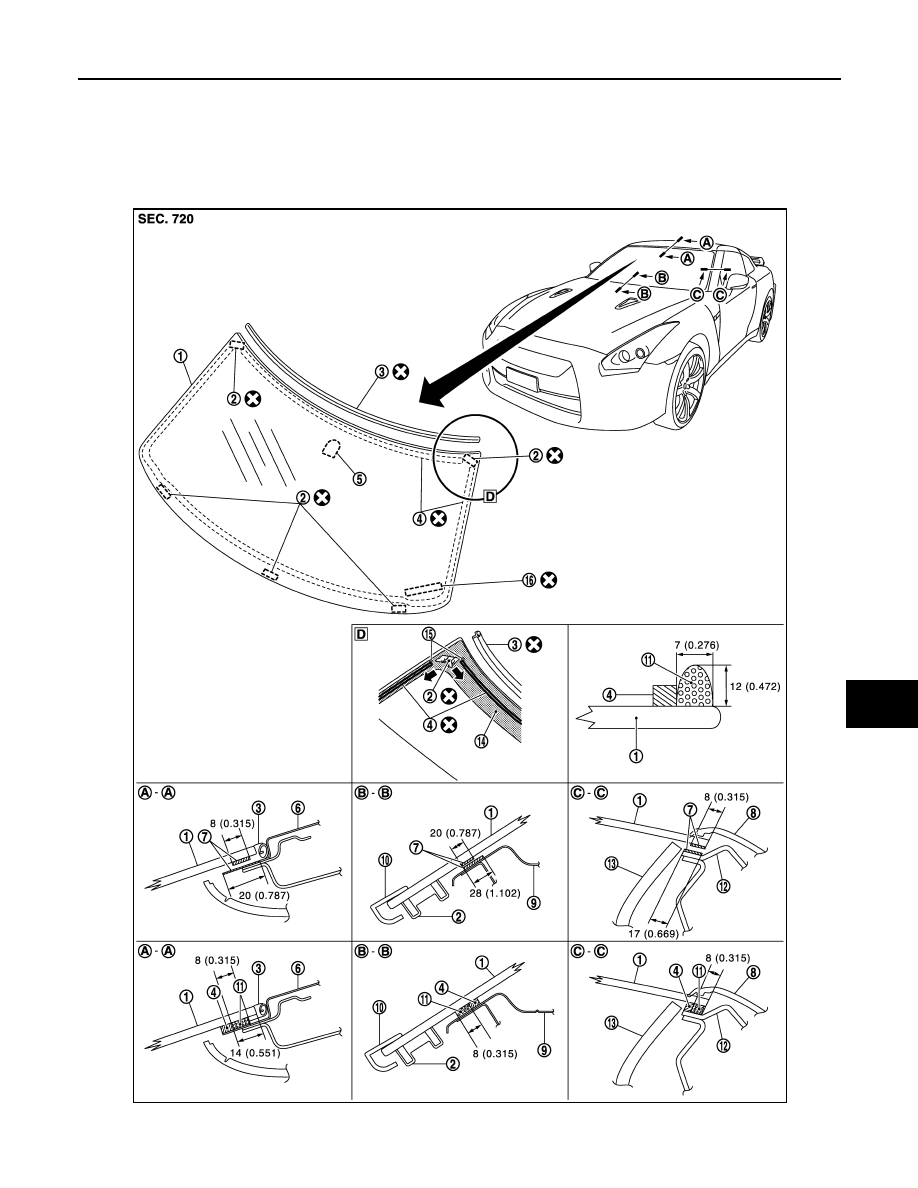
WINDSHIELD GLASS
Exploded View (GT-R certified NISSAN dealer)
INFOID:0000000009161678
JMKIA2802GB