содержание .. 116 117 118 119 ..
Nissan GT-R. Manual - part 118
EXT-26
< REMOVAL AND INSTALLATION >
COWL TOP
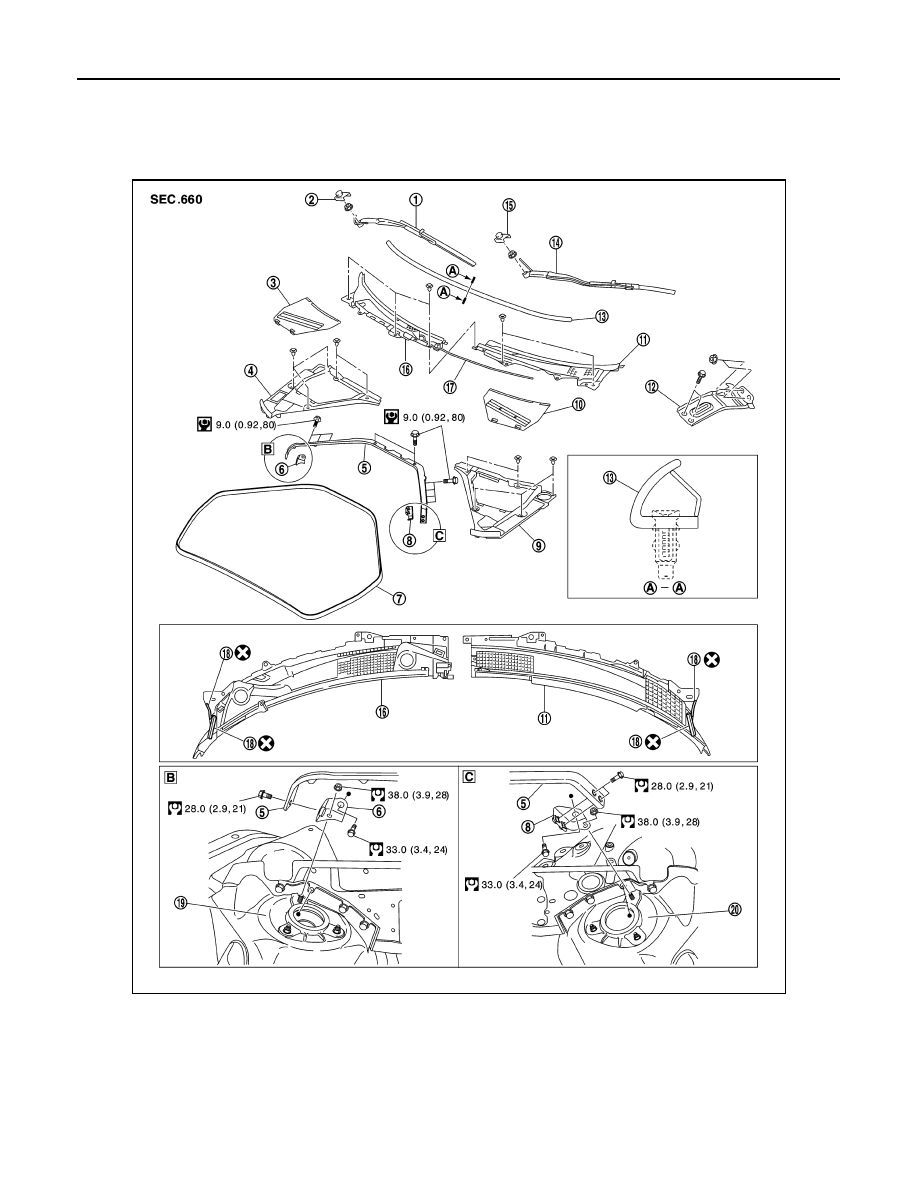
COWL TOP
Exploded View
INFOID:0000000009161557
RHD models
JMKIA6704GB
1.
Wiper arm & blade RH
2.
Wiper arm cover RH
3.
Brake master cylinder cover
4.
Hoodledge cover RH
5.
Strut support bar
6.
Strut support bar bracket RH
7.
Cowl top cover seal
8.
Strut support bar bracket LH
9.
Hoodledge cover LH
10. Battery cover
11. Cowl top cover LH
12. Cowl top center stay
13. Cowl top cover seal
14. Wiper arm & blade LH
15. Wiper arm cover LH
16. Cowl top cover RH
17. Washer tube
18. EPT sealer