Nissan Pathfinder (2010 year). Manual - part 62
AV
AUDIO ANTENNA
AV-303
< ON-VEHICLE REPAIR >
[BOSE AUDIO WITHOUT NAVIGATION]
C
D
E
F
G
H
I
J
K
L
M
B
A
O
P
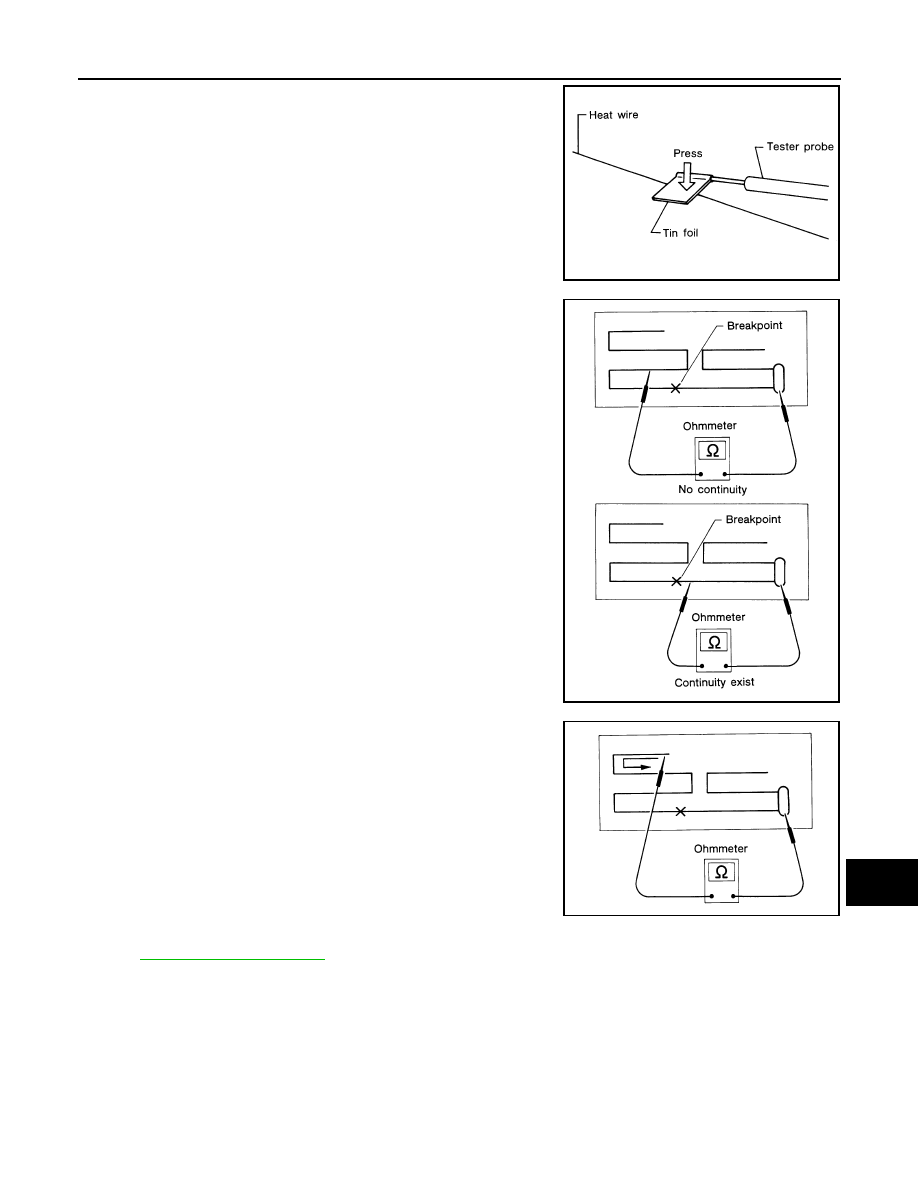
•
When measuring continuity, wrap tin foil around the top of
probe. Then, press the foil against the wire with your fin-
ger.
2. If an element is broken, no continuity will exist.
3. To locate a break, move probe along element. Tester indication
will change abruptly when probe passes the broken point.
ELEMENT REPAIR
SEL122R
SEL252I
SEL253I
2010 Pathfinder
2010 Pathfinder