Nissan Teana J32. Manual - part 622
 

  Index      Nissan     Nissan Teana J32 (2008 year) - Service and Repair Manual


Search            


Content   ..  620  621  622  623   ..


Nissan Teana J32. Manual - part 622


TRANSVERSE LINK

FSU-13

< ON-VEHICLE REPAIR >

C

D

F

G

H

I

J

K

L

M

A

B

FSU

N

O

P

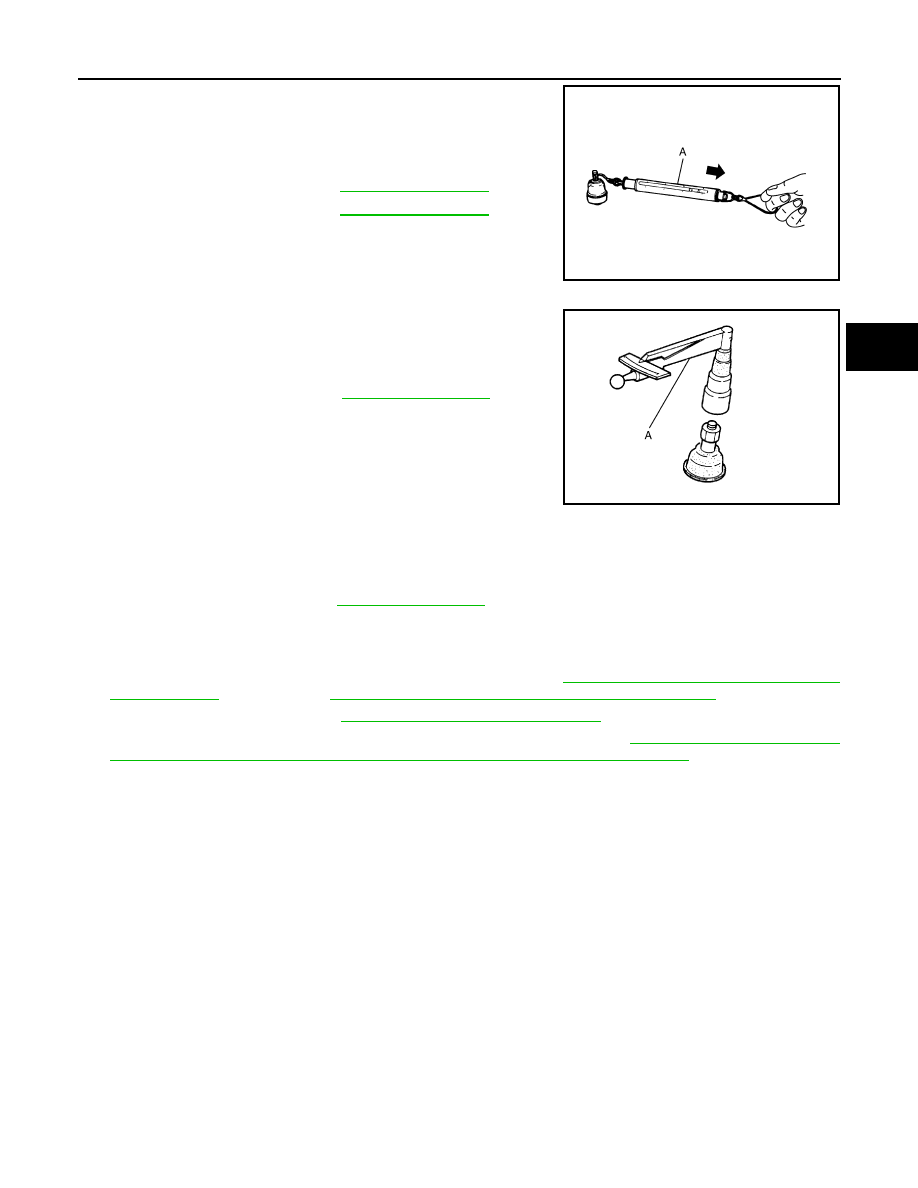
• Hook a spring balance (A) at cotter pin mounting hole. Confirm

spring balance measurement value is within specifications when
ball stud begins moving.

- If swing torque exceeds standard value, replace transverse link

assembly.

Rotating Torque Inspection

• Attach mounting nut to boll stud. Check that rotating torque is

within specifications with a preload gauge (A) (SST: ST3127S000).

- If rotating torque exceeds standard range, replace transverse link

assembly.

Axial End Play Inspection

• Move tip of ball stud in axial direction to check for looseness.

- If axial end play exceeds the standard value, replace transverse link assembly.

INSPECTION AFTER INSTALLATION

1.

Check wheel sensor harness for proper connection. Refer to 

BRC-57, "FRONT WHEEL SENSOR :

Exploded View"

 (without VDC), 

BRC-151, "FRONT WHEEL SENSOR : Exploded View"

 (with VDC).

2.

Check wheel alignment. Refer to 

FSU-7, "Wheel Alignment Inspection"

.

3.

Adjust neutral position of steering angle sensor (with VDC). Refer to 

BRC-66, "ADJUSTMENT OF

STEERING ANGLE SENSOR NEUTRAL POSITION : Special Repair Requirement"

.

Standard

Swing torque

:Refer to 

FSU-18, "Ball Joint"

.

Spring balance 
measurement

:Refer to 

FSU-18, "Ball Joint"

.

JPEIA0005ZZ

Standard

Rotating torque

: Refer to 

FSU-18, "Ball Joint"

.

PDIA1258E

Standard

Axial end play

:Refer to 

FSU-18, "Ball Joint"

.

FSU-14

< ON-VEHICLE REPAIR >

FRONT STABILIZER

FRONT STABILIZER

Exploded View

INFOID:0000000003811123

Removal and Installation

INFOID:0000000003811124

REMOVAL

1.

Remove tires.

2.

Remove front exhaust tube. Refer to 

EX-5, "Exploded View"

.

3.

Remove stabilizer connecting rod.

4.

Remove steering gear assembly. Refer to 

ST-18, "Exploded View"

.

5.

Remove mounting bolts (

) of stabilizer clamp, and then

remove stabilizer clamp and stabilizer bushing from front sus-
pension member.

6.

Remove stabilizer bar.

INSTALLATION

Note the following, and install in the reverse order of removal.

1.

Stabilizer clamp

2.

Stabilizer bushing

3.

Stabilizer bar

4.

Front suspension member

5.

Stabilizer connecting rod


Refer to 

GI-4, "Components"

 for symbols in the figure.

JPEIA0101GB

WEIA0182E

FRONT STABILIZER

FSU-15

< ON-VEHICLE REPAIR >

C

D

F

G

H

I

J

K

L

M

A

B

FSU

N

O

P

• Install stabilizer clamp that notch (A) becomes vehicle front side

(

).

• Install stabilizer bushing that slit (B) becomes vehicle front side

(

).

Inspection

INFOID:0000000003811125

INSPECTION AFTER REMOVAL

Check stabilizer bar, stabilizer connecting rod, stabilizer bushing and stabilizer clamp for deformation, cracks
or damage. Replace if necessary.

JPEIA0058ZZ

FSU-16

< REMOVAL AND INSTALLATION >

FRONT SUSPENSION MEMBER

REMOVAL AND INSTALLATION

FRONT SUSPENSION MEMBER

Exploded View

INFOID:0000000003811126

Removal and Installation

INFOID:0000000003811127

REMOVAL

1.

Remove tires.

2.

Remove under cover.

3.

Remove wheel sensor. Refer to 

BRC-57, "FRONT WHEEL SENSOR : Exploded View"

 (without VDC),

BRC-151, "FRONT WHEEL SENSOR : Exploded View"

 (with VDC).

4.

Remove lock plate of brake hose. Refer to 

BR-19, "FRONT : Exploded View"

.

5.

Remove caliper assembly. Hang caliper assembly not to interfere with work. Refer to 

BR-34, "BRAKE

CALIPER ASSEMBLY : Exploded View"

.

6.

Remove stabilizer connecting rod (upper side). Refer to 

FSU-14, "Exploded View"

.

7.

Remove exhaust front tube. Refer to 

EX-5, "Exploded View"

.

8.

Remove power steering solenoid valve harness connector and harness clip. Refer to 

ST-18, "Exploded

View"

.

9.

Remove heat insulator from suspension member.

10. Remove drive shaft. Refer to 

FAX-18, "LEFT SIDE : Removal and Installation"

 (left side), 

FAX-19, "RIGHT

SIDE : Removal and Installation"

 (right side).

11. Separate lower shaft and steering gear assembly. Refer to 

ST-16, "Exploded View"

.

12. Remove power steering oil pump and then separate suction hose and high pressure piping. Refer to 

ST-

28, "Exploded View"

ST-34, "Exploded View"

.

13. Separate engine mount insulator from engine assembly. Refer to 

EM-67, "Exploded View"

.

14. Set suitable jack to front suspension member.

15. Remove front suspension member stay.
16. Remove front suspension member mounting bolts.

17. Gradually lower the jack placed at the front suspension member.

CAUTION:

Perform the work while checking that the jack is stable.

1.

Front suspension member

2.

Rebound stopper

3.

Front suspension member stay

Refer to 

GI-4, "Components"

 for symbols in the figure.

JPEIA0102GB


Content   ..  620  621  622  623   ..