Nissan Teana J32. Manual - part 200
 

  Index      Nissan     Nissan Teana J32 (2008 year) - Service and Repair Manual


Search            


Content   ..  198  199  200  201   ..


Nissan Teana J32. Manual - part 200


AV

CENTER SPEAKER

AV-655

< ON-VEHICLE REPAIR >

[BOSE AUDIO WITH NAVIGATION]

C

D

E

F

G

H

I

J

K

L

M

B

A

O

P

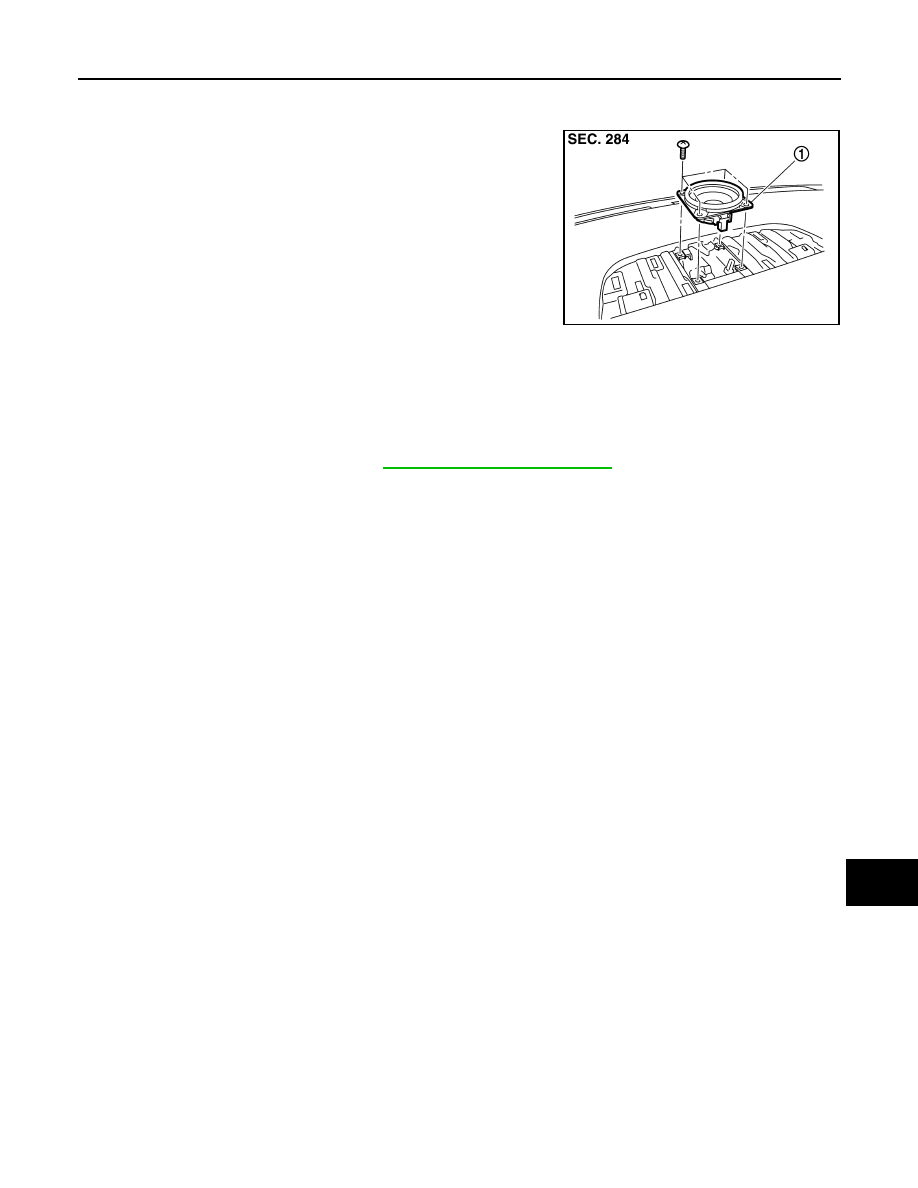
CENTER SPEAKER

Exploded View

INFOID:0000000003765995

Removal and Installation

INFOID:0000000003765996

REMOVAL

1.

Remove center speaker grille. Refer to 

IP-12, "Removal and Installation"

.

2.

Remove center speaker mounting screws, lift up the center speaker and disconnect center speaker con-
nector.

3.

Remove center speaker.

INSTALLATION

Installation is the reverse order of removal.

JPNIA1039ZZ

1.

Center speaker

AV-656

< ON-VEHICLE REPAIR >

[BOSE AUDIO WITH NAVIGATION]

WOOFER

WOOFER

Exploded View

INFOID:0000000003765997

Removal and Installation

INFOID:0000000003765998

REMOVAL

1.

Remove rear parcel shelf finisher. Refer to 

INT-43, "Removal and Installation"

.

2.

Remove woofer mounting bolts, lift up the woofer and disconnect woofer connector.

3.

Remove woofer.

INSTALLATION

Installation is the reverse order of removal.

JPNIA1041ZZ

1.

Woofer

AV

BOSE AMP.

AV-657

< ON-VEHICLE REPAIR >

[BOSE AUDIO WITH NAVIGATION]

C

D

E

F

G

H

I

J

K

L

M

B

A

O

P

BOSE AMP.

Exploded View

INFOID:0000000003765999

Removal and Installation

INFOID:0000000003766000

REMOVAL

1.

Remove trunk front finisher upper. Refer to 

INT-57, "Removal and Installation"

.

2.

Remove BOSE amp. mounting bolts, disconnect the BOSE amp. connector.

3.

Remove BOSE amp.

INSTALLATION

Installation is the reverse order of removal.

JPNIA1042ZZ

:

Vehicle front

1.

BOSE amp.

AV-658

< ON-VEHICLE REPAIR >

[BOSE AUDIO WITH NAVIGATION]

ANTENNA AMP.

ANTENNA AMP.

Exploded View

INFOID:0000000003766001

Removal and Installation

INFOID:0000000003766002

REMOVAL

1.

Remove rear side pillar finisher. Refer to 

INT-39, "Removal and Installation"

2.

Disconnect antenna feeder connector and clip.

3.

Remove antenna amp. mounting nut, disconnect the antenna amp. connector.

4.

Remove antenna amp. 

INSTALLATION

Installation is the reverse order of removal.

JPNIA1032ZZ

1.

AM-FM main connector

2.

Antenna amp.


Content   ..  198  199  200  201   ..