Content .. 1227 1228 1229 1230 ..
Nissan Teana J32. Manual - part 1229
VTL-102
< ON-VEHICLE REPAIR >
[WITH 7 INCH DISPLAY]
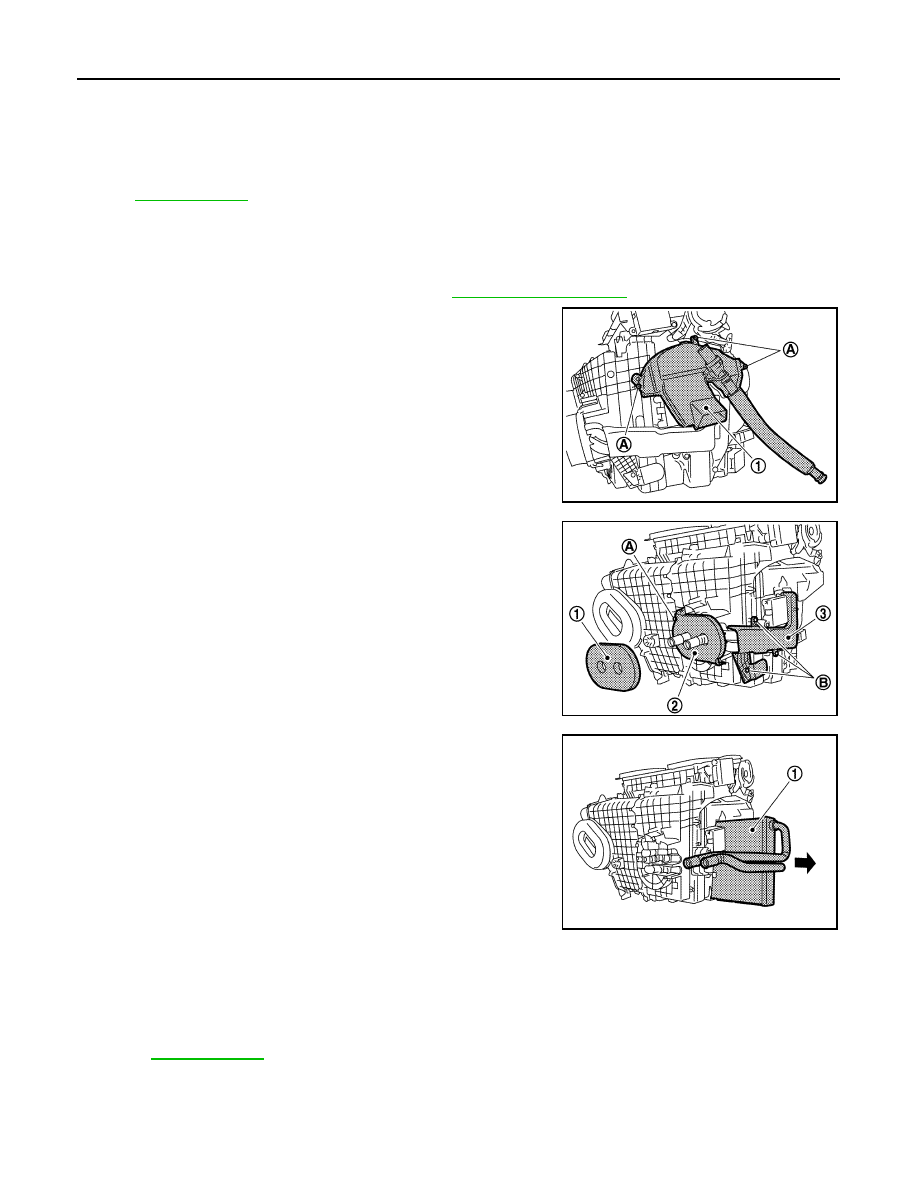
HEATER CORE
Removal and Installation
INFOID:0000000003894516
REMOVAL
1.
Remove heater & cooling unit assembly. Refer to
.
2.
Remove mounting screws (A), and then remove foot duct (left)
(1).
3.
Remove heater pipe grommet (1).
4.
Remove mounting screw (A), and then remove heater pipe sup-
port (2).
5.
Remove mounting screws (B), and then remove heater pipe
cover (3).
6.
Slide heater core (1) to leftward (as shown in the figure).
INSTALLATION
Installation is basically the reverse order of removal.
CAUTION:
• Replace O-rings with new ones. Then apply compressor oil to them when installing.
• Check for refrigerant leakage when charging refrigerant.
NOTE:
• Refer to
when filling radiator with engine coolant.
• Charge the refrigerant.
37. Defroster door link
38.
Foot door link
39.
Max. cool door lever
40. Foot door lever
41.
Defroster door lever
42.
Adapter case
43. Distributor lower case
44.
Ventilator door
45.
Intake sensor
46. Intake sensor bracket
47.
Foot door
48.
Max. cool door
49. Defroster door
50.
Air mix door (Slide door)
for symbols in the figure.
JPIIA0925ZZ
JPIIA0926ZZ
JPIIA0927ZZ