содержание .. 935 936 937 938 ..
Nissan Murano Z51. Manual - part 937
INT-18
< REMOVAL AND INSTALLATION >
DOOR FINISHER
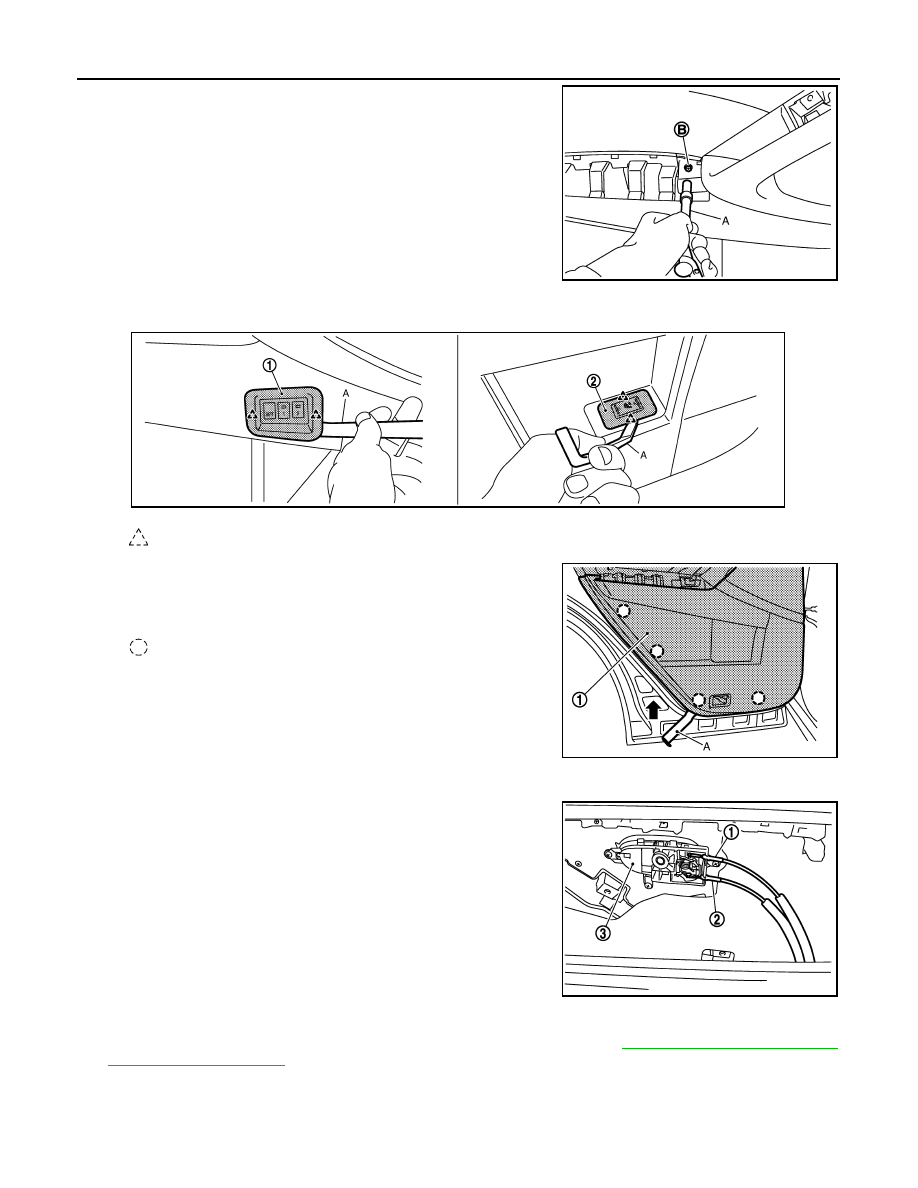
8.
Remove bolt (B) located behind armrest finisher with tool (A).
9.
Remove seat memory switch finisher (1) and rear heated seat (LH/RH) switch finisher (2) with remover
tool (A), then disconnect the harness connectors. (With sunroof)
10. Insert remover tool (A) between door finisher and door panel to
disengage door finisher mounting clips, starting from the bottom
and working to the top.
11. Pull up rear door finisher and pull out.
12. Disconnect lock knob cable (1) and inside handle cable (2) from
rear door inside handle (3).
13. Remove rear door finisher.
14. Remove the inside handle after removing rear door finisher. Refer to
.
INSTALLATION
Install in the reverse order of removal.
CAUTION:
JMJIA1356ZZ
: Pawl
JMJIA1358ZZ
: Clip
JMJIA1360ZZ
JMJIA1359ZZ