содержание .. 460 461 462 463 ..
Nissan Murano Z51. Manual - part 462
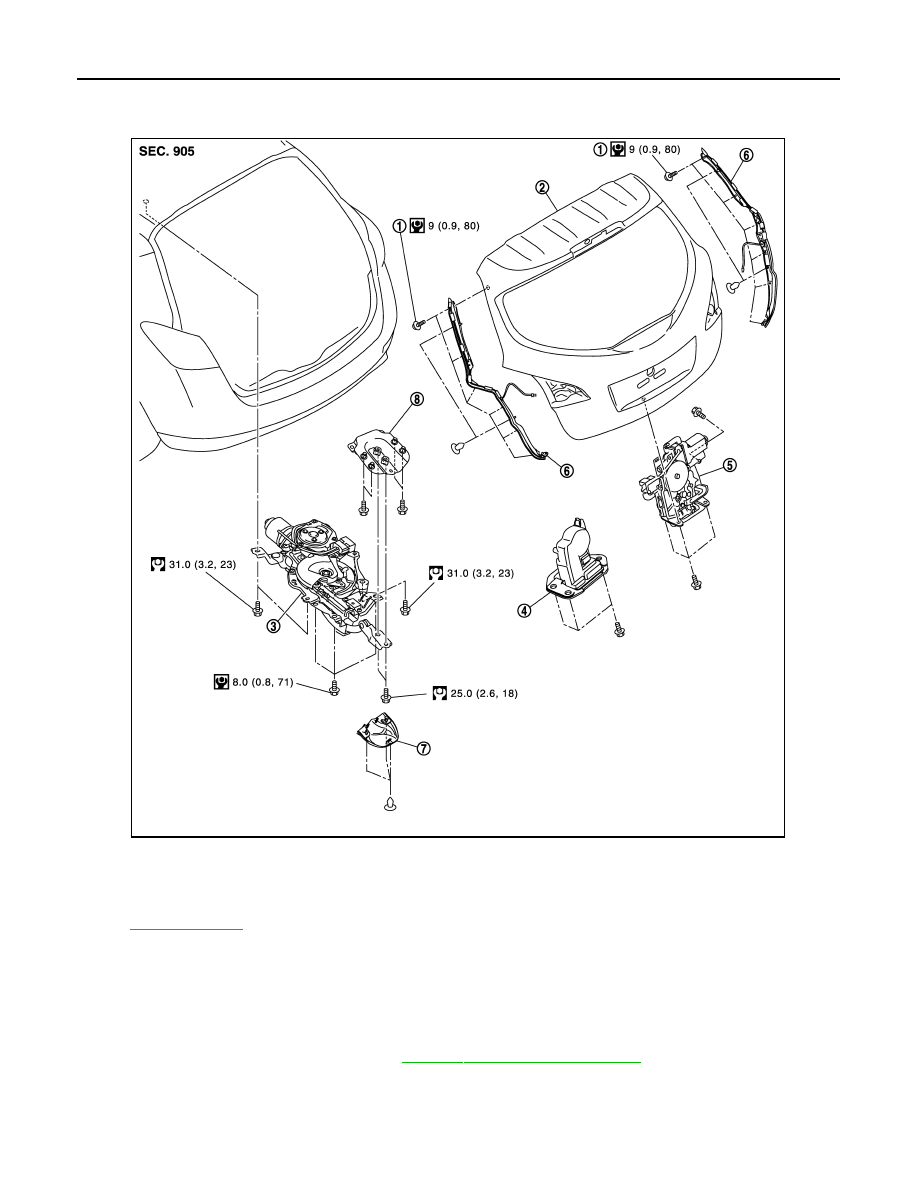
DLK-356
< REMOVAL AND INSTALLATION >
[WITH INTELLIGENT KEY SYSTEM]
BACK DOOR LOCK
TOUCH SENSOR : Exploded View
INFOID:0000000005517827
TOUCH SENSOR : Removal and Installation
INFOID:0000000005517828
CAUTION:
Take care not to bend touch sensor.
REMOVAL
1.
Remove back door finisher inner. Refer to
INT-38, "Removal and Installation"
2.
Disconnect touch sensor connector.
JMKIA1804GB
1.
TORX bolt
2.
Back door assembly
3.
Power back door drive assembly
4.
Back door lock assembly (normal)
5.
Back door lock assembly (super lock)
6.
Touch sensor (RH/LH)
7.
Cover
8.
Patch
Refer to
for symbols in the figure.