Nissan Murano Z50 (2006 year). Manual - part 8


  Index      Manuals     Nissan Murano Z50 (2006 year) - Service and Repair Manual


Search            copyright infringement  


Content      ..     6      7      8      9     ..


Nissan Murano Z50 (2006 year). Manual - part 8


TROUBLE DIAGNOSIS

ATC-89

C

D

E

F

G

H

I

K

L

M

A

B

ATC

Revision: 2006 August

2006 Murano

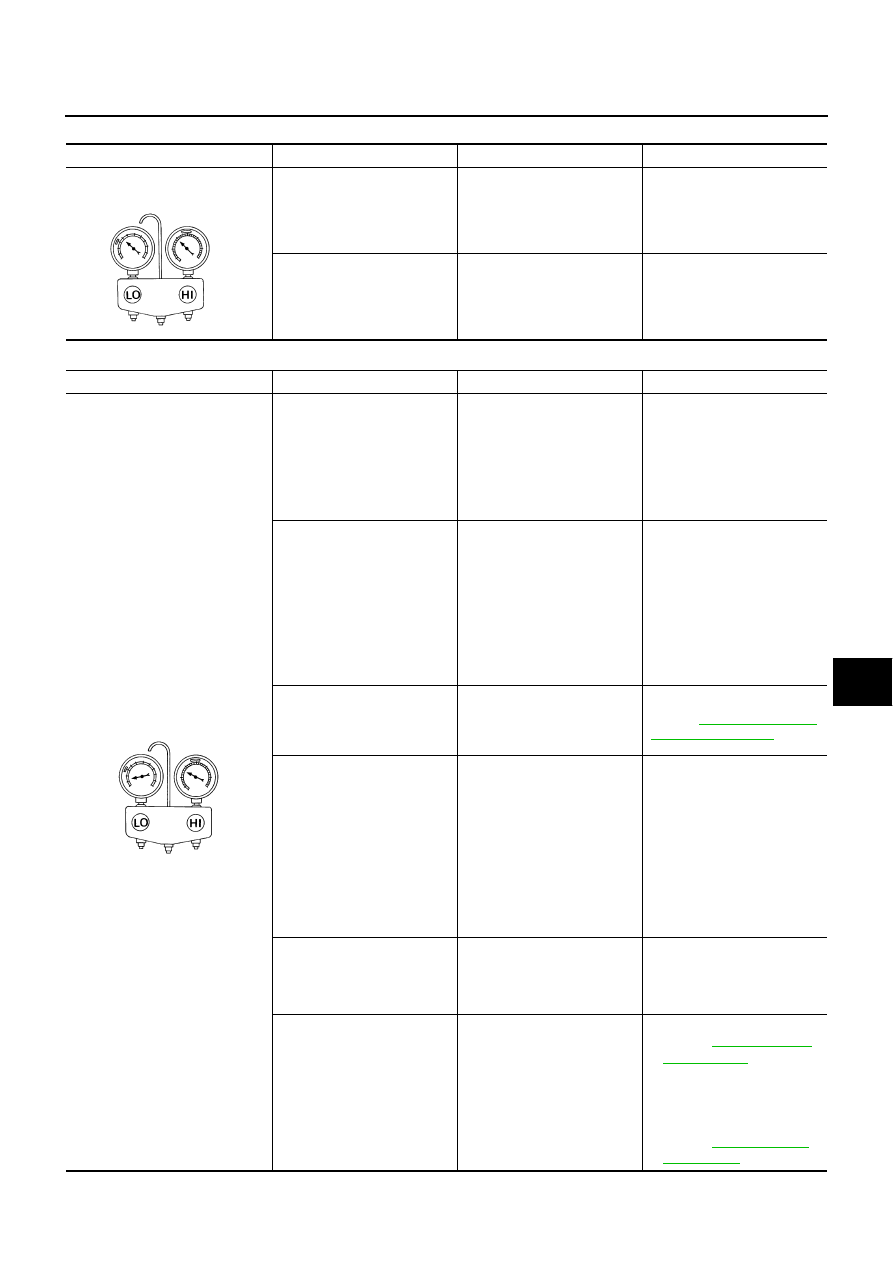
High-pressure Side is Too Low and Low-pressure Side is Too High

Both High- and Low-pressure Sides are Too Low

Gauge indication

Refrigerant cycle

Probable cause

Corrective action

High-pressure side is too low and 
low-pressure side is too high.

High- and low-pressure sides 
become equal soon after com-
pressor operation stops.

Compressor pressure opera-
tion is improper.

Damaged inside compressor 
packings.

Replace compressor.

No temperature difference 
between high- and low-pres-
sure sides.

Compressor pressure opera-
tion is improper.

Damaged inside compressor 
packings.

Replace compressor.

AC356A

Gauge indication

Refrigerant cycle

Probable cause

Corrective action

Both high- and low-pressure sides 
are too low.

There is a big temperature 
difference between liquid 
tank outlet and inlet. Outlet 
temperature is extremely 
low.

Liquid tank inlet and expan-
sion valve are frosted.

Liquid tank inside is slightly 
clogged.

Replace liquid tank.

Check lubricant for contami-
nation.

Temperature of expansion 
valve inlet is extremely low 
as compared with areas 
near liquid tank.

Expansion valve inlet is 
frosted.

Temperature difference 
occurs somewhere in high-
pressure side.

High-pressure pipe located 
between liquid tank and 
expansion valve is clogged.

Check and repair malfunc-
tioning parts.

Check lubricant for contami-
nation.

Expansion valve and liquid 
tank are warm or slightly cool 
when touched.

Low refrigerant charge.

Leaking fittings or compo-
nents.

Check refrigerant for leaks. 
Refer to 

ATC-144, "Checking 

for Refrigerant Leaks"

 .

There is a big temperature dif-
ference between expansion 
valve inlet and outlet while the 
valve itself is frosted.

Expansion valve closes a little 
compared with the specifica-
tion.

1. Improper expansion valve 

adjustment.

2. Malfunctioning expansion 

valve.

3. Outlet and inlet may be 

clogged.

Remove foreign particles by 
using compressed air.

Replace expansion valve.

Check lubricant for contami-
nation.

An area of the low-pressure 
pipe is colder than areas near 
the evaporator outlet.

Low-pressure pipe is clogged 
or crushed.

Check and repair malfunc-
tioning parts.

Check lubricant for contami-
nation.

Air flow volume is not enough 
or is too low.

Evaporator is frozen.

Check intake sensor circuit.
Refer to 

ATC-104, "Intake 

Sensor Circuit"

 .

Replace compressor.

Repair evaporator fins.

Replace evaporator.

Refer to 

ATC-72, "Blower 

Motor Circuit"

 .

AC353A

ATC-90

TROUBLE DIAGNOSIS

Revision: 2006 August

2006 Murano

Low-pressure Side Sometimes Becomes Negative

Low-pressure Side Becomes Negative

Gauge indication

Refrigerant cycle

Probable cause

Corrective action

Low-pressure side sometimes 
becomes negative.

Air conditioning system 
does not function and does 
not cyclically cool the com-
partment air.

The system constantly func-
tions for a certain period of 
time after compressor is 
stopped and restarted.

Refrigerant does not dis-
charge cyclically.

Moisture is frozen at expan-
sion valve outlet and inlet.

Water is mixed with refriger-
ant.

Drain water from refrigerant 
or replace refrigerant.

Replace liquid tank.

AC354A

Gauge indication

Refrigerant cycle

Probable cause

Corrective action

Low-pressure side becomes nega-
tive.

Liquid tank or front/rear side of 
expansion valve’s pipe is 
frosted or wet with dew.

High-pressure side is closed 
and refrigerant does not flow.

Expansion valve or liquid tank 
is frosted.

Leave the system at rest until 
no frost is present. Start it 
again to check whether or not 
the malfunction is caused by 
water or foreign particles.

If water is the cause, initially 
cooling is okay. Then the 
water freezes causing a 
blockage. Drain water from 
refrigerant or replace refrig-
erant.

If due to foreign particles, 
remove expansion valve 
and remove the particles 
with dry and compressed air 
(not shop air).

If either of the above meth-
ods cannot correct the mal-
function, replace expansion 
valve.

Replace liquid tank.

Check lubricant for contami-
nation.

AC362A

TROUBLE DIAGNOSIS

ATC-91

C

D

E

F

G

H

I

K

L

M

A

B

ATC

Revision: 2006 August

2006 Murano

Insufficient Heating

NJS000B7

SYMPTOM: Insufficient heating

INSPECTION FLOW

*1

ATC-55, "Operational Check"

*2

ATC-66, "Air Mix Door Motor Circuit"

*3

ATC-48, "FUNCTION CONFIRMA-
TION PROCEDURE"

, see No. 4 to 6.

*4

ATC-48, "FUNCTION CONFIRMA-
TION PROCEDURE"

, see No.13.

*5

ATC-59, "LAN System Circuit"

*6

ATC-72, "Blower Motor Circuit"

*7

EC-209, "DTC P0117, P0118 ECT 
SENSOR"

*8

CO-9, "Changing Engine Coolant"

*9

CO-15, "Checking Radiator Cap"

SJIA1231E

ATC-92

TROUBLE DIAGNOSIS

Revision: 2006 August

2006 Murano

Noise

NJS000B8

SYMPTOM: Noise

INSPECTION FLOW

*1

ATC-55, "Operational Check"

*2

ATC-135, "Check Disc to Pulley 
Clearance"

*3

ATC-22, "Maintenance of Lubricant 
Quantity in Compressor"

*4

EM-13, "Checking Drive Belts"

SJIA0843E

TROUBLE DIAGNOSIS

ATC-93

C

D

E

F

G

H

I

K

L

M

A

B

ATC

Revision: 2006 August

2006 Murano

Self-diagnosis

NJS000B9

SYMPTOM: Self-diagnosis cannot be performed.

INSPECTION FLOW

*1

ATC-57, "Power Supply and Ground 
Circuit for Auto Amp."

*2

ATC-95, "Ambient Sensor Circuit"

*3

ATC-98, "In-vehicle Sensor Circuit"

*4

ATC-101, "Sunload Sensor Circuit"

*5

ATC-104, "Intake Sensor Circuit"

*6

ATC-68, "Air Mix Door Motor PBR 
Circuit"

*7

ATC-55, "Operational Check"

*8

ATC-36, "SYMPTOM TABLE"

SJIA1163E

ATC-94

TROUBLE DIAGNOSIS

Revision: 2006 August

2006 Murano

Memory Function

NJS000BA

SYMPTOM: Memory function does not operate.

INSPECTION FLOW

*1

ATC-57, "Power Supply and Ground 
Circuit for Auto Amp."

*2

ATC-55, "Operational Check"

*3

ATC-48, "FUNCTION CONFIRMA-
TION PROCEDURE"

SJIA1164E

TROUBLE DIAGNOSIS

ATC-95

C

D

E

F

G

H

I

K

L

M

A

B

ATC

Revision: 2006 August

2006 Murano

Ambient Sensor Circuit

NJS000BB

COMPONENT DESCRIPTION
Ambient Sensor

The ambient sensor is attached on the radiator core support (left
side). It detects ambient temperature and converts it into a resis-
tance value which is then input into the unified meter and A/C amp.

AMBIENT TEMPERATURE INPUT PROCESS

The unified meter and A/C amp. includes a processing circuit for the ambient sensor input. However, when the
temperature detected by the ambient sensor increases quickly, the processing circuit retards the unified meter
and A/C amp. function. It only allows the unified meter and A/C amp. to recognize an ambient temperature
increase of 0.33

°

C (0.6

°

F) per 100 seconds.

As an example, consider stopping for a few minutes after high speed driving. Although the actual ambient tem-
perature has not changed, the temperature detected by the ambient sensor will increase. This is because the
heat from the engine compartment can radiate to the front grille area, location of the ambient sensor.

DIAGNOSIS PROCEDURE FOR AMBIENT SENSOR

SYMPTOM: Ambient sensor circuit is open or shorted. (21 or 

 21 is

indicated on unified meter and A/C amp. As a result of performing
self-diagnosis STEP-2.)

1. 

CHECK VOLTAGE BETWEEN AMBIENT SENSOR AND GROUND

1.

Disconnect ambient sensor connector.

2.

Turn ignition switch ON.

3.

Check voltage between ambient sensor harness connector E15
terminal 1 and ground.

OK or NG

OK

>> GO TO 2.

NG

>> GO TO 4.

RJIA3971E

RJIA1461E

1 – Ground

: Approx. 5 V

RJIA2017E

ATC-96

TROUBLE DIAGNOSIS

Revision: 2006 August

2006 Murano

2. 

CHECK CIRCUIT CONTINUITY BETWEEN AMBIENT SENSOR AND UNIFIED METER AND A/C AMP. 

1.

Turn ignition switch OFF.

2.

Disconnect unified meter and A/C amp. connector.

3.

Check continuity between ambient sensor harness connector
E15 terminal 2 and unified meter and A/C amp. harness connec-
tor M51 terminal 49.

OK or NG

OK

>> GO TO 3.

NG

>> Repair harness or connector.

3. 

CHECK AMBIENT SENSOR

Refer to 

ATC-97, "Ambient Sensor"

 .

OK or NG

OK

>> 1. Replace unified meter and A/C amp.

2. Go to self-diagnosis 

ATC-48, "FUNCTION CONFIRMATION PROCEDURE"

  and perform self-

diagnosis STEP-2. Confirm that code No. 20 is displayed.

NG

>> 1. Replace ambient sensor.

2. Go to self-diagnosis 

ATC-48, "FUNCTION CONFIRMATION PROCEDURE"

  and perform self-

diagnosis STEP-2. Confirm that code No. 20 is displayed.

4. 

CHECK CIRCUIT CONTINUITY BETWEEN AMBIENT SENSOR AND UNIFIED METER AND A/C AMP.

1.

Turn ignition switch OFF.

2.

Disconnect unified meter and A/C amp. connector.

3.

Check continuity between ambient sensor harness connector
E15 terminal 1 and unified meter and A/C amp. harness connec-
tor M51 terminal 39.

4.

Check continuity between ambient sensor harness connector
E15 terminal 1 and ground.

OK or NG

OK

>> 1. Replace unified meter and A/C amp.

2. Go to self-diagnosis 

ATC-48, "FUNCTION CONFIRMATION PROCEDURE"

  and perform self-

diagnosis STEP -2. Confirm that code No. 20 is displayed.

NG

>> Repair harness or connector.

2 – 49

: Continuity should exist.

RJIA2018E

1 – 39

: Continuity should exist.

1 – Ground

: Continuity should not exist.

RJIA2019E

TROUBLE DIAGNOSIS

ATC-97

C

D

E

F

G

H

I

K

L

M

A

B

ATC

Revision: 2006 August

2006 Murano

COMPONENT INSPECTION
Ambient Sensor

After disconnecting ambient sensor connector E15, measure resis-
tance between terminals 1 and 2 at sensor side. Refer to the table
below.

If NG, replace ambient sensor.

Temperature 

°

C (

°

F)

Resistance k


15 (5)

12.73


10 (14)

9.92


5 (23)

7.80

0 (32)

6.19

5 (41)

4.95

10 (50)

3.99

15 (59)

3.24

20 (68)

2.65

25 (77)

2.19

30 (86)

1.81

35 (95)

1.51

40 (104)

1.27

45 (113)

1.07

RJIA3972E

ATC-98

TROUBLE DIAGNOSIS

Revision: 2006 August

2006 Murano

In-vehicle Sensor Circuit

NJS000BC

COMPONENT DESCRIPTION
In-vehicle Sensor

The in-vehicle sensor is located on instrument driver lower panel. It
converts variations in temperature of compartment air drawn from
the aspirator into a resistance value. It is then input into the unified
meter and A/C amp.

Aspirator

The aspirator is located on driver’s side of heater & cooling unit
assembly. It produces vacuum pressure due to air discharged from
the heater & cooling unit assembly, continuously taking compartment
air in the aspirator.

RJIA1802E

RJIA3973E

RJIA1804E

TROUBLE DIAGNOSIS

ATC-99

C

D

E

F

G

H

I

K

L

M

A

B

ATC

Revision: 2006 August

2006 Murano

DIAGNOSIS PROCEDURE FOR IN-VEHICLE SENSOR

SYMPTOM: In-vehicle sensor circuit is open or shorted. (22 or 

22 is

indicated on unified meter and A/C amp. as a result of performing
self-diagnosis STEP-2.)

1. 

CHECK VOLTAGE BETWEEN IN-VEHICLE SENSOR AND GROUND

1.

Disconnect in-vehicle sensor connector.

2.

Turn ignition switch ON.

3.

Check voltage between in-vehicle sensor harness connector
M52 terminal 1 and ground.

OK or NG

OK

>> GO TO 2.

NG

>> GO TO 4.

2. 

CHECK CIRCUIT CONTINUITY BETWEEN IN-VEHICLE SENSOR AND UNIFIED METER AND A/C 

AMP.

1.

Turn ignition switch OFF.

2.

Disconnect unified meter and A/C amp. connector.

3.

Check continuity between in-vehicle sensor harness connector
M52 terminal 2 and unified meter and A/C amp. harness con-
nector M51 terminal 49.

OK or NG

OK

>> GO TO 3.

NG

>> Repair harness or connector.

3. 

CHECK IN-VEHICLE SENSOR

Refer to 

ATC-100, "In-vehicle Sensor"

 .

OK or NG

OK

>> 1. Replace unified meter and A/C amp.

2. Go to self-diagnosis 

ATC-48, "FUNCTION CONFIRMATION PROCEDURE"

  and perform self-

diagnosis STEP-2. Confirm that code No. 20 is displayed.

NG

>> 1. Replace in-vehicle sensor.

2. Go to self-diagnosis 

ATC-48, "FUNCTION CONFIRMATION PROCEDURE"

  and perform self-

diagnosis STEP-2. Confirm that code No. 20 is displayed.

RJIA1452E

1 – Ground

: Approx. 5 V

RJIA2022E

2 – 49

: Continuity should exist.

RJIA2023E

ATC-100

TROUBLE DIAGNOSIS

Revision: 2006 August

2006 Murano

4. 

CHECK CIRCUIT CONTINUITY BETWEEN IN-VEHICLE SENSOR AND UNIFIED METER AND A/C 

AMP.

1.

Turn ignition switch OFF.

2.

Disconnect unified meter and A/C amp. connector.

3.

Check continuity between in-vehicle sensor harness connector
M52 terminal 1 and unified meter and A/C amp. harness con-
nector M51 terminal 40.

4.

Check continuity between in-vehicle sensor harness connector
M52 terminal 1 and ground.

OK or NG

OK

>> 1. Replace unified meter and A/C amp.

2. Go to self-diagnosis 

ATC-48, "FUNCTION CONFIRMATION PROCEDURE"

  and perform self-

diagnosis STEP-2. Confirm that code No. 20 is displayed.

NG

>> Repair harness or connector.

COMPONENT INSPECTION
In-vehicle Sensor

After disconnecting in-vehicle sensor connector M52, measure resis-
tance between terminals 1 and 2 at sensor side. Refer to the table
below.

If NG, replace in-vehicle sensor.

1 – 40

: Continuity should exist.

1 – Ground

: Continuity should not exist.

RJIA2024E

Temperature 

°

C (

°

F)

Resistance k


15 (5)

12.73


10 (14)

9.92


5 (23)

7.80

0 (32)

6.19

5 (41)

4.95

10 (50)

3.99

15 (59)

3.24

20 (68)

2.65

25 (77)

2.19

30 (86)

1.81

35 (95)

1.51

40 (104)

1.27

45 (113)

1.07

RJIA1805E

TROUBLE DIAGNOSIS

ATC-101

C

D

E

F

G

H

I

K

L

M

A

B

ATC

Revision: 2006 August

2006 Murano

Sunload Sensor Circuit

NJS000BD

COMPONENT DESCRIPTION
Sunload Sensor

The sunload sensor is located on the passenger’s side instrument
mask. It detects sunload entering through windshield by means of a
photo diode. The sensor converts the sunload into a current value
which is then input into the unified meter and A/C amp.

SUNLOAD INPUT PROCESS

The unified meter and A/C amp. also includes a processing circuit which averages the variations in detected
sunload over a period of time. This prevents drastic swings in the ATC system operation due to small or quick
variations in detected sunload.
For example, consider driving along a road bordered by an occasional group of large trees. The sunload
detected by the sunload sensor will vary whenever the trees obstruct the sunlight. The processing circuit aver-
ages the detected sunload over a period of time, so that the (insignificant) effect of the trees momentarily
obstructing the sunlight does not cause any change in the ATC system operation. On the other hand, shortly
after entering a long tunnel, the system will recognize the change in sunload, and the system will react accord-
ingly.

DIAGNOSIS PROCEDURE FOR SUNLOAD SENSOR

SYMPTOM: Sunload sensor circuit is open or shorted. (25 or 

25 is

indicated on unified meter and A/C amp. as a result of performing
self-diagnosis STEP-2.)

1. 

CHECK VOLTAGE BETWEEN SUNLOAD SENSOR AND GROUND

1.

Disconnect sunload sensor connector.

2.

Turn ignition switch ON.

3.

Check voltage between sunload sensor harness connector M79
terminal 1 and ground.

OK or NG

OK

>> GO TO 2.

NG

>> GO TO 4.

RJIA1806E

RJIA1455E

1 – Ground

: Approx. 5 V

RJIA2027E

ATC-102

TROUBLE DIAGNOSIS

Revision: 2006 August

2006 Murano

2. 

CHECK CIRCUIT CONTINUITY BETWEEN SUNLOAD SENSOR AND UNIFIED METER AND A/C AMP.

1.

Turn ignition switch OFF.

2.

Disconnect unified meter and A/C amp. connector.

3.

Check continuity between sunload sensor harness connector
M79 terminal 2 and unified meter and A/C amp. harness con-
nector M51 terminal 49.

OK or NG

OK

>> GO TO 3.

NG

>> Repair harness or connector.

3. 

CHECK SUNLOAD SENSOR

1.

Reconnect sunload sensor connector and unified meter and A/C amp. connector.

2.

Refer to 

ATC-103, "Sunload Sensor"

 .

OK or NG

OK

>> 1. Replace unified meter and A/C amp.

2. Go to self-diagnosis 

ATC-48, "FUNCTION CONFIRMATION PROCEDURE"

  and perform self-

diagnosis STEP-2. Confirm that code No. 20 is displayed.

NG

>> 1. Replace sunload sensor.

2. Go to self-diagnosis 

ATC-48, "FUNCTION CONFIRMATION PROCEDURE"

  and perform self-

diagnosis STEP-2. Confirm that code No. 20 is displayed.

4. 

CHECK CIRCUIT CONTINUITY BETWEEN SUNLOAD SENSOR AND UNIFIED METER AND A/C AMP.

1.

Turn ignition switch OFF.

2.

Disconnect unified meter and A/C amp. connector.

3.

Check continuity between sunload sensor harness connector
M79 terminal 1 and unified meter and A/C amp. harness con-
nector M51 terminal 50.

4.

Check continuity between sunload sensor harness connector
M79 terminal 1 and ground.

OK or NG

OK

>> 1. Replace unified meter and A/C amp.

2. Go to self-diagnosis 

ATC-48, "FUNCTION CONFIRMATION PROCEDURE"

  and perform self-

diagnosis STEP-2. Confirm that code No. 20 is displayed.

NG

>> Repair harness or connector.

2 – 49

: Continuity should exist.

RJIA2028E

1 – 50

: Continuity should exist.

1 – Ground

: Continuity should not exist.

RJIA2029E

TROUBLE DIAGNOSIS

ATC-103

C

D

E

F

G

H

I

K

L

M

A

B

ATC

Revision: 2006 August

2006 Murano

COMPONENT INSPECTION
Sunload Sensor

Measure voltage between unified meter and A/C amp. harness con-
nector M51 terminal 50 and ground.

When checking sunload sensor, select a place where sunshine directly on it.

If NG, replace sunload sensor.

RJIA1807E

SHA930E

ATC-104

TROUBLE DIAGNOSIS

Revision: 2006 August

2006 Murano

Intake Sensor Circuit

NJS000BE

COMPONENT DESCRIPTION
Intake Sensor

The intake sensor is located on the heater & cooling unit assembly. It
converts temperature of air after it passes through the evaporator
into a resistance value which is then input to the unified meter and A/
C amp.

DIAGNOSIS PROCEDURE FOR INTAKE SENSOR

SYMPTOM: Intake sensor circuit is open or shorted. (24 or 

24 is

indicated on unified meter and A/C amp. as a result of performing
self-diagnosis STEP-2.)

1. 

CHECK VOLTAGE BETWEEN INTAKE SENSOR AND GROUND

1.

Disconnect intake sensor connector.

2.

Turn ignition switch ON.

3.

Check voltage between intake sensor harness connector M256
terminal 1 and ground.

OK or NG

OK

>> GO TO 2.

NG

>> GO TO 4.

2. 

CHECK CIRCUIT CONTINUITY BETWEEN INTAKE SENSOR AND UNIFIED METER AND A/C AMP.

1.

Turn ignition switch OFF.

2.

Disconnect unified meter and A/C amp. connector.

3.

Check continuity between intake sensor harness connector
M256 terminal 2 and unified meter and A/C amp. harness con-
nector M51 terminal 49.

OK or NG

OK

>> GO TO 3.

NG

>> Repair harness or connector.

RJIA1808E

RJIA1458E

1 – Ground

: Approx. 5 V

RJIA1809E

2 – 49

: Continuity should exist.

RJIA1810E


Content      ..     6      7      8      9     ..