Nissan Murano. Manual - part 464


  Главная      Nissan     Nissan Murano (2014 year) - Service Manual


поиск по сайту            


содержание   ..  462  463  464  465   ..


Nissan Murano. Manual - part 464


PREPARATION

DLN-95

< PREPARATION >

[REAR FINAL DRIVE: R145]

C

E

F

G

H

I

J

K

L

M

A

B

DLN

N

O

P

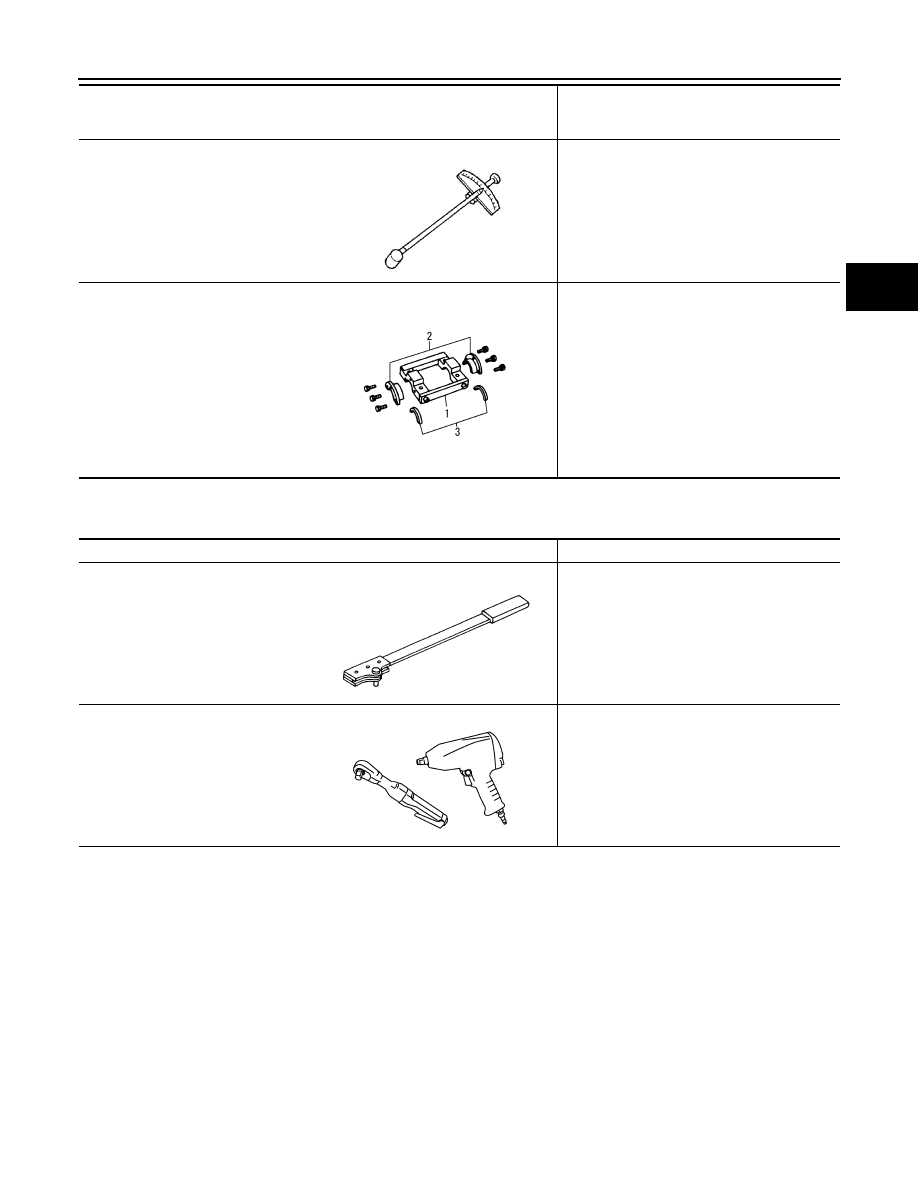
Commercial Service Tools

INFOID:0000000009718178

ST3127S000
(J-25765-A)
Preload gauge

Measuring preload torque

KV381086S1
(

)

Dummy cover set
1. KV38108610
(

)

Dummy cover
2. KV38108621
(

)

Dummy cover spacer
3. KV38108630
(

)

Dummy cover shim

• Checking backlash
• Checking drive gear runout
• Checking tooth contact

Tool number
(Kent-More No.)
Tool name

Description

ZZA0503D

SDIA2313E

Tool name

Description

Flange wrench

Removing and installing companion flange 
lock nut

Power tool

Loosening bolts and nuts

NT771

PBIC0190E

DLN-96

< PERIODIC MAINTENANCE >

[REAR FINAL DRIVE: R145]

REAR DIFFERENTIAL GEAR OIL

PERIODIC MAINTENANCE

REAR DIFFERENTIAL GEAR OIL

Inspection

INFOID:0000000009718179

OIL LEAKAGE

Check that oil is not leaking from final drive assembly or around it.

OIL LEVEL

• Remove filler plug (1) and check oil level from filler plug mounting

hole as shown in the figure.

CAUTION:

Never start engine while checking oil level.

• Set a new gasket on filler plug and install it on final drive assembly.

Refer to 

DLN-107, "Exploded View"

.

CAUTION:

Never reuse gasket.

Draining

INFOID:0000000009718180

1.

Stop engine.

2.

Remove drain plug (1) and drain gear oil.

3.

Set a new gasket on drain plug and install it to final drive assem-
bly and tighten to the specified torque. Refer to 

DLN-107,

"Exploded View"

.

CAUTION:

Never reuse gasket.

Refilling

INFOID:0000000009718181

1.

Remove filler plug (1). Fill with new gear oil until oil level reaches
the specified level near filler plug mounting hole.

2.

After refilling oil, check oil level. Set a new gasket to filler plug, then install it to final drive assembly. Refer
to 

DLN-107, "Exploded View"

.

CAUTION:

Never reuse gasket.

JPDID0164ZZ

JPDID0163ZZ

Oil grade and viscosity

: Refer to 

MA-15, "FOR 

NORTH AMERICA : Fluids 
and Lubricants"

 (for 

NORTH AMERICA), 

MA-16, 

"FOR MEXICO : Fluids and 
Lubricants"

 (for MEXICO).

Oil capacity

: Refer to 

DLN-129, "Gen-

eral Specification"

.

JPDID0164ZZ

FRONT OIL SEAL

DLN-97

< REMOVAL AND INSTALLATION >

[REAR FINAL DRIVE: R145]

C

E

F

G

H

I

J

K

L

M

A

B

DLN

N

O

P

REMOVAL AND INSTALLATION

FRONT OIL SEAL

Exploded View

INFOID:0000000009718182

Removal and Installation

INFOID:0000000009718183

REMOVAL

1.

Remove rear propeller shaft. Refer to 

DLN-85, "Exploded View"

.

2.

Put matching mark on the thread edge of electric controlled cou-
pling. The matching mark should be in line with the matching
mark on companion flange.

CAUTION:

For matching mark, use paint. Never damage electric con-
trolled coupling.

1.

Final drive assembly

2.

Front oil seal

3.

Companion flange

4.

Companion flange lock nut

A.

Oil seal lip

: Vehicle front

: Apply gear oil.

Refer to 

GI-4, "Components"

 for symbols not described above.

JPDID0004GB

PDIA0455E

DLN-98

< REMOVAL AND INSTALLATION >

[REAR FINAL DRIVE: R145]

FRONT OIL SEAL

3.

Remove companion flange lock nut, using a flange wrench
(commercial service tool). Then remove companion flange.

4.

Remove front oil seal from coupling cover, using a suitable tool.

CAUTION:

Be careful not to damage coupling cover.

INSTALLATION

1.

Install front oil seal until it becomes flush with the coupling cover
end, using the drifts.

CAUTION:

• Never reuse oil seal.
• When installing, never incline oil seal.
• Apply multi-purpose grease onto oil seal lips, and gear oil

onto the circumference of oil seal.

2.

Align the matching mark of electric controlled coupling with the
matching mark of companion flange, then install the companion
flange.

3.

Install companion flange lock nut with a flange wrench (commer-
cial service tool), tighten to the specified torque.

CAUTION:

Never reuse companion flange lock nut.

4.

Install rear propeller shaft. Refer to 

DLN-85, "Exploded View"

.

5.

When oil leaks while removing, check oil level after the installa-
tion. Refer to 

DLN-96, "Inspection"

.

JSDIA0199ZZ

JSDIA0200ZZ

A

: Drift [SST: KV38100200 (J-26233)]

B

: Drift [SST: ST27861000 (

)]

PDIA0038E

PDIA0455E


содержание   ..  462  463  464  465   ..