содержание .. 671 672 673 674 ..
Nissan X-Trail 32. Manual - part 673
TRANSFER CASE
DLN-103
< UNIT DISASSEMBLY AND ASSEMBLY >
[TRANSFER: TY21C]
C
E
F
G
H
I
J
K
L
M
A
B
DLN
N
O
P
TRANSFER CASE
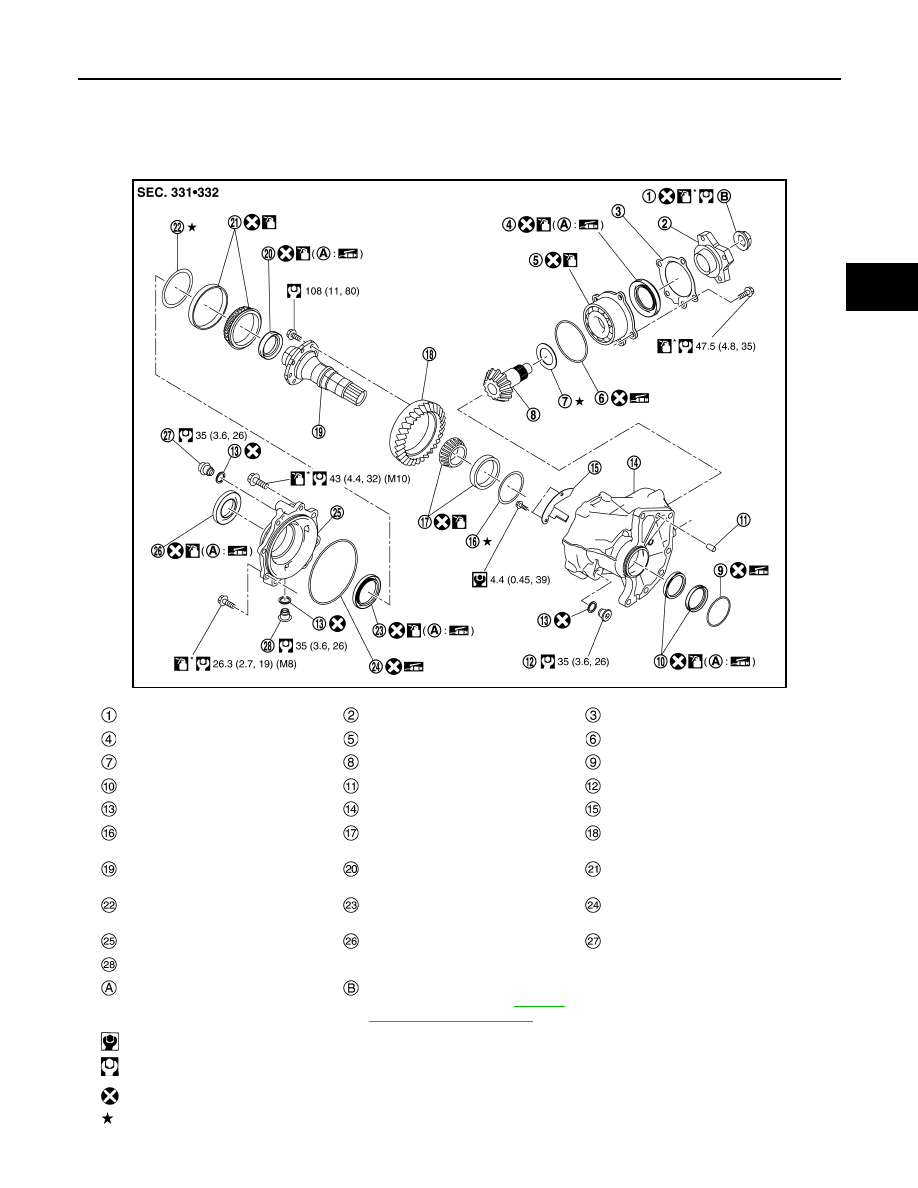
Exploded View
INFOID:0000000010992052
MR20DD models
JSDIA5341GB
Pinion lock nut
Companion flange
Dust cover
Oil seal
Pinion bearing assembly
O-ring
Drive pinion adjusting shim
Drive pinion
O-ring
Oil seal
Dowel pin
Plug
Gasket
Transfer case
Baffle plate
Ring gear bearing adjusting shim
(transfer case side)
Ring gear bearing (transfer case
side)
Ring gear
Ring gear shaft
Ring gear shaft oil seal
Ring gear bearing (transfer cover
side)
Ring gear bearing adjusting shim
(transfer cover side)
Oil seal
O-ring
Transfer cover
Oil seal
Filler plug
Drain plug
Oil seal lip
Comply with the assembly procedure
when tightening. Refer to
.
: N·m (kg-m, in-lb)
: N·m (kg-m, ft-lb)
: Always replace after every disassembly.
: Select with proper thickness.