содержание .. 609 610 611 612 ..
Nissan X-Trail 32. Manual - part 611
FUEL FILLER LID OPENER
DLK-785
< REMOVAL AND INSTALLATION >
[TYPE 3]
C
D
E
F
G
H
I
J
L
M
A
B
DLK
N
O
P
2.
Remove fuel mounting pin
.
3.
Remove mounting bolts, and then remove fuel filler lid assembly.
INSTALLATION
Note the following items, and then install in the reverse order of removal.
CAUTION:
• After installation, apply the touch-up paint (the body color) onto the head of the mounting screws.
• After installation, check fuel filler lid assembly open/close, lock/unlock operation.
NOTE:
• The following table shows the specified values for checking normal installation status.
• Fitting adjustment cannot be performed.
Unit: mm [in]
FUEL FILLER LID LOCK
FUEL FILLER LID LOCK : Removal and Installation
INFOID:0000000010728601
REMOVAL
1.
Fully open fuel filler lid.
2.
Remove luggage side lower finisher RH. Refer to
INT-43, "LUGGAGE SIDE LOWER FINISHER :
.
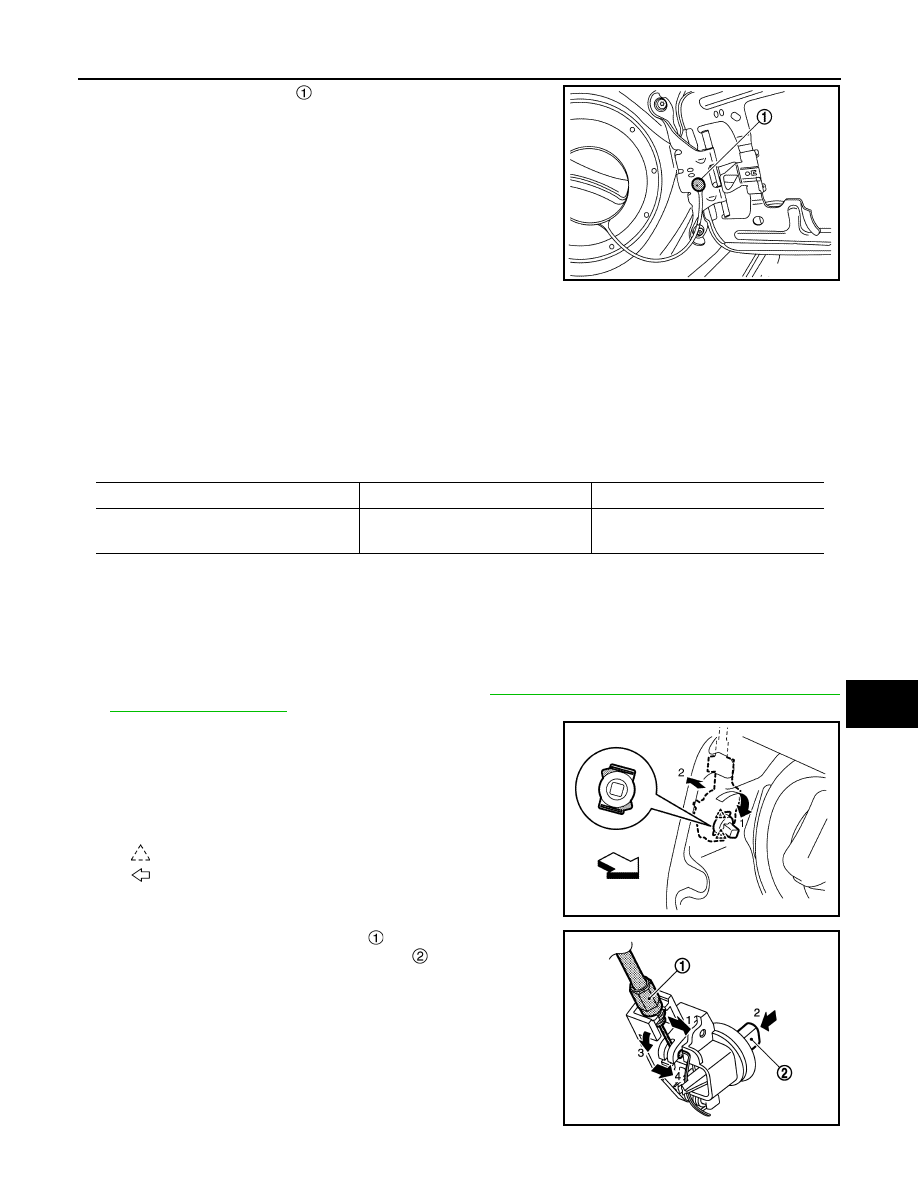
3.
Rotate fuel filler lid lock assembly to disengage pawls and
remove fuel filler lid lock assembly according to the numerical
order 1
→
2 indicated by arrows as shown in the figure.
NOTE:
Operation is performed easily when rotating fuel filler lid lock
from passenger room side.
4.
Disengage fuel filler lid opener cable
and remove fuel filler lid
opener cable while pressing stopper pin
according to the
numerical order 1
→
4 indicated by arrows as shown in the figure.
JMKIB3183ZZ
Clearance
Evenness
Fuel filler lid – Body side outer
2.5 – 4.5
[0.098 – 0.177]
(
−
1.0) – (+1.0)
[(
−
0.039) – (+0.039)]
: Pawl
: Vehicle front
JMKIB1094ZZ
JMKIA5719ZZ