содержание .. 605 606 607 608 ..
Nissan X-Trail 32. Manual - part 607
HOOD LOCK
DLK-769
< REMOVAL AND INSTALLATION >
[TYPE 3]
C
D
E
F
G
H
I
J
L
M
A
B
DLK
N
O
P
2.
Disconnect hood lock bell crank cable from hood lock assembly. Refer to
CRANK : Removal and Installation"
.
3.
Remove hood lock assembly mounting bolts, and then remove hood lock assembly.
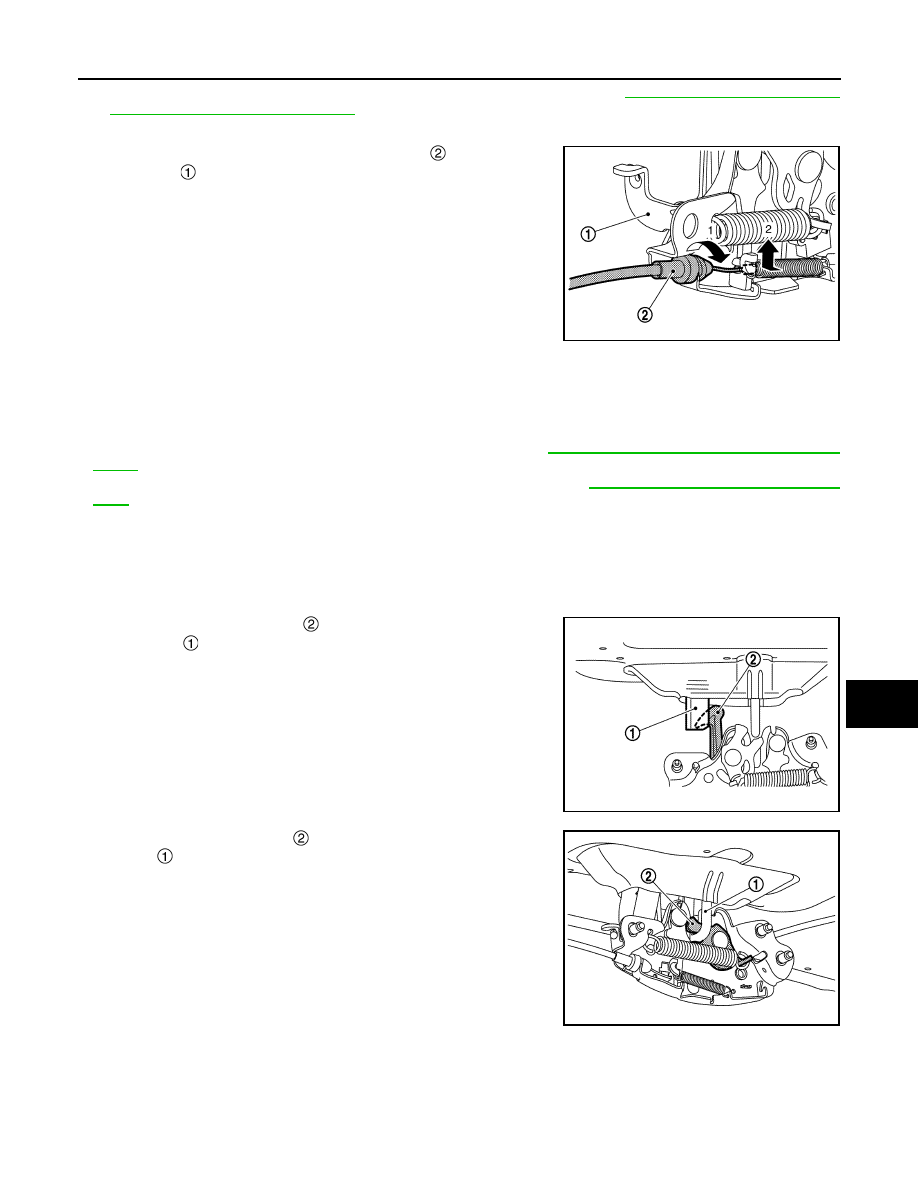
4.
Disconnect hood lock control cable assembly
from hood lock
assembly
according to the numerical order 1
→
2 indicated by
arrows as shown in the figure.
INSTALLATION
Note the following items, and install in the reverse order of removal.
CAUTION:
• Never bend cable too much, keeping the radius 100 mm (3.937 in) or more.
• Check that hood lock control cable is properly engaged with hood lock.
• After installation, perform hood fitting adjustment. Refer to
DLK-733, "HOOD ASSEMBLY : Adjust-
• After installation, perform hood lock control inspection. Refer to
.
HOOD LOCK : Inspection
INFOID:0000000010728579
NOTE:
If the hood lock cable is bent or deformed, replace it.
1.
Check that hood opener operating is condition 49 N (5.0 kg, 11.0 lb) or below.
2.
Check that secondary latch
is securely engaged with second-
ary striker
from the dead load of hood assembly.
3.
Check that primary latch
is securely engaged with primary
striker
when hood assembly is closed [free-fall from approxi-
mately 200 mm (7.874 in) height].
4.
While operating the hood opener carefully, check that the front end of the hood is lifted by approximately
20 mm (0.787 in) (A). Also, check that the hood opener returns to the original position.
JMKIB2975ZZ
JMKIB3518ZZ
JMKIB3551ZZ