содержание .. 2120 2121 2122 2123 ..
Nissan X-Trail 32. Manual - part 2122
TM-446
< REMOVAL AND INSTALLATION >
[CVT: RE0F10D]
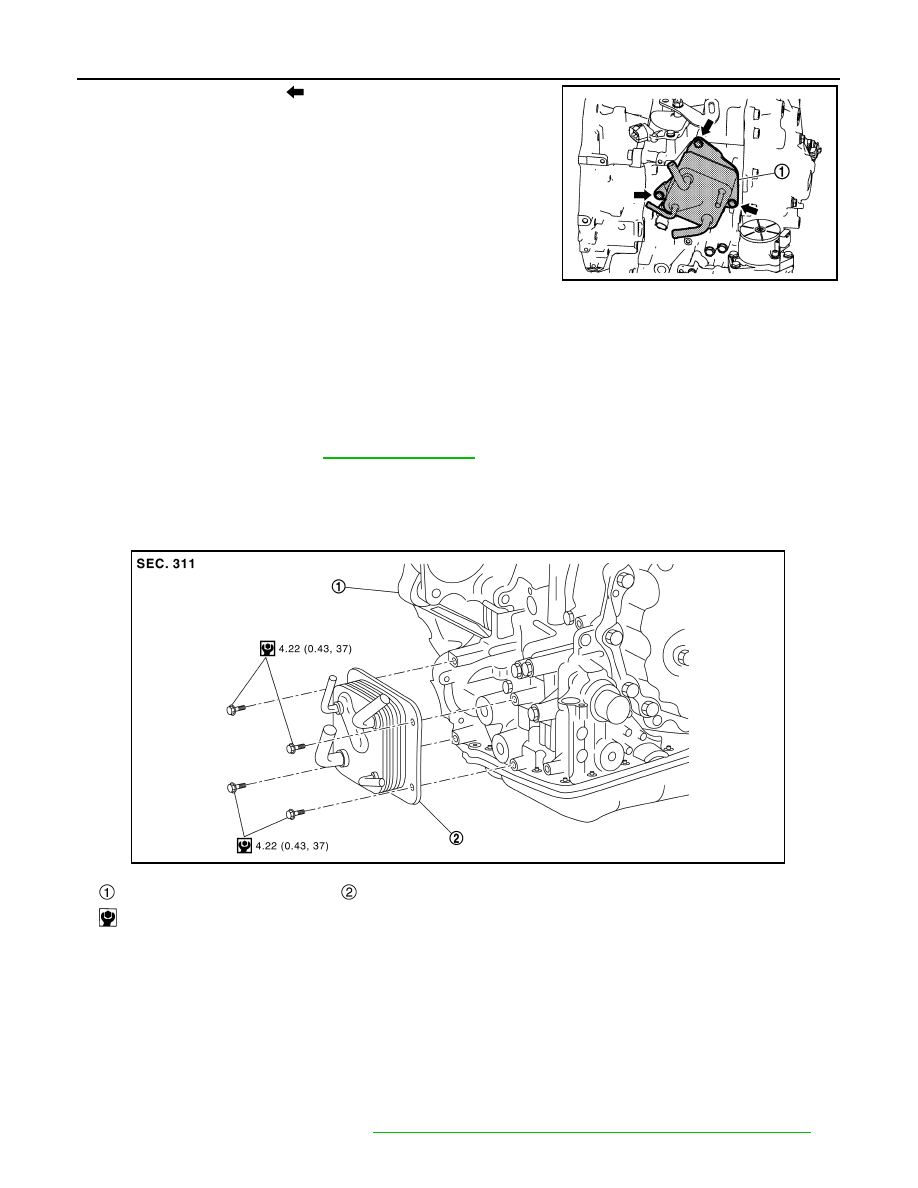
CVT OIL WARMER
5.
Remove mounting bolts (
) and remove CVT oil warmer from
transaxle assembly.
INSTALLATION
Installation is in the reverse order of removal.
MR20DD : Inspection and Adjustment
INFOID:0000000010622640
INSPECTION AFTER INSTALLATION
Start the engine and check visually that there is no leakage of CVT fluid and engine coolant.
ADJUSTMENT AFTER INSTALLATION
Adjust the CVT fluid level. Refer to
.
QR25DE
QR25DE : Exploded View
INFOID:0000000010622641
QR25DE : Removal and Installation
INFOID:0000000010622642
REMOVAL
WARNING:
Never remove the radiator cap when the engine is hot. Serious burns could occur from high pressure
engine coolant escaping from the radiator. Wrap a thick cloth around the cap. Slowly turn it a quarter
turn to allow built-up pressure to escape. Carefully remove the cap by turning it all the way.
CAUTION:
Perform when the engine is cold.
1.
Remove engine under cover. Refer to
EXT-40, "ENGINE UNDER COVER : Removal and Installation"
JSDIA5245ZZ
Transaxle assembly
CVT oil warmer
: N·m (kg-m, in-lb)
JSDIA5663GB