Nissan X-Trail 32. Manual - part 1480


  Главная      Nissan     Nissan X-Trail 32 - Service Manual


поиск по сайту            


содержание   ..  1478  1479  1480  1481   ..


Nissan X-Trail 32. Manual - part 1480


INSTRUMENT PANEL ASSEMBLY

IP-15

< REMOVAL AND INSTALLATION >

[LHD MODELS]

C

D

E

F

G

H

I

K

L

M

A

B

IP

N

O

P

[]: Number indicates step in removal procedure.

WARNING:

Before servicing, turn ignition switch OFF, disconnect battery negative terminal and wait for 3 minutes
or more.

REMOVAL

CAUTION:

• When removing, always use a remover tool that is made of plastic.
• Always apply the parking brake before performing removal and installation.

1.

Remove center console assembly. Refer to 

IP-25, "Removal and Installation"

.

2.

Remove A/C control (automatic air conditioning) or A/C control (A/C amp.) (manual air conditioning).
Refer to 

HAC-125, "Removal and Installation"

 (automatic air conditioning) or 

HAC-222, "Removal and

Installation"

 (manual air conditioning)

3.

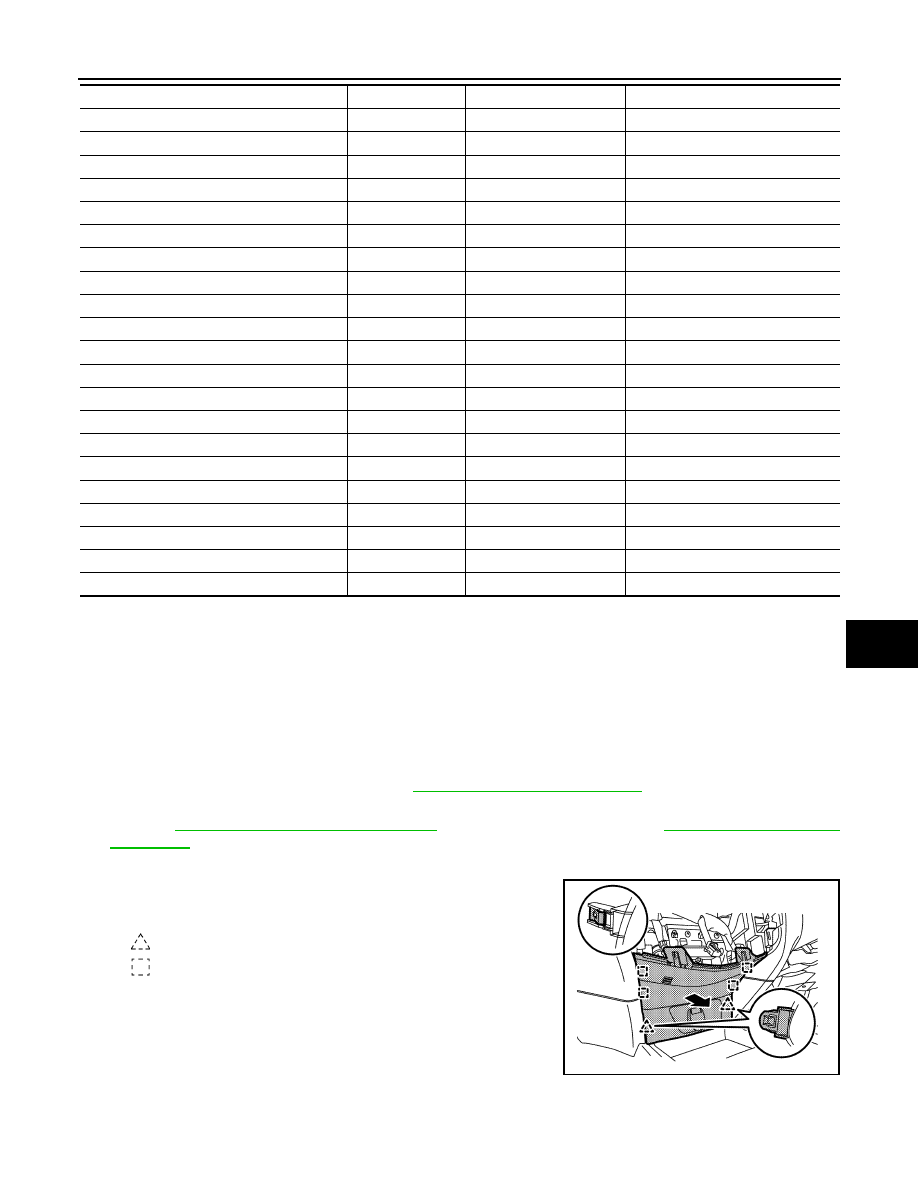
Remove instrument lower panel center.

a.

Disengage fixing pawls and metal clips, and then remove instru-
ment lower panel center.

b.

Disconnect harness connector and aspirator duct (if equipped).

4.

Remove instrument finisher E.

Cluster lid C (without audio system)

[12]

Instrument mask LH

[13]

[3]

Fuse block lid

[14]

[4]

Hood lock control handle

[15]

[5]

instrument lower panel LH

[16]

[6]

Side ventilator grille LH

[17]

[7]

Instrument finisher A

[18]

[8]

Cluster lid A

[19]

[9]

Combination meter

[20]

[10]

Sunload sensor (if equipped)

[21]

Front pillar garnish LH and RH

[22]

Instrument garnish

[23]

Center ventilator grille

[24]

Driver air bag module

[25]

Steering wheel

[26]

Steering column cover

[27]

Spiral cable

[28]

Steering angle sensor (if equipped)

[29]

Combination switch

[30]

Passenger air bag module mounting bolt

[31]

Passenger air bag module harness connector

[32]

Instrument panel assembly

[33]

: Pawl

: Metal clip

JMJIA9814ZZ

IP-16

< REMOVAL AND INSTALLATION >

[LHD MODELS]

INSTRUMENT PANEL ASSEMBLY

a.

Disengage fixing metal clips and pawl, and then remove instru-
ment finisher E.

b.

Remove push-button ignition switch harness connector. (with Intelligent Key System)

c.

Remove the following part after removing instrument finisher E. (with Intelligent Key System)
Push-button ignition switch: Refer to 

PCS-116, "Removal and Installation"

5.

Remove glove box.

a.

Disengage glove box damper arm from glove box according to
the numerical order 1

2 indicated by arrows as shown in the

figure.

b.

Open the glove box approximately 50 mm.

c.

Pull up glove box toward the direction of arrow as shown in the
figure to disengage pawls from instrument panel.

6.

Disengage fixing pawls, and then remove instrument mask RH.

7.

Remove glove box cover.

: Pawl

: Metal clip

JMJIB0125ZZ

JMJIA9817ZZ

: Pawl

JMJIB0130ZZ

: Pawl

JMJIB0121ZZ

INSTRUMENT PANEL ASSEMBLY

IP-17

< REMOVAL AND INSTALLATION >

[LHD MODELS]

C

D

E

F

G

H

I

K

L

M

A

B

IP

N

O

P

a.

Remove fixing screws 

.

b.

Disengage fixing metal clips and pawls, and then remove glove
box cover by arrow as shown in the figure.

c.

Disconnect glove box lamp harness connector.

d.

Remove the following part after removing glove box.
• Glove box lamp: Refer to 

INL-82, "Exploded View"

.

• Air bag cutoff switch: refer to 

SR-35, "Removal and Installation"

.

8.

Remove side ventilator grille RH. Refer to 

VTL-12, "SIDE DEFROSTER GRILLE : Removal and Installa-

tion"

.

9.

Disengage fixing clips and pawl, and then remove instrument
finisher B.

10. Disengage fixing metal clips and pawls, and then remove instrument upper panel assist.

11. Remove audio unit or AV control unit. Refer to the following. (with audio system)

• Audio unit: Refer to 

AV-51, "Removal and Installation"

 (BASE AUDIO).

• NAVI control unit: Refer to 

AV-262, "Removal and Installation"

 (WITH NAVIGATION).

: Pawl

: Metal clip

JMJIB0234ZZ

: Clip

: Pawl

JMJIB0124ZZ

: Pawl

: Metal clip

JMJIB0233ZZ

IP-18

< REMOVAL AND INSTALLATION >

[LHD MODELS]

INSTRUMENT PANEL ASSEMBLY

12. Disengage fixing pawls and metal clips, and then remove cluster

lid C by arrow as shown in the figure. (without audio system)

13. Remove instrument mask LH.

a.

Apply protective tape (A) on the part to protect it from damage.

b.

Disengage fixing pawls using remover tool (A), and then remove
instrument mask. 

14. Disengage fixing pawls, and then remove fuse block lid by arrow

as shown in the figure.

15. Remove hood lock control handle. Refer to 

DLK-607, "HOOD LOCK CONTROL HANDLE : Removal and

Installation"

 (with Intelligent Key system) or 

DLK-912, "HOOD LOCK CONTROL HANDLE : Removal and

Installation"

 (without Intelligent Key system).

16. Remove instrument lower panel LH.

: Pawl

: Metal clip

JMJIA9779ZZ

JMJIB0119ZZ

: Pawl

JMJIB0120ZZ

: Pawl

JMJIB0122ZZ


содержание   ..  1478  1479  1480  1481   ..