Nissan X-Trail 32. Manual - part 1475


  Главная      Nissan     Nissan X-Trail 32 - Service Manual


поиск по сайту            


содержание   ..  1473  1474  1475  1476   ..


Nissan X-Trail 32. Manual - part 1475


LUGGAGE TRIM

INT-45

< REMOVAL AND INSTALLATION >

C

D

E

F

G

H

I

K

L

M

A

B

INT

N

O

P

15. Disconnect power socket harness connector (luggage side lower finisher RH), and then remove luggage

side lower finisher.

16. Remove mounting bolts, and then remove front luggage side finisher bracket and rear luggage side fin-

isher bracket (without third seat).

INSTALLATION

Note the following items, and then install in the reverse order of removal.

CAUTION:

• Visually check the clips for deformation and damage during installation. Replace with new ones if

necessary.

• Check in advance that clips and pawls are accurately aligned with the portions on body panel, and

then install by pressing in.

• Tighten second seat belt outer anchor mounting anchor bolts and third seat belt outer anchor

mounting anchor bolts to specified torque. Refer to 

SB-16, "Exploded View"

 (second seat belt) or

SB-21, "Exploded View"

 (third seat belt).

LUGGAGE SIDE UPPER FINISHER

LUGGAGE SIDE UPPER FINISHER : Removal and Installation

INFOID:0000000010730564

CAUTION:

Never damage the body panel.

REMOVAL

1.

Remove luggage side lower finisher. Refer to 

INT-43, "LUGGAGE SIDE LOWER FINISHER : Removal

and Installation"

.

2.

Remove second seat belt shoulder anchor bolt. Refer to 

SB-17, "SEAT BELT RETRACTOR : Removal

and Installation"

.

3.

Remove third seat belt shoulder anchor bolt. Refer to 

SB-21, "SEAT BELT RETRACTOR : Removal and

Installation"

 (with third seat).

4.

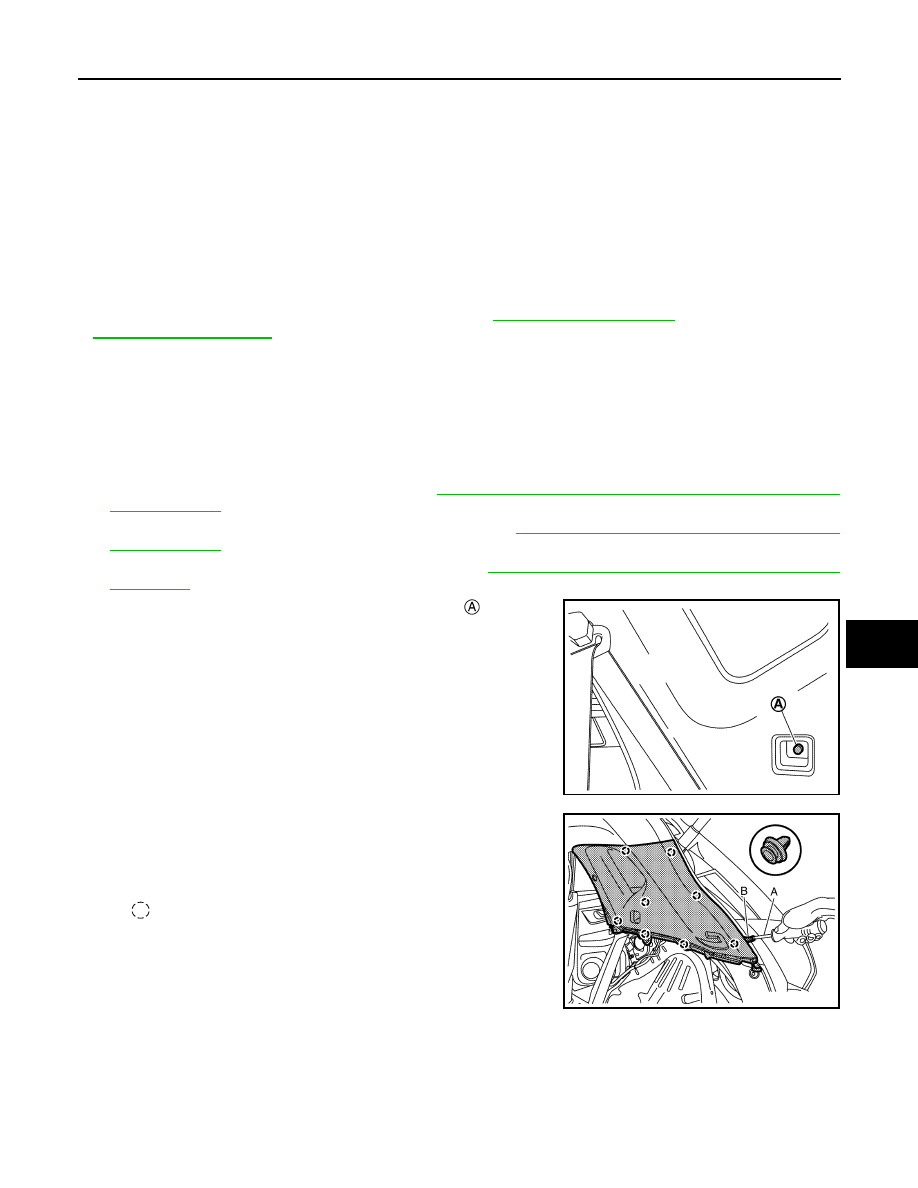
Remove luggage side upper finisher mounting bolt 

.

5.

Remove luggage side upper finisher fixing clips using a remover
tool (A).

CAUTION:

Use a remover tool wrapped in tape (B).

JMJIB0108ZZ

: Clip

JMJIB0118ZZ

INT-46

< REMOVAL AND INSTALLATION >

LUGGAGE TRIM

6.

Disengage fixing metal clips according to numerical order 1

2 indicated by arrows as shown in the figure,

and then remove luggage side upper finisher. 

INSTALLATION

Note the following items, and then install in the reverse order of removal.

CAUTION:

• Visually check clips and metal clips for deformation and damage during installation. Replace with

new ones if necessary.

• Check in advance that clips and metal clips are accurately aligned with the portions on body panel,

and then install by pressing in.

: Metal clip

: Vehicle front

JMJIA9841ZZ

BACK DOOR TRIM

INT-47

< REMOVAL AND INSTALLATION >

C

D

E

F

G

H

I

K

L

M

A

B

INT

N

O

P

BACK DOOR TRIM

Exploded View

INFOID:0000000010730565

*1

: With automatic back door

*2

: Without automatic back door

Removal and Installation

INFOID:0000000010730566

CAUTION:

• When removing, always use a remover tool that is made of plastic to prevent damage to the parts.
• Never damage the back door panel.

REMOVAL

1.

Fully open back door.

Back door inner finisher

Back door assembly

automatic back door close switch fin-

isher

*1

Back door pull handle

Back door plate

Back door finisher lower cap

*2

: Clip

: Pawl

: Metal clip

: Vehicle front

JMJIA9762ZZ

INT-48

< REMOVAL AND INSTALLATION >

BACK DOOR TRIM

2.

Remove back door inner finisher fixing clips, and then remove
back door inner finisher.

3.

Remove back door pull handle.

a.

Apply protective tape (A) on the back door panel to protect from
damage.

b.

 Disengage back door pull handle fixing pawls using a remover
tool (A), and then remove back door pull handle.

4.

Remove back door finisher lower cap (without automatic back door close switch).

a.

Apply protective tape (A) on the back door panel to protect from
damage.

: Clip

JMJIA9710ZZ

JMJIA9712ZZ

: Pawl

JMJIA9644ZZ

JMJIA9771ZZ


содержание   ..  1473  1474  1475  1476   ..