содержание .. 1323 1324 1325 1326 ..
Nissan X-Trail 32. Manual - part 1325
GW-18
< REMOVAL AND INSTALLATION >
WINDSHIELD GLASS
b.
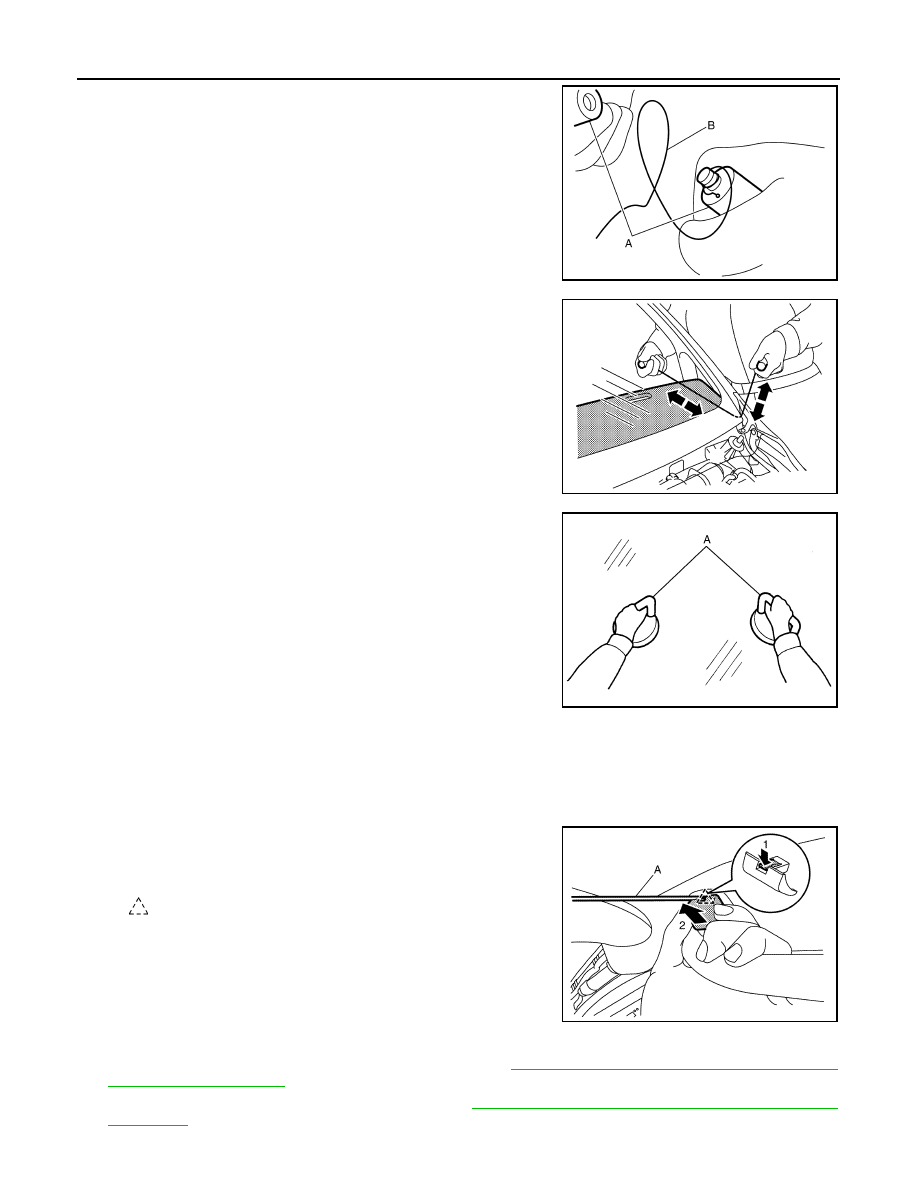
Tie both ends of the piano wire (B) to the wire grip (A), etc..
c.
Remove adhesive by using piano wire alongside of windshield
glass and body panel.
CAUTION:
• Never press piano wire excessively against edge of glass.
• Remove adhesive, 2 workers are required by all means.
19. Use rubber suction cups or suction lifter (A), etc. to remove
windshield glass from the vehicle.
CAUTION:
Due to weight of windshield glass, 2 workers are required
by all means.
Reuse Windshield Glass
CAUTION:
• Never use a windshield cutter if the windshield glass is reused. (It may scratch the glass surface)
• Never damage windshield glass and body panel.
1.
Remove all assist grips.
a.
Disengage assist grip cap fixing pawl using a remover tool (A),
and then slide assist grip cap and remove it according to numer-
ical order 1
→
2 indicated by the arrows as shown in the figure.
b.
Disengage assist grip fixing metal clips, and then remove assist grip.
2.
Remove center pillar upper garnish (LH and RH). Refer to
INT-28, "CENTER PILLAR UPPER GARNISH :
.
3.
Remove front pillar garnish (LH and RH). Refer to
INT-23, "FRONT PILLAR GARNISH : Removal and
.
JMKIA9832ZZ
JMKIB2163ZZ
JMKIA1138ZZ
: Pawl
JMJIA8937ZZ