содержание .. 1241 1242 1243 1244 ..
Nissan X-Trail 32. Manual - part 1243
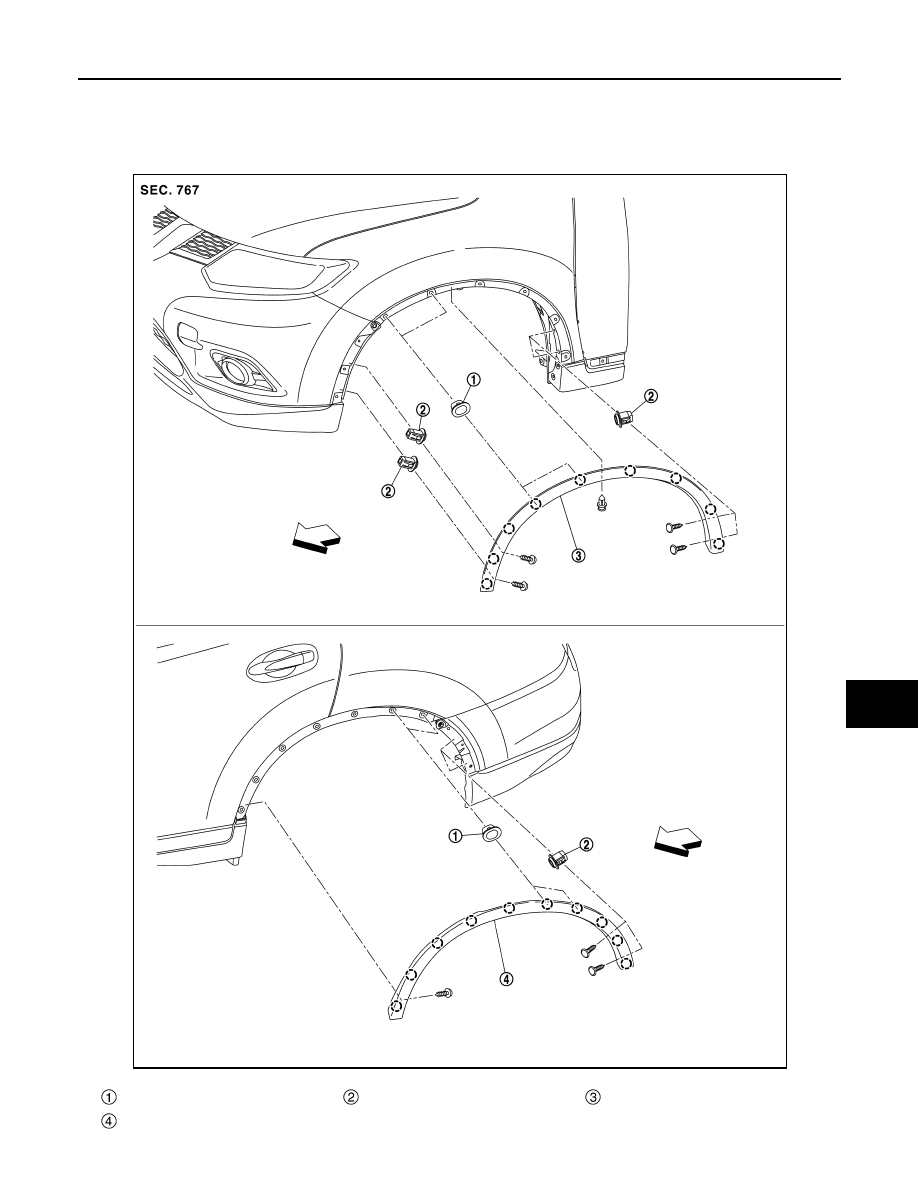
FILLET MOLDING
EXT-31
< REMOVAL AND INSTALLATION >
C
D
E
F
G
H
I
J
L
M
A
B
EXT
N
O
P
FILLET MOLDING
Exploded View
INFOID:0000000010787447
Grommet
Screw grommet
Front fillet molding
Rear fillet molding
JMKIB3026ZZ