Nissan X-Trail 32. Manual - part 1108


  Главная      Nissan     Nissan X-Trail 32 - Service Manual


поиск по сайту            


содержание   ..  1106  1107  1108  1109   ..


Nissan X-Trail 32. Manual - part 1108


EXHAUST MANIFOLD

EM-329

< REMOVAL AND INSTALLATION >

[R9M]

C

D

E

F

G

H

I

J

K

L

M

A

EM

N

P

O

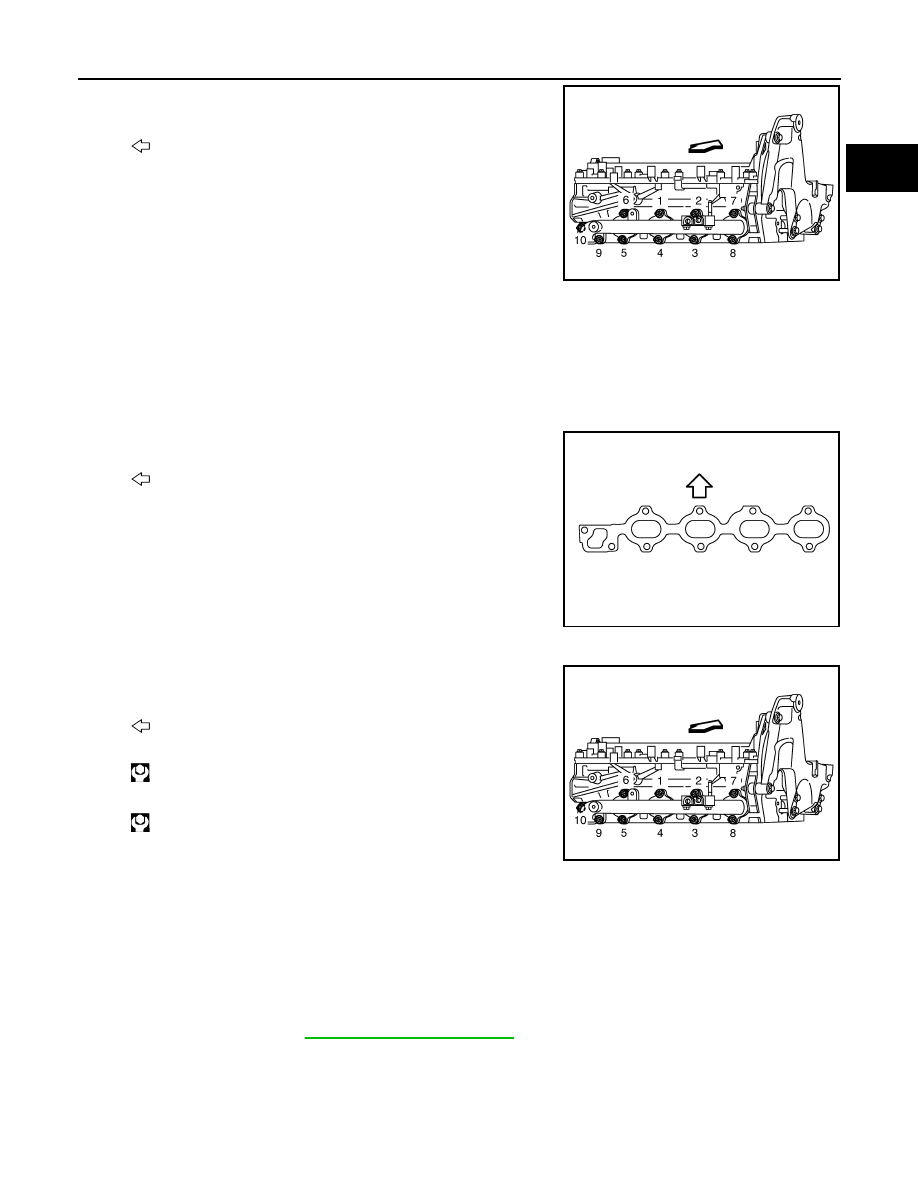
• Loosen mounting nuts in the reverse order as shown in the fig-

ure.

6.

Remove exhaust manifold gasket.

CAUTION:

Cover engine openings to avoid entry of foreign materials.

INSTALLATION

CAUTION:

• Clean each joint surface before installation.
• Replace exhaust manifold stud if loosened.

1.

Install gasket to cylinder head as shown in the figure.

2.

Install exhaust manifold.
• Tighten the mounting nuts in two steps separately in numerical

order as shown in the figure.

3.

Install in the reverse order of removal, for the rest of parts.

Inspection

INFOID:0000000010784327

INSPECTION AFTER REMOVAL

Surface Distortion

• Check the surface distortion of the exhaust manifold mating surface with a straightedge and a feeler gauge.

• If it exceeds the standard, replace exhaust manifold.

INSPECTION AFTER INSTALLATION

Start engine and raise engine speed to check no exhaust emission leaks.

: Vehicle front

E1BIA0581ZZ

: Engine upper

E1BIA0583ZZ

: Vehicle front

1st step: 15.0 N·m (1.5 kg-m, 11 ft-lb)

2nd step: 30.0 N·m (3.1 kg-m, 22 ft-lb)

E1BIA0581ZZ

Standard

: Refer to 

EM-414, "Exhaust Manifold"

.

EM-330

< REMOVAL AND INSTALLATION >

[R9M]

OIL PAN (LOWER)

OIL PAN (LOWER)

Exploded View

INFOID:0000000010784328

Removal and Installation

INFOID:0000000010784329

REMOVAL

1.

Remove engine under cover. Refer to 

EXT-39, "ENGINE UNDER COVER : Exploded View"

.

2.

Drain engine oil. Refer to 

LU-39, "Draining"

.

CAUTION:

Perform this step when engine is cold.

3.

Remove oil pan (lower) with the following procedure:

Oil pan (upper)

Oil pan (lower)

Drain plug washer

Oil pan drain plug

Oil level sensor

Comply with the installation proce-
dure when tightening. Refer to 

EM-

380, "Removal and Installation"

Comply with the installation proce-
dure when tightening. Refer to 

EM-

330, "Removal and Installation"

: N·m (kg-m, ft-lb)

: N·m (kg-m, in-lb)

: Always replace after every disassembly.

: Sealing point

JPBIA6951GB

OIL PAN (LOWER)

EM-331

< REMOVAL AND INSTALLATION >

[R9M]

C

D

E

F

G

H

I

J

K

L

M

A

EM

N

P

O

a.

Loosen mounting bolts in reverse order shown in the figure.

b.

Insert the seal cutter [SST:KV10111100 ( — )] (A) between oil
pan (upper) and oil pan (lower). Slide tool by tapping on the side
of the tool with a hammer.

CAUTION:

• Be careful not to damage mating surface.
• Never insert screwdriver, or oil pan flange will be

deformed.

c.

Remove oil pan (lower).

4.

Remove oil strainer. Refer to 

LU-44, "Exploded View"

.

INSTALLATION

1.

Install oil strainer. Refer to 

LU-44, "Exploded View"

.

2.

Install oil pan (lower) with the following procedure:

a.

Use a scraper (A) to remove old liquid gasket from mating sur-
faces.

CAUTION:

Never scratch or damage the mating surfaces when clean-
ing off old liquid gasket.
• Remove old liquid gasket from the bolt holes and threads.

b.

Apply a continuous bead of liquid gasket with the tube presser
(commercial service tool) as shown in the figure.

Use Genuine Liquid Gasket or equivalent

CAUTION:

Attaching should be done within 5 minutes after coating.

E1BIA0582ZZ

JPBIA0276ZZ

JPBIA0025ZZ

: Oil pan (lower)

: 3.0 - 7.0 mm (0.118 - 0.276 in)

: Engine front

JPBIA6982ZZ

EM-332

< REMOVAL AND INSTALLATION >

[R9M]

OIL PAN (LOWER)

c.

Tighten mounting bolts in two steps separately in numerical
order as shown in the figure.

3.

Install in the reverse order of removal, for the rest of parts.
NOTE:
At least 30 minutes after oil pan is installed, pour engine oil.

Inspection

INFOID:0000000010784330

INSPECTION AFTER REMOVAL

Clean oil strainer if any object attached.

INSPECTION AFTER INSTALLATION

1.

Check the engine oil level and adjust engine oil. Refer to 

LU-38, "Inspection"

.

2.

Start engine, and check there is no leak of engine oil.

3.

Stop engine and wait for 10 minutes.

4.

Check the engine oil level again. Refer to 

LU-38, "Inspection"

.

1st step: 5.0 N·m (0.51 kg-m, 44 in-lb)

2nd step: 12.0 N·m (1.2 kg-m, 9 ft-lb)

E1BIA0582ZZ


содержание   ..  1106  1107  1108  1109   ..