содержание .. 714 715 716 717 ..
Nissan Primera P12. Manual - part 716
WW-48
REAR WIPER AND WASHER SYSTEM
REMOVAL (WAGON)
1.
Remove the back door finisher. Refer to EI section in P12 ESM (SM2E00-1P12E0E).
2.
Operate the wiper motor, and stop it at the auto stop position.
3.
Disconnect wiper motor connector.
4.
Remove wiper arm from the vehicle.
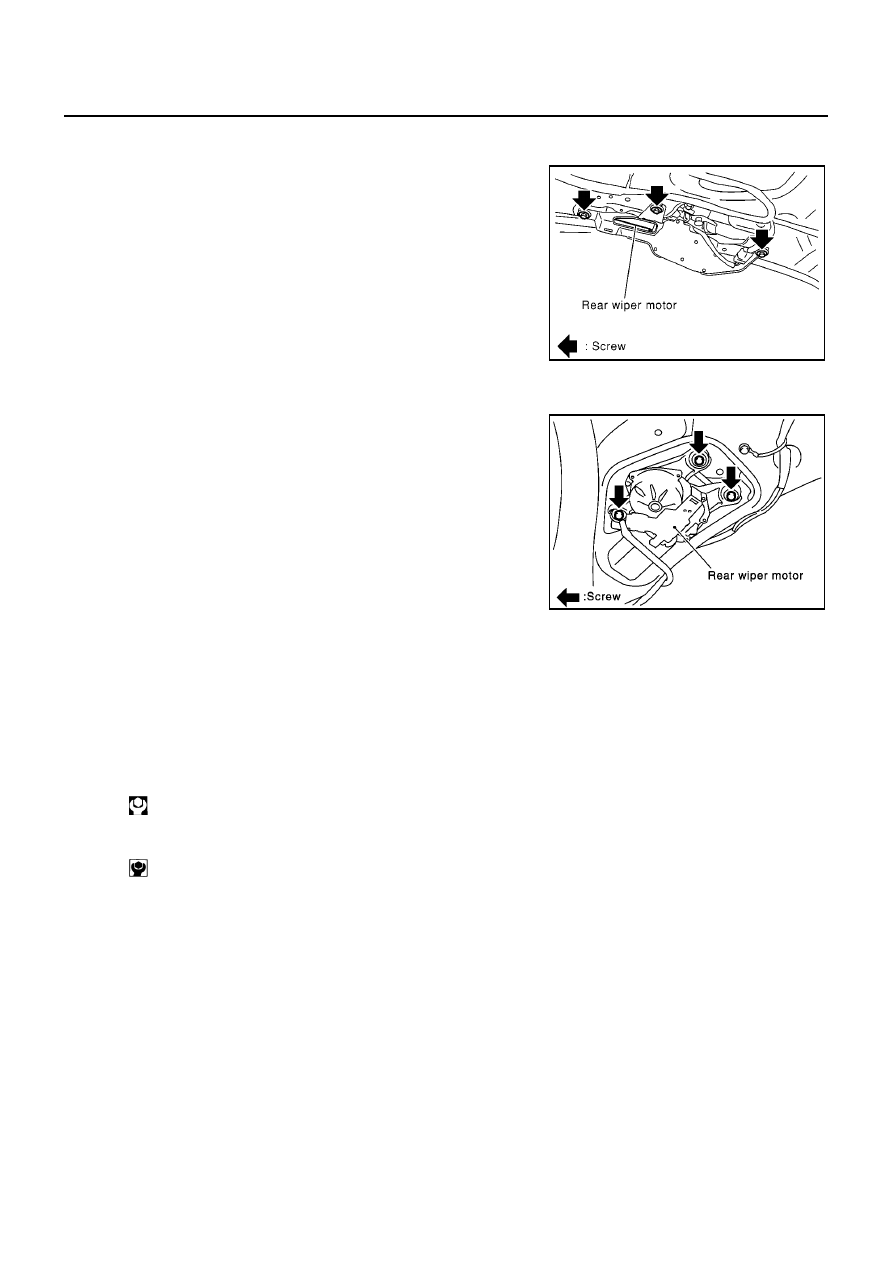
5.
Remove wiper motor form the vehicle.
6.
Remove rubber from the vehicle.
REMOVAL (HATCH BACK)
1.
Remove the back door finisher. Refer to EI section in P12 ESM (SM2E00-1P12E0E).
2.
Operate the wiper motor, and stop it at the auto stop position.
3.
Disconnect wiper motor connector.
4.
Remove wiper arm from the vehicle.
5.
Remove wiper motor form the vehicle.
6.
Remove rubber from the vehicle.
INSTALLATION
1.
Install rubber to the vehicle.
2.
Install wiper motor to the vehicle.
3.
Connect wiper motor to connector. Turn the wiper switch ON to operate wiper motor, then turn the wiper
switch OFF (auto stop).
4.
Install wiper arm to the vehicle.
5.
Install back door finisher. Refer to EI section in P12 ESM (SM2E00-1P12E0E).
●
Tighten windshield wiper arm nuts to specified torque.
●
Tighten windshield wiper motor nuts to specified torque.
CAUTION:
●
Do not drop the wiper motor or cause it to contact other parts.
●
Check the grease conditions of the motor arm and wiper link joint (at retainer). Apply grease if
necessary.
SKIA0274E
MKIB0240E
: 12.7 - 17.6 N-m (1.3 - 1.8 kg-m, 10 - 13 ft-lb)
: 3.8 - 5.1 N-m (0.39 - 0.52 kg-m, 34 - 45 in-lb)