содержание .. 448 449 450 451 ..
Nissan Primera P12. Manual - part 450
EM-146
[F9Q]
INTAKE MANIFOLD, EXHAUST MANIFOLD, TURBO CHARGER, CATALYST
INTAKE MANIFOLD, EXHAUST MANIFOLD, TURBO CHARGER, CATALYST
PFP:14004
Removal and Installation
EBS00SK5
REMOVAL
1.
Remove battery ground cable.
2.
Remove engine undercover.
3.
Remove wiper arms and wiper motor. Refer to
WW-12, "Removal and Installation for Wiper Motor and
or
WW-33, "Removal and Installation for Wiper Motor and Linkage"
(with rain sensor).
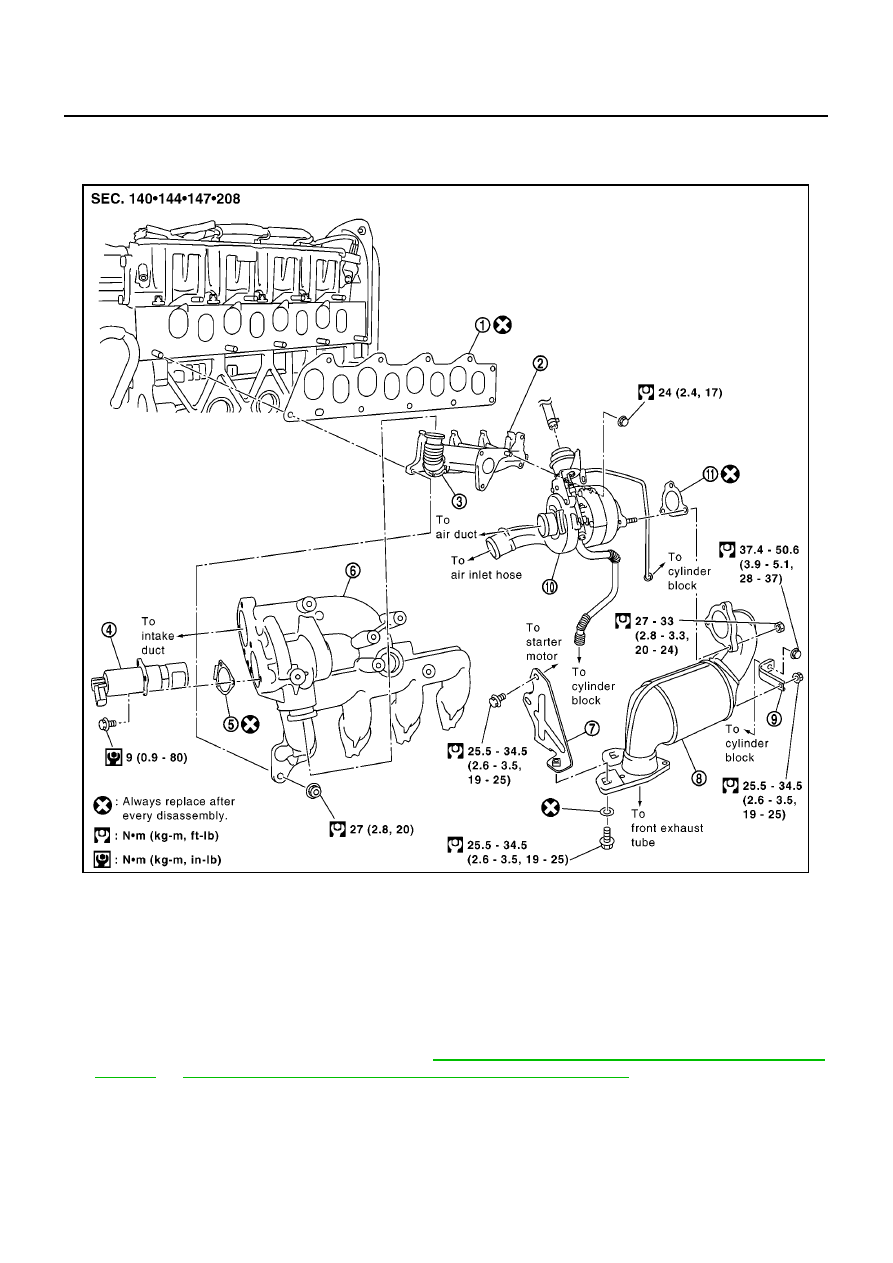
MBIB0948E
1.
Gasket
2.
Exhaust manifold
3.
EGR tube
4.
EGR control valve
5.
Gasket
6.
Intake manifold
7.
Bracket
8.
Catalyst
9.
Bracket
10. Turbocharger
11.
Gasket