содержание .. 164 165 166 167 ..
Nissan Primera P12. Manual - part 166
ENGINE COOLANT
CO-25
[F9Q]
C
D
E
F
G
H
I
J
K
L
M
A
CO
ENGINE COOLANT
PFP:KQ100
Inspection
EBS00S37
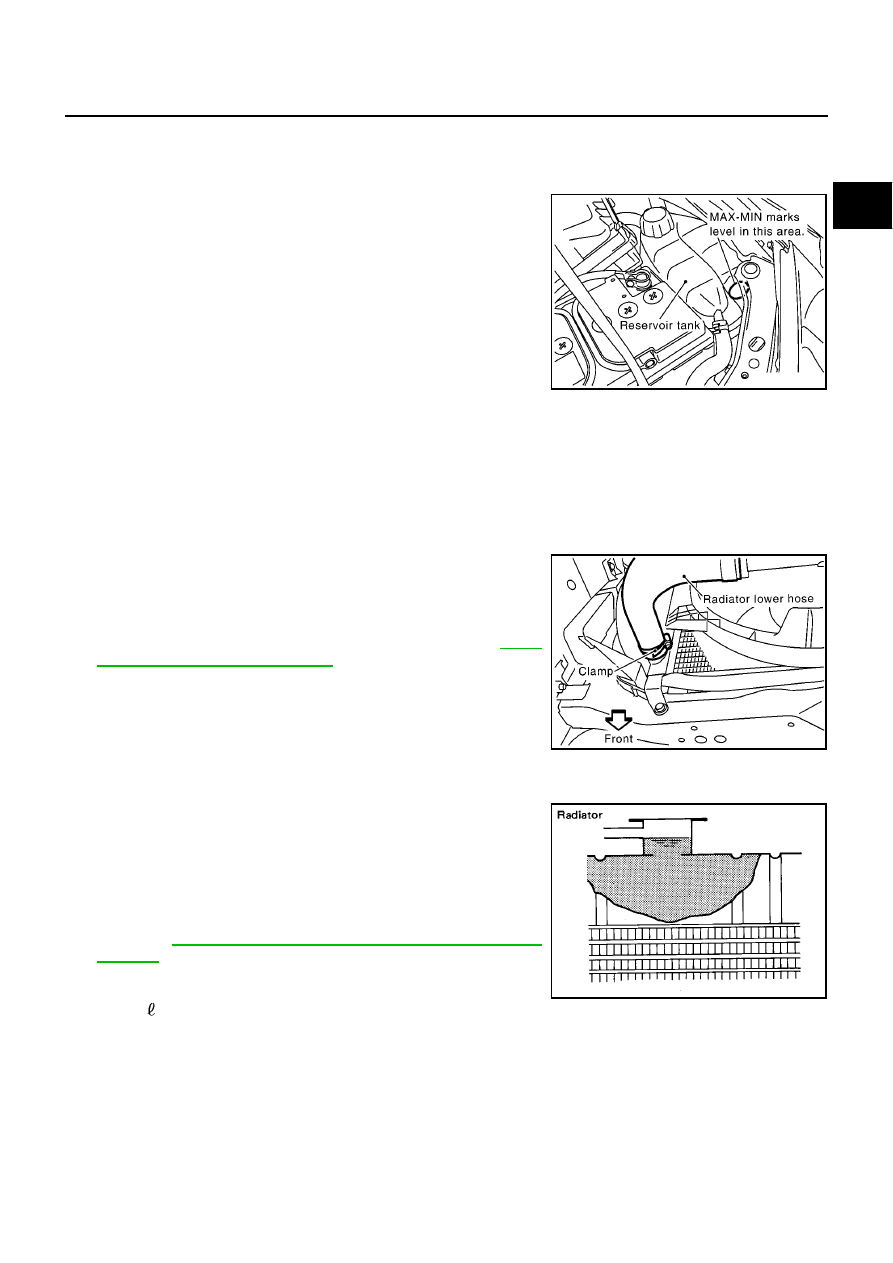
LEVEL CHECK
●
Check if the reservoir tank coolant level is within MIN to MAX
when engine is cool.
●
Adjust coolant if too much or too little.
Changing Engine Coolant
EBS00S38
WARNING:
●
To avoid being scalded, never change the coolant when the engine is hot.
●
Wrap a thick cloth around cap and carefully remove the cap. First, turn the cap a quarter of a turn
to release built-up pressure. Then turn the cap all the way.
DRAINING ENGINE COOLANT
1.
Remove engine undercover.
2.
Disconnect radiator lower hose, and open reservoir tank cap.
3.
Drain engine coolant.
4.
Check drained coolant for contaminants such as rust, corrosion
or discoloration.
●
If contaminated, flush engine cooling system. Refer to
.
REFILLING ENGINE COOLANT
1.
Install reservoir tank, radiator lower hose and radiator upper hose.
2.
Fill radiator slowly with coolant.
CAUTION:
If the filling rate is too fast, this could lead to air being
mixed in the coolant. Be sure to fill the coolant slowly
according to the rate indicated above.
●
Use genuine Nissan anti-freeze coolant or equivalent mixed
with water (distilled or demineralized).
Refer to
MA-15, "RECOMMENDED FLUIDS AND LUBRI-
.
MBIB0981E
MBIB0930E
Engine coolant capacity (With reservoir tank):
6.5
(5-3/4 Imp qt)
SMA182B