содержание .. 155 156 157 158 ..
Nissan Primera P12. Manual - part 157
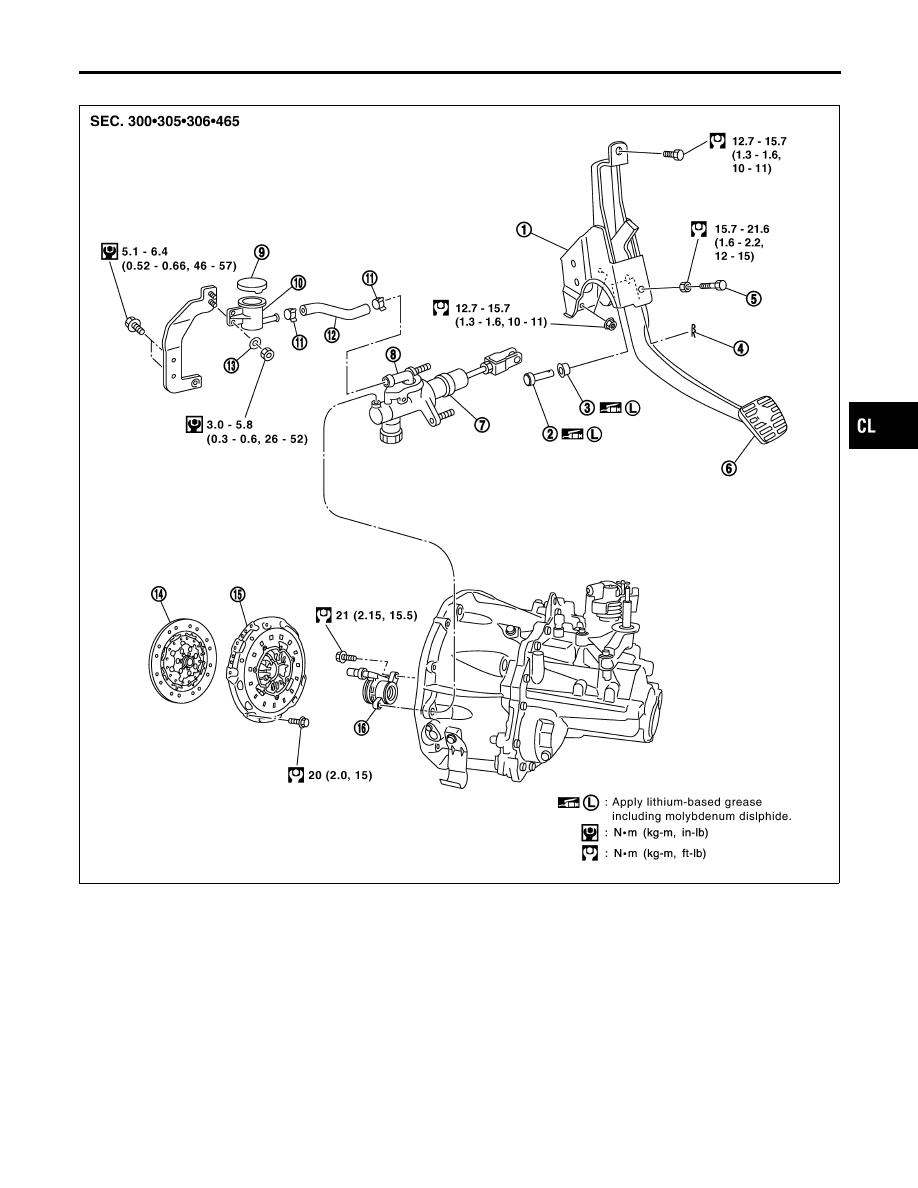
Components — LHD Model with F9Q Engine —
NOCL0050
YCL074
1.
Clutch pedal bracket
2.
Clevis pin
3.
Bushing
4.
Snap pin
5.
Pedal stopper bolt
6.
Clutch pedal
7.
Clutch master cylinder
8.
Nipple
9.
Reservoir cap
10. Reservoir tank
11. Hose clamp
12. Hose
13. Washer
14. Clutch disc
15. Clutch cover
16. Clutch operating cylinder
GI
MA
EM
LC
EC
FE
MT
AT
AX
SU
BR
ST
RS
BT
HA
SC
EL
IDX
CLUTCH SYSTEM
Components — LHD Model with F9Q Engine —
CL-5