Nissan Qashqai J11. Manual - part 824
DLN-212
< UNIT DISASSEMBLY AND ASSEMBLY >
[REAR FINAL DRIVE: R145]
ELECTRIC CONTROLLED COUPLING
Adjustment
INFOID:0000000010288412
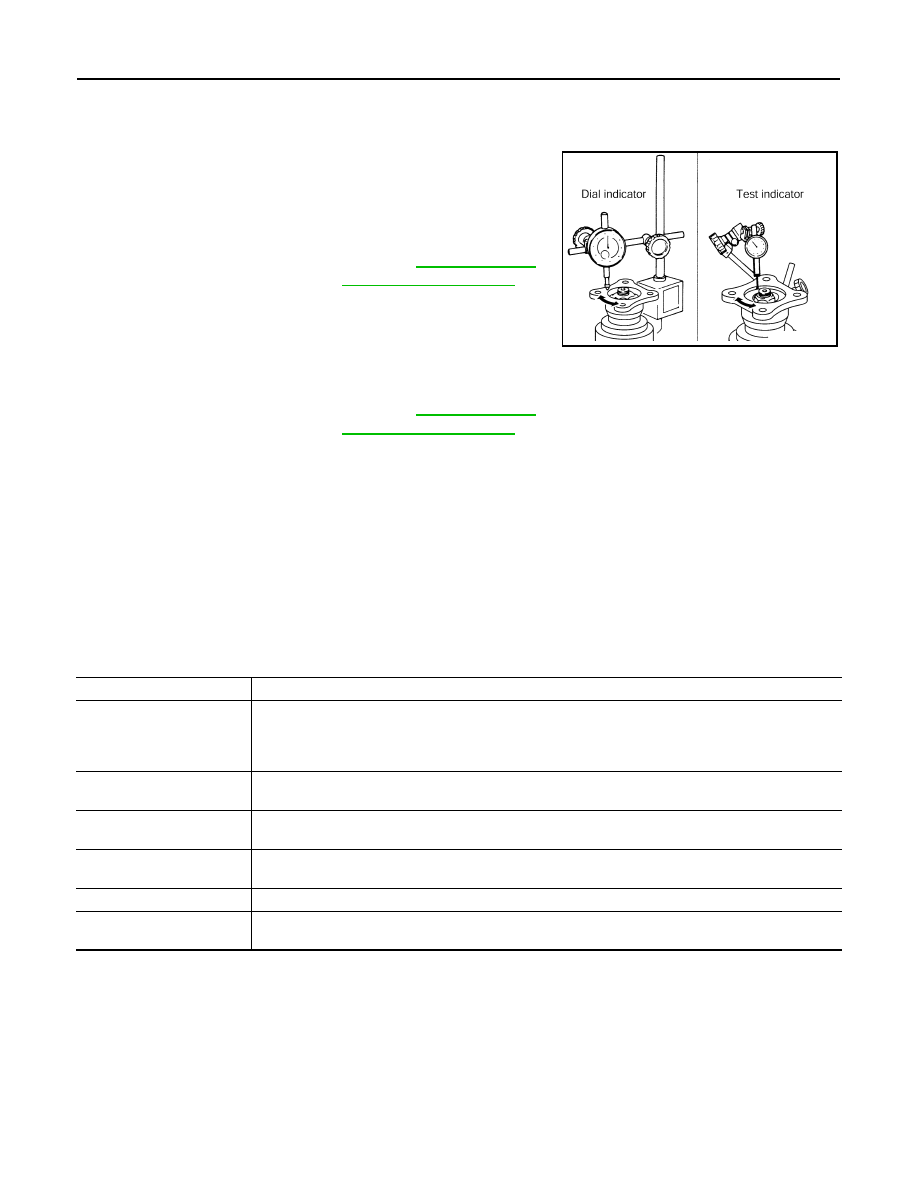
COMPANION FLANGE RUNOUT
1.
Fit a dial indicator onto the companion flange face (inner side of
the rear propeller shaft mounting bolt holes).
2.
Rotate companion flange to check for runout.
3.
Fit a test indicator to the inner side of companion flange (socket
diameter).
4.
Rotate companion flange to check for runout.
5.
If the runout value is outside the runout limit, follow the procedure below to adjust.
a.
Check for runout while changing the phase between companion flange and drive pinion by 90
°
step, and
search for the position where the runout is the minimum.
b.
If the runout value is still outside of the limit after the phase has been changed, replace companion flange.
c.
If the runout value is still outside of the limit after companion flange has been replaced, possible cause will
be an assembly malfunction of drive pinion and electric controlled coupling, malfunctioning coupling bear-
ing, or malfunctioning of electric controlled coupling.
Inspection After Disassembly
INFOID:0000000010288413
Clean up the disassembled parts. Then, inspect if the parts are worn or damaged. If so, follow the measures
below.
Limit
Companion flange runout
: Refer to
.
Limit
Companion flange runout
: Refer to
.
PDIA0439E
Content
Conditions and Measures
Hypoid gear
• If the gear teeth do not mesh or line-up correctly, determine the cause and adjust or replace as nec-
essary.
• If the gears are worn, cracked, damaged, pitted or chipped (by friction) noticeably, replace with new
drive gear and drive pinion as a set.
Bearing
If any chipped (by friction), pitted, worn, rusted or scratched mark, or unusual noise from the bearing is
observed, replace as a bearing assembly (as a new set).
Side gear and Pinion mate
gear
• If any cracks or damage on the surface of the tooth is found, replace.
• If any worn or chipped mark on the contact sides of the thrust washer is found, replace.
Side gear thrust washer and
pinion mate thrust washer
If it is chipped (by friction), damaged, or unusually worn, replace.
Differential case
If any wear or crack on the contact sides of the differential case is found, replace.
Companion flange
If any chipped mark (about 0.1 mm, 0.004 in) or other damage on the contact sides of the lips of the com-
panion flange is found, replace.