Nissan Qashqai J11. Manual - part 710
TRANSAXLE ASSEMBLY
TM-415
< UNIT REMOVAL AND INSTALLATION >
[CVT: RE0F10D]
C
E
F
G
H
I
J
K
L
M
A
B
TM
N
O
P
UNIT REMOVAL AND INSTALLATION
TRANSAXLE ASSEMBLY
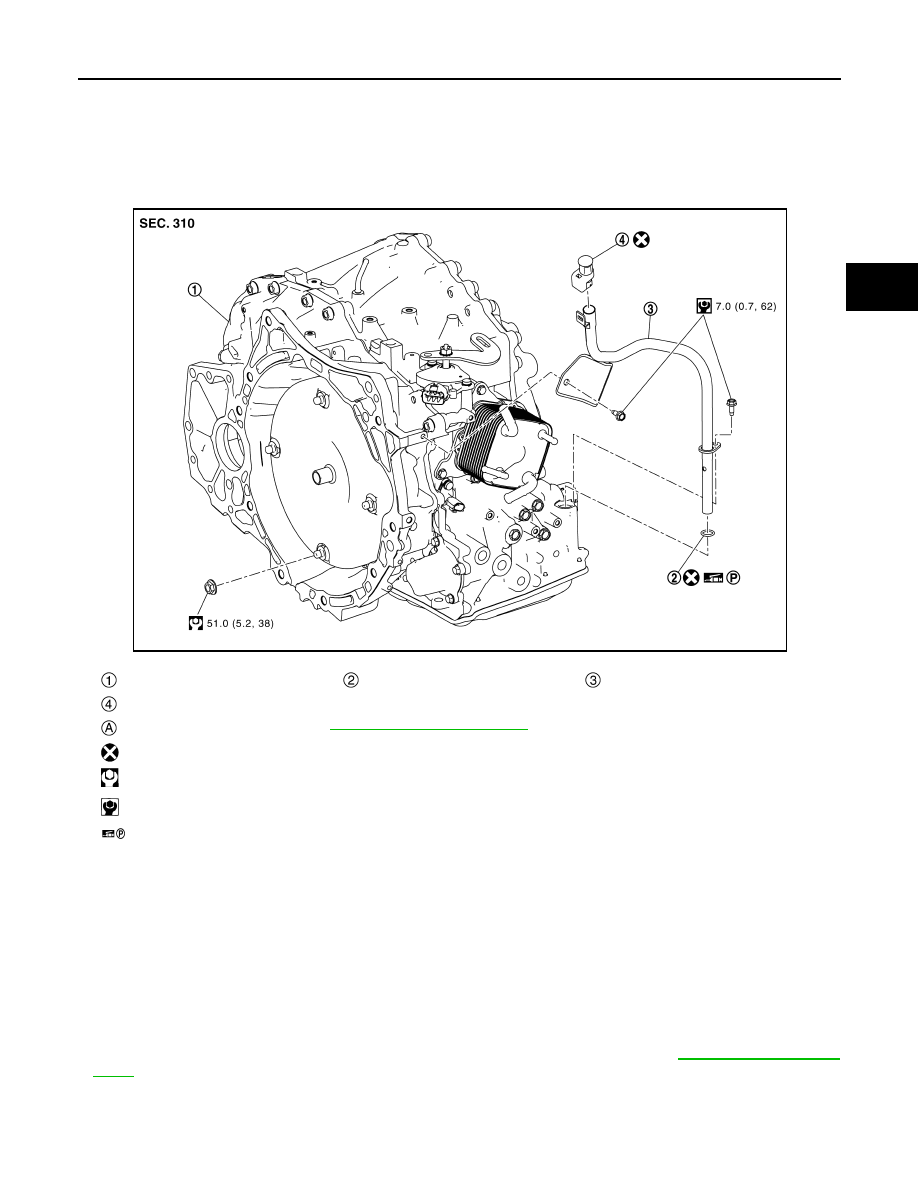
Exploded View
INFOID:0000000010589407
Removal and Installation
INFOID:0000000010589408
REMOVAL
WARNING:
Never remove the radiator cap when the engine is hot. Serious burns could occur from high pressure
coolant escaping from the radiator. Wrap a thick cloth around the cap. Slowly turn a quarter turn to
allow built-up pressure to escape. Carefully remove the cap by turning it all the way.
CAUTION:
• Perform when the engine is cold.
• When replacing TCM and transaxle assembly simultaneously, perform “ADDITIONAL SERVICE
WHEN REPLACING TCM AND TRANSAXLE ASSEMBLY” before work. Refer to
.
NOTE:
When removing components such as hoses, tubes/lines, etc., cap or plug openings to prevent fluid from spill-
ing.
Transaxle assembly
O-ring
CVT fluid charging pipe
CVT fluid charging pipe cap
: For the tightening torque, refer to
TM-415, "Removal and Installation"
.
: Always replace after every disassembly.
: N·m (kg-m, ft-lb)
: N·m (kg-m, in-lb)
: Apply petroleum jelly
JSDIA5327GB