Nissan Qashqai J11. Manual - part 701
CVT FLUID
TM-379
< PERIODIC MAINTENANCE >
[CVT: RE0F10D]
C
E
F
G
H
I
J
K
L
M
A
B
TM
N
O
P
8.
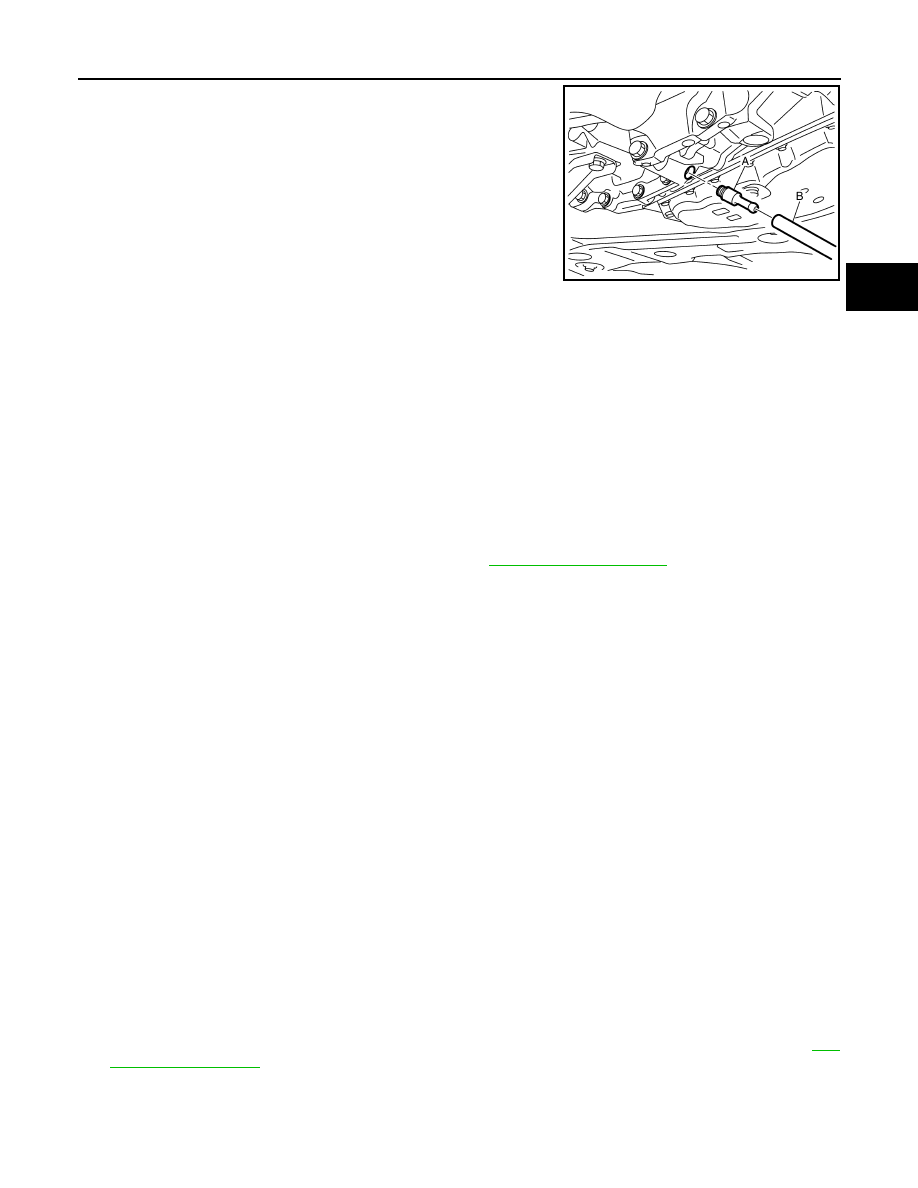
Install the charging pipe set (KV311039S0) (A) into the overflow
plug hole.
CAUTION:
Tighten the charging pipe by hand.
9.
Install the ATF changer hose (B) to the charging pipe.
CAUTION:
Press the ATF changer hose all the way onto the charging
pipe until it stops.
10. Fill approximately 3 liter (2-5/8 lmp qt) of the CVT fluid.
11. Remove the ATF changer hose and charging pipe, then install
the overflow plug.
NOTE:
Perform this work quickly because CVT fluid leaks.
12. Lift down the vehicle.
13. Start the engine.
14. While depressing the brake pedal, shift the selector lever to the entire position from “P” to “Ds”, and shift it
to the “P” position.
NOTE:
Hold the lever at each position for 5 seconds.
15. Check that the CONSULT “Data Monitor” in “FLUID TEMP” is 35
°
C (95
°
F) to 45
°
C (113
°
F).
16. Stop the engine.
17. Lift up the vehicle.
18. Remove the drain plug, and then drain CVT fluid from oil pan.
19. Repeat steps 6 to 18 (one time).
20. Tighten the drain plug to the specified torque. Refer to
21. Remove the overflow plug.
22. Install the charging pipe set (KV311039S0) into the overflow plug hole.
CAUTION:
Tighten the charging pipe by hand.
23. Install the ATF changer hose to the charging pipe.
CAUTION:
Press the ATF changer hose all the way onto the charging pipe until it stops.
24. Fill approximately 3 liter (2-5/8 lmp qt) of the CVT fluid.
25. Remove the ATF changer hose and charging pipe, then install the overflow plug.
NOTE:
Perform this work quickly because CVT fluid leaks.
26. Lift down the vehicle.
27. Start the engine.
28. While depressing the brake pedal, shift the selector lever to the entire position from “P” to “Ds”, and shift it
to the “P” position.
NOTE:
Hold the lever at each position for 5 seconds.
29. Check that the CONSULT “Data Monitor” in “FLUID TEMP” is 35
°
C (95
°
F) to 45
°
C (113
°
F).
30. Lift up the vehicle.
31. Remove the overflow plug and confirm that the CVT fluid is drained from the overflow plug hole.
CAUTION:
Perform this work with the vehicle idling.
NOTE:
If the CVT fluid is not drained, refer to “Adjustment” and refill with the CVT fluid.
32. When the flow of CVT fluid slows to a drip, tighten the overflow plug to the specified torque. Refer to
CAUTION:
Never reuse O-ring.
33. Lift down the vehicle.
JSDIA3713ZZ