Nissan Qashqai J11. Manual - part 586
EX-24
< REMOVAL AND INSTALLATION >
[R9M]
PARTICLE FILTER
PARTICLE FILTER
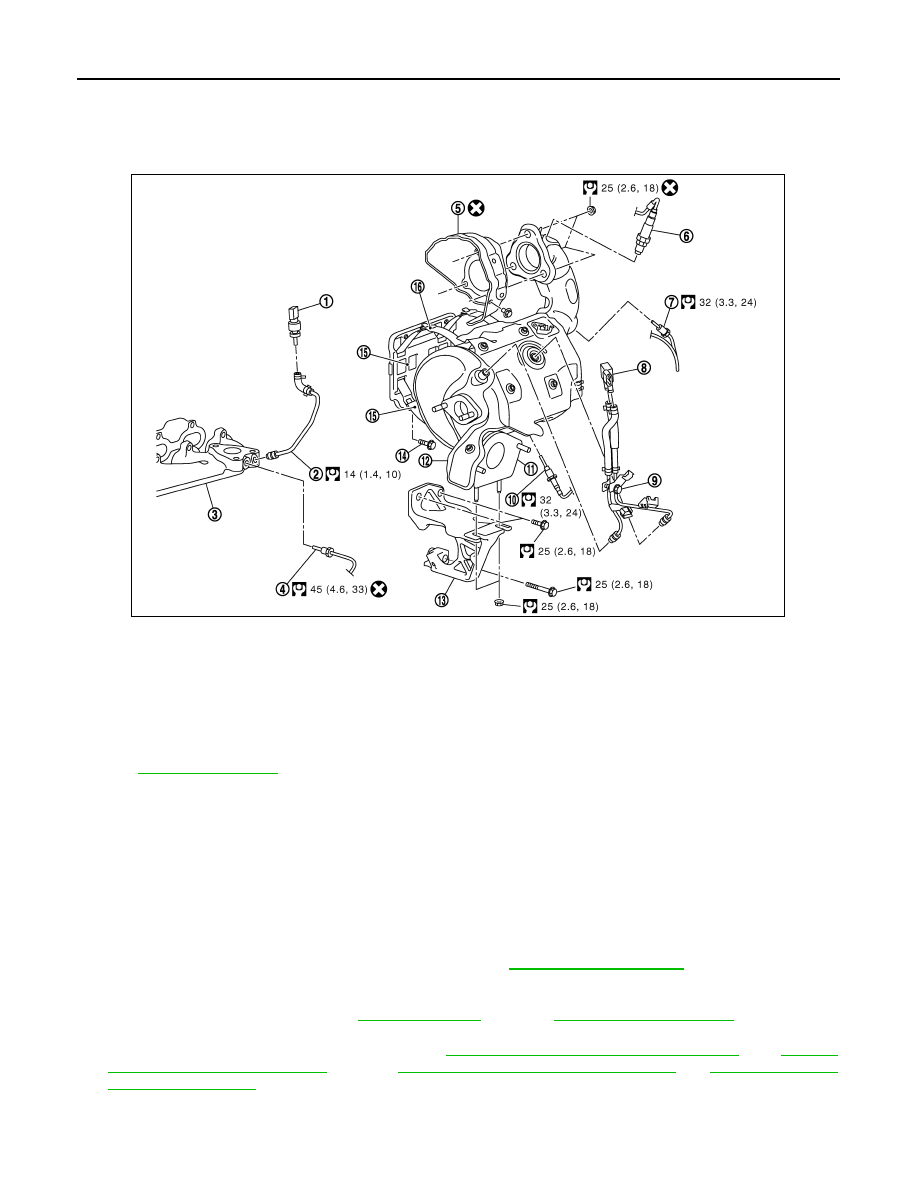
Exploded View
INFOID:0000000010287096
for symbol marks in the figure.
Removal and installation
INFOID:0000000010287097
CAUTION:
• Perform the operation with the exhaust system fully cooled down because the system is still hot just
after engine stops.
• Be careful not to cut your hand on the insulator edge.
REMOVAL
1.
Disconnect the batterie negative terminal.
2.
Remove cowl top cover and extension cowl top. Refer to
3.
Remove the air inlet pipe
4.
Remove the air duct inlet.
5.
Drain the manuel gearbox. Refer to
(2WD) or
(4WD)
6.
Remove the front wheels.
7.
Remove the drive shaft (right side). Refer to
FAX-22, "Removal and Installation (LH)"
"Removal and Installation (RH)"
FAX-60, "Removal and Installation (LH)"
(4WD)
1.
Exhaust gas pressure sensor
2.
Exhaust gas pressure sensor take-off
pipe
3.
Exhaust manifold
4.
Exhaust gas temperature sensor
5.
Turbocharger heat shield gasket
6.
Oxygen sensor
7.
Particle filter temperature sensor
8.
Particle filter pressure sensor
9.
Particle filter pressure pipe
10. Particle filter temperature sensor
11. Diesel particle filter
12. Particle filter heat shield
13. Particle filter bracket
14. Particle filter mounting
15. Particle filter mounting
E1BIA0618GB