Content .. 2270 2271 2272 2273 ..
Nissan Qashqai J11. Manual - part 2272
ENGINE MAINTENANCE (R9M)
MA-123
< PERIODIC MAINTENANCE >
C
D
E
F
G
H
I
J
K
L
M
B
MA
N
O
A
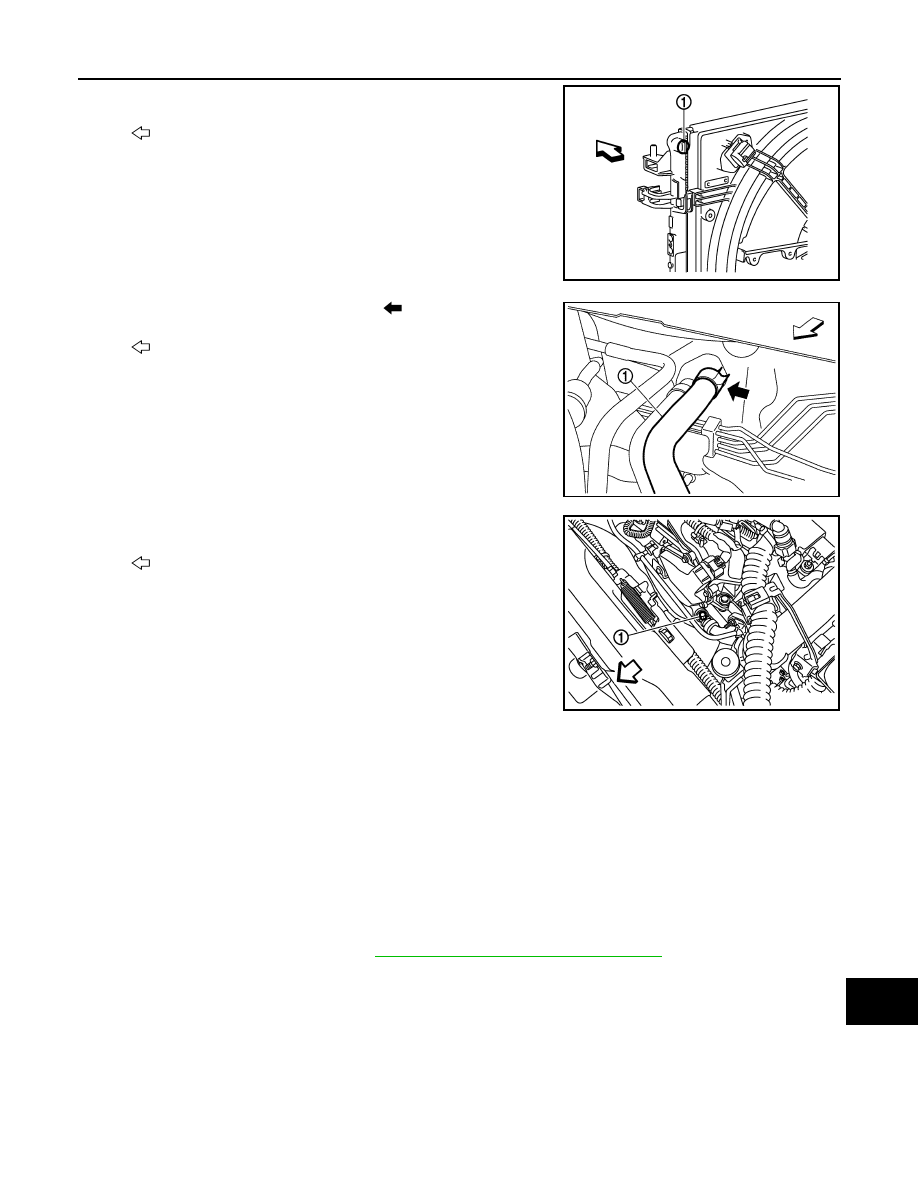
2.
Open radiator air relief plug (1).
3.
Disconnect heater hose (1) at position (
) in the figure.
• Enhance heater as high as possible.
4.
Open air relief plug (1).
5.
Fill reservoir tank with water.
• When engine coolant over flows opened radiator air relief plug, close air relief plug, and continue filling
the engine coolant.
• When engine coolant over flows opened water outlet air relief plug, close air relief plug, and continue fill-
ing the engine coolant.
• When engine coolant over flows disconnected heater hose, connect heater hose, and continue filling the
engine coolant.
6.
Install radiator cap.
7.
Run the engine and warm it up to normal operating temperature.
8.
Rev the engine two or three times under no-load.
9.
Stop the engine and wait until it cools down.
10. Drain water from the system. Refer to
MA-120, "ENGINE COOLANT : Draining"
.
11. Repeat steps 1 through 10 until clear water begins to drain from radiator.
RESERVOIR TANK CAP
: Vehicle front
E1BIA1141ZZ
: Vehicle front
JPBIA4208ZZ
: Vehicle front
E1BIA1151ZZ