Content .. 1800 1801 1802 1803 ..
Nissan Qashqai J11. Manual - part 1802
WW-86
< REMOVAL AND INSTALLATION >
REAR WASHER
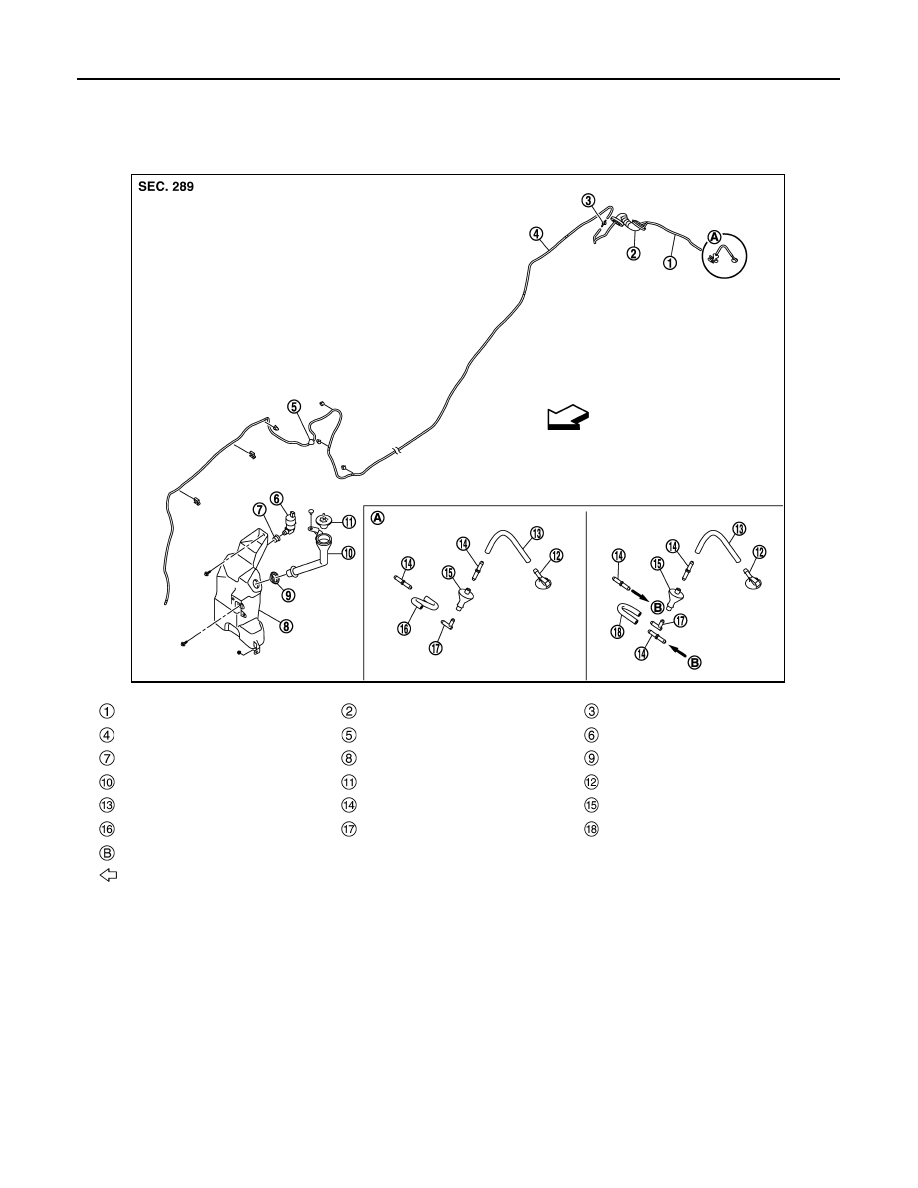
REAR WASHER
Exploded View
INFOID:0000000010479856
Washer tube
Grommet
Check valve
Washer tube
Grommet
Washer pump
Packing
Washer tank
Washer tank packing
Washer tank inlet
Washer tank cap
Rear washer nozzle
Washer tube
Tube connector
Grommet
Washer tube
Tube connector
Washer tube
: To solenoid valve
: Vehicle front
JMLIA5163ZZ