Content .. 1774 1775 1776 1777 ..
Nissan Qashqai J11. Manual - part 1776
MAP LAMP
INL-69
< REMOVAL AND INSTALLATION >
C
D
E
F
G
H
I
J
K
M
A
B
INL
N
O
P
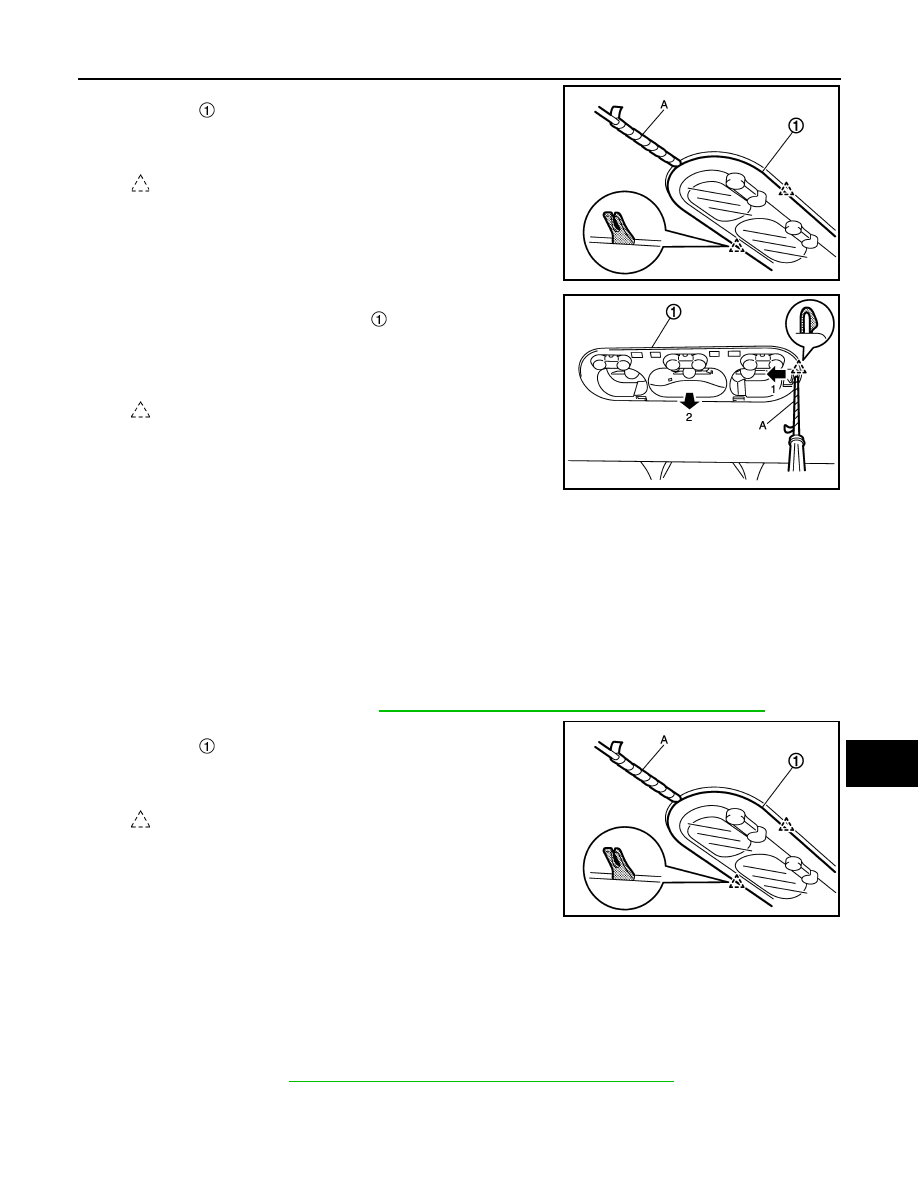
1.
Disengage lens fixing pawls using a remover tool (A), and then
remove lens
.
CAUTION:
Apply protect tape on remover tool.
2.
Disengage map lamp housing fixing pawl using a remover tool
(A), and then pull out lamp housing
according to numerical
order 1
→
2 indicated by arrows as shown in the figure.
CAUTION:
Apply protect tape on remover tool.
3.
Disconnect map lamp harness connector, and then remove map lamp housing.
INSTALLATION
Install in the reverse order of removal.
MAP LAMP : Replacement
INFOID:0000000010430924
MAP LAMP BULB
CAUTION:
Disconnect the battery negative terminal or remove power circuit fuse when performing the operation
for preventing electric leakage. Refer to
INL-3, "Precautions for Removing Battery Terminal"
1.
Disengage lens fixing pawls using a remover tool (A), and then
remove lens
.
CAUTION:
Apply protect tape on remover tool.
2.
Remove bulb.
MAP LAMP FINISHER
MAP LAMP FINISHER : Removal and Installation
INFOID:0000000010451298
CAUTION:
Disconnect the battery negative terminal or remove power circuit fuse while performing the operation
to electric leakage. Refer to
INL-3, "Precautions for Removing Battery Terminal"
.
REMOVAL
: Pawl
JMLIA1063ZZ
: Pawl
JMLIA1064ZZ
: Pawl
JMLIA1063ZZ