Content .. 1539 1540 1541 1542 ..
Nissan Qashqai J11. Manual - part 1541
EXT-38
< REMOVAL AND INSTALLATION >
ROOF SIDE MOLDING
ROOF SIDE MOLDING
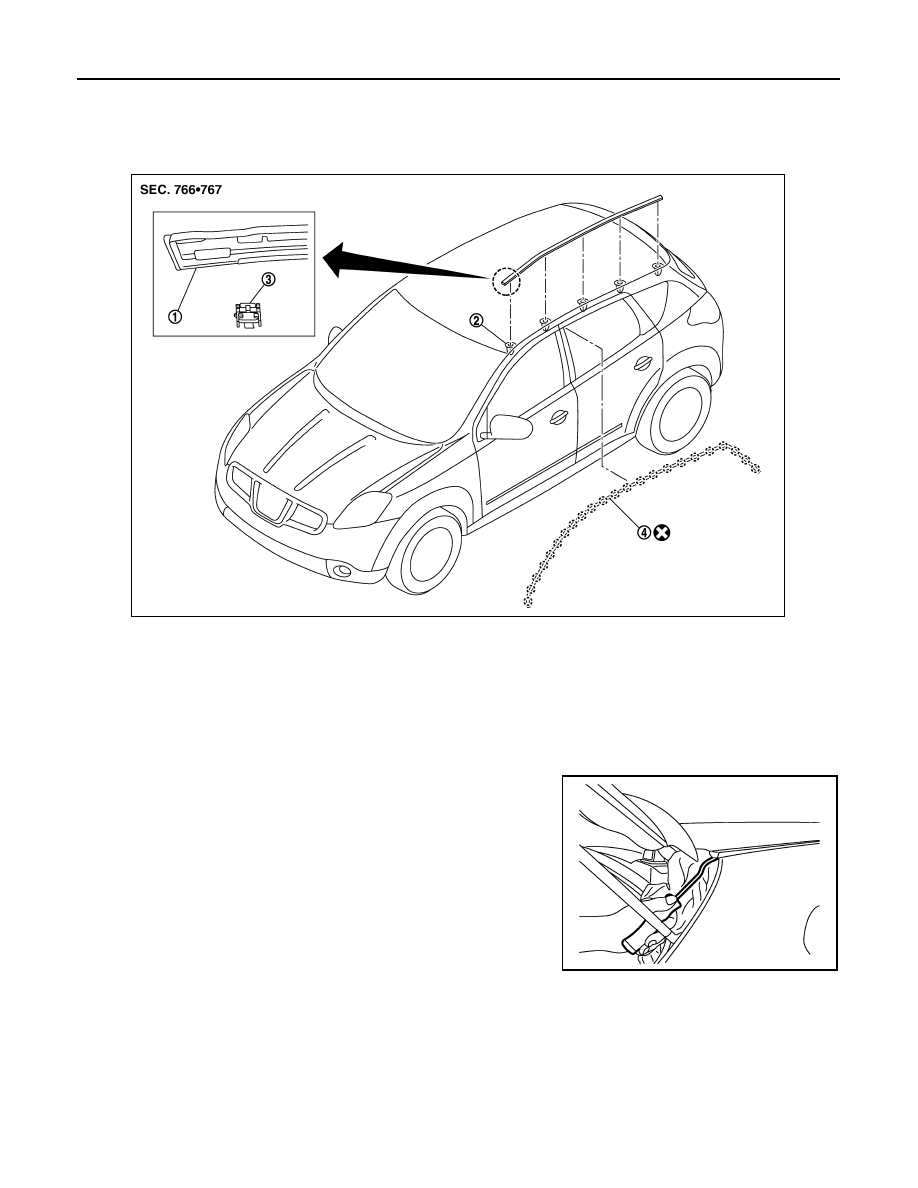
Exploded View
INFOID:0000000010377917
Removal and Installation
INFOID:0000000010377918
REMOVAL
1.
Open back door.
2.
Using suitable tool, release roof side molding fixing clips from
rear to front, then remove roof side molding.
CAUTION:
Always use shop cloth to avoid damaging the vehicle.
INSTALLATION
Install in the reverse order of removal.
WEATHERSTRIP-ROOF DRIP SEAL
REMOVAL
1.
Remove weatherstrip-roof drip seal by releasing clips.
1.
Roof side molding
2.
Roof side molding clip
3.
Roof side molding fastener
4.
Weatherstrip-roof drip seal
E1KIA0131ZZ
E1KIA0024ZZ