Nissan Juke F15. Manual - part 1093


  Index      Nissan     Nissan Juke F15 (2015 year) - Service and Repair Manual


Search            


Content   ..  1091  1092  1093  1094   ..


Nissan Juke F15. Manual - part 1093


RF-38

< REMOVAL AND INSTALLATION >

SUNROOF MOTOR ASSEMBLY

2. Remove headlining. Refer to 

INT-30, "SUNROOF : Removal and Installation"

.

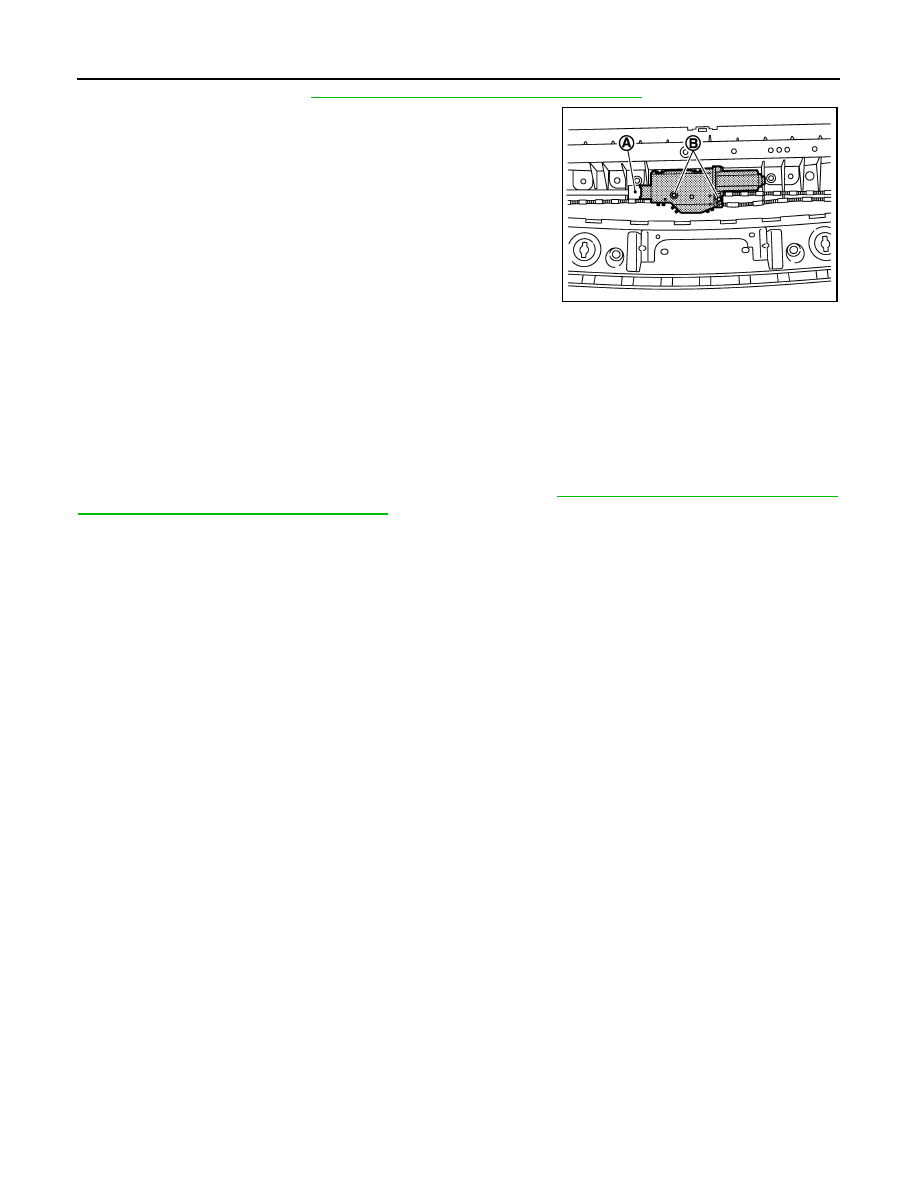
3. Remove sunroof motor.

1. Disconnect harness connector (A) from sunroof motor.

2. Remove sunroof motor assembly fixing screws (B), and

then remove sunroof motor assembly.

INSTALLATION

CAUTION:

Before installing the sunroof motor assembly, be sure to the place the link and wire assembly in the

symmetrical and fully closed position.
1. Move the sunroof motor assembly laterally by little so that the gear is completely engaged into the wire on

the sunroof unit assembly and mounting surface becomes parallel. Then secure the sunroof motor

assembly with screws.

2. Install headlining. 
NOTE:

After installation sunroof motor, perform additional service. Refer to 

RF-17, "ADDITIONAL SERVICE WHEN

REPLACING CONTROL UNIT : Description"

.

JMKIA5811ZZ

SUNROOF UNIT ASSEMBLY

RF-39

< REMOVAL AND INSTALLATION >

C

D

E

F

G

H

I

J

L

M

A

B

RF

N

O

P

SUNROOF UNIT ASSEMBLY

Exploded View

INFOID:0000000012196985

REMOVAL

DISASSEMBLY

1.

TORX bolt

2.

Glass lid

3.

Sunroof bracket

4.

Drain hose (front)

5.

Drain connector (front)

6.

Sunroof welt

7.

Sunroof motor assembly

8.

Drain hose (rear)

9.

Drain connector (rear)

10. Sunroof unit assembly

11. Seal guide rubber

12. Seal sunroof

     : Indicates that the part is connected at points with same symbol in actual vehicle.

JSKIA2884ZZ

RF-40

< REMOVAL AND INSTALLATION >

SUNROOF UNIT ASSEMBLY

Removal and Installation

INFOID:0000000012196986

REMOVAL

CAUTION:

• Always work with a helper.

• Fully close the glass lid assembly, before removal, then never operate sunroof motor assembly after

removal.

• After removing sunroof motor, never attempt to rotate sunroof motor assembly as a single unit.

• When remove/install sunroof unit, use cloths to protect the seats and trim from damage.

• After installing the sunroof unit and glass lid, perform the leak test and check that there is no mal-

function.

1. Remove glass lid. Refer to 

RF-34, "Removal and Installation"

.

2. Remove headlining. Refer to 

INT-30, "SUNROOF : Removal and Installation"

.

3. Disconnect drain hoses.

1.

Rear drain assembly

2.

Wind deflector

3.

Sunshade stopper

4.

Sunroof frame assembly

5.

Seating deflector

6.

Sunshade

JSKIA2885ZZ

SUNROOF UNIT ASSEMBLY

RF-41

< REMOVAL AND INSTALLATION >

C

D

E

F

G

H

I

J

L

M

A

B

RF

N

O

P

4. Remove sunroof brackets mounting bolts, and then remove sunroof brackets.
5. Remove bolts from the front end and side rail, and then remove sunroof unit assembly from roof panel.
6. Remove sunroof unit assembly through the passenger compartment while being careful not to damage

the seats and trim.

INSTALLATION

1. Temporarily tighten the mounting bolts to the both side of sunroof unit assembly.
2. Temporarily tighten the mounting bolts to the front end of sunroof unit assembly.
3. Temporarily tighten the mounting bolts to the sunroof brackets (LH and RH).
4. Tighten the installation points diagonally excluding the installation points of the sunroof brackets around

the roof opening.

5. Tighten the sunroof bracket bolts of the vehicle side, and then tighten the bolt of the sunroof unit assembly

side.

6. Tighten the mounting bolts to the front end and both side of sunroof unit assembly.
7. Connect drain hoses.
8. Install headlining. Refer to 

INT-30, "SUNROOF : Removal and Installation"

.

9. Install glass lid. Refer to 

RF-34, "Removal and Installation"

.

10. Install side trims.
NOTE:

• After installation, perform fitting adjustment. Refer to 

RF-35, "Adjustment"

.

• After installation sunroof unit assembly, perform additional service. Refer to 

RF-17, "ADDITIONAL SERVICE

WHEN REPLACING CONTROL UNIT : Description"

.

Disassembly and Assembly

INFOID:0000000012196987

DISASSEMBLY

1. Remove sunshade stopper mounting from the rear end of sunroof frame.
2. Remove sunshade from the rear end of sunroof frame.
3. Remove rear drain assembly from sunroof guide assembly.

ASSEMBLY

Assemble in the reverse order of disassembly.


Content   ..  1091  1092  1093  1094   ..