содержание .. 702 703 704 705 ..
Nissan Tiida C11. Manual - part 704
EM-168
< ON-VEHICLE REPAIR >
[MR18DE]
OIL PAN
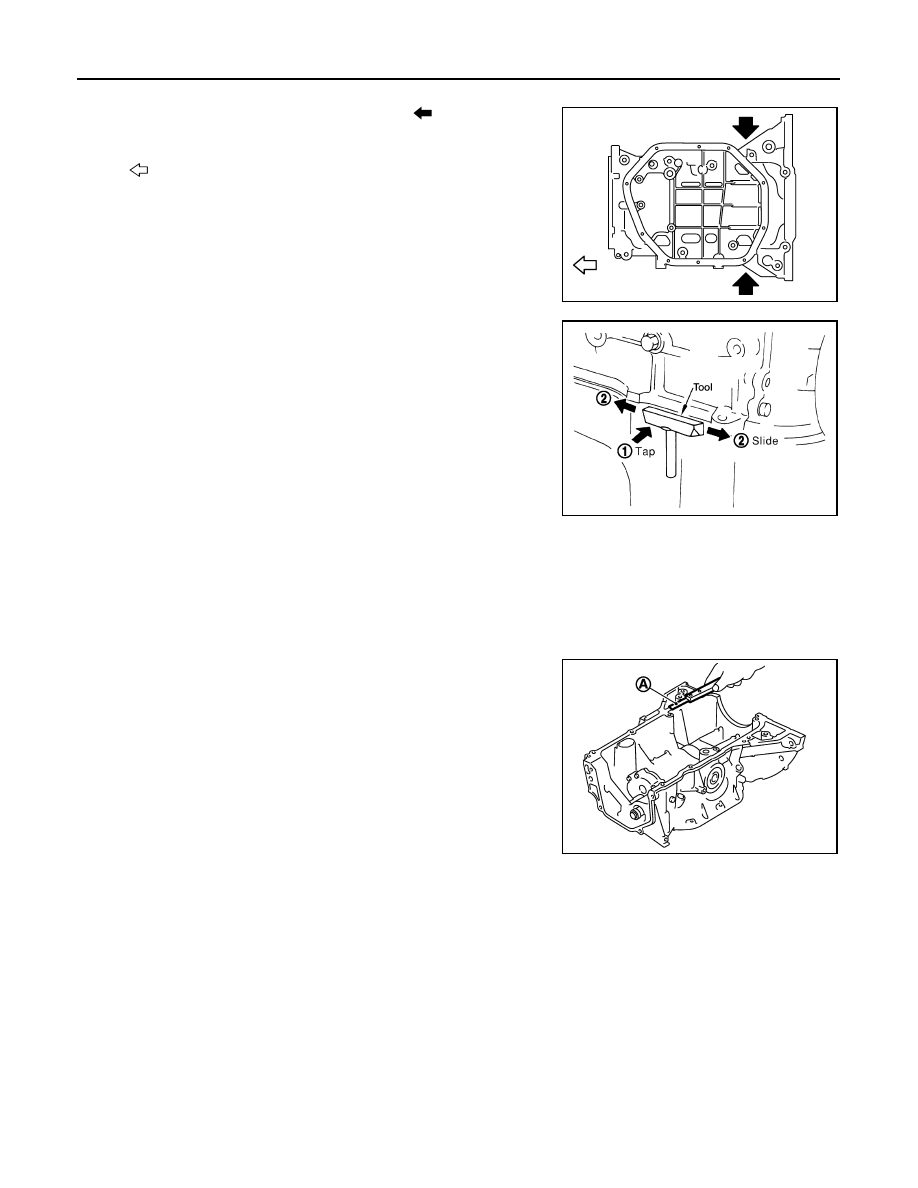
9.
Insert a screwdriver shown by the arrow (
) and open up a
crack between oil pan (upper) and cylinder block.
CAUTION:
A more adhesive liquid gasket is applied compared to previ-
ous types when shipped, so it should not be forced off the
position not specified.
10. After removing the bolts, separate the mating surface and
remove the sealant using Tool.
• Slide (1) the Tool by tapping (2) its side with a hammer to
remove the lower oil pan from the upper oil pan.
CAUTION:
Be careful not to damage the mating surfaces.
11. Remove O-ring between cylinder block and oil pan (upper).
INSPECTION AFTER REMOVAL
Oil Filter
Clean oil strainer portion (part of the oil pump) if any object attached.
INSTALLATION
1.
Use a scraper (A) to remove old liquid gasket from mating sur-
faces.
• Remove the old liquid gasket from mating surface of cylinder
block.
• Remove old liquid gasket from the bolt holes and threads.
CAUTION:
Never scratch or damage the mating surfaces when clean-
ing off old liquid gasket.
: Engine front
PBIC3534J
Tool number
: KV10111100 (J-37228)
WBIA0566E
PBIC3949E