содержание .. 199 200 201 202 ..
Nissan Tiida C11. Manual - part 201
DLK-214
< REMOVAL AND INSTALLATION >
[WITH I-KEY, WITHOUT SUPER LOCK]
HOOD
4.
Press the hood lightly with [approx. 29 N (3 kg] of force and adjust A and B as shown.
5.
After adjustment tighten lock bolts to the specified torque.
6.
Install the front grille. Refer to
EXT-19, "Removal and Installation"
.
Removal and Installation
INFOID:0000000001315832
HOOD ASSEMBLY
Removal
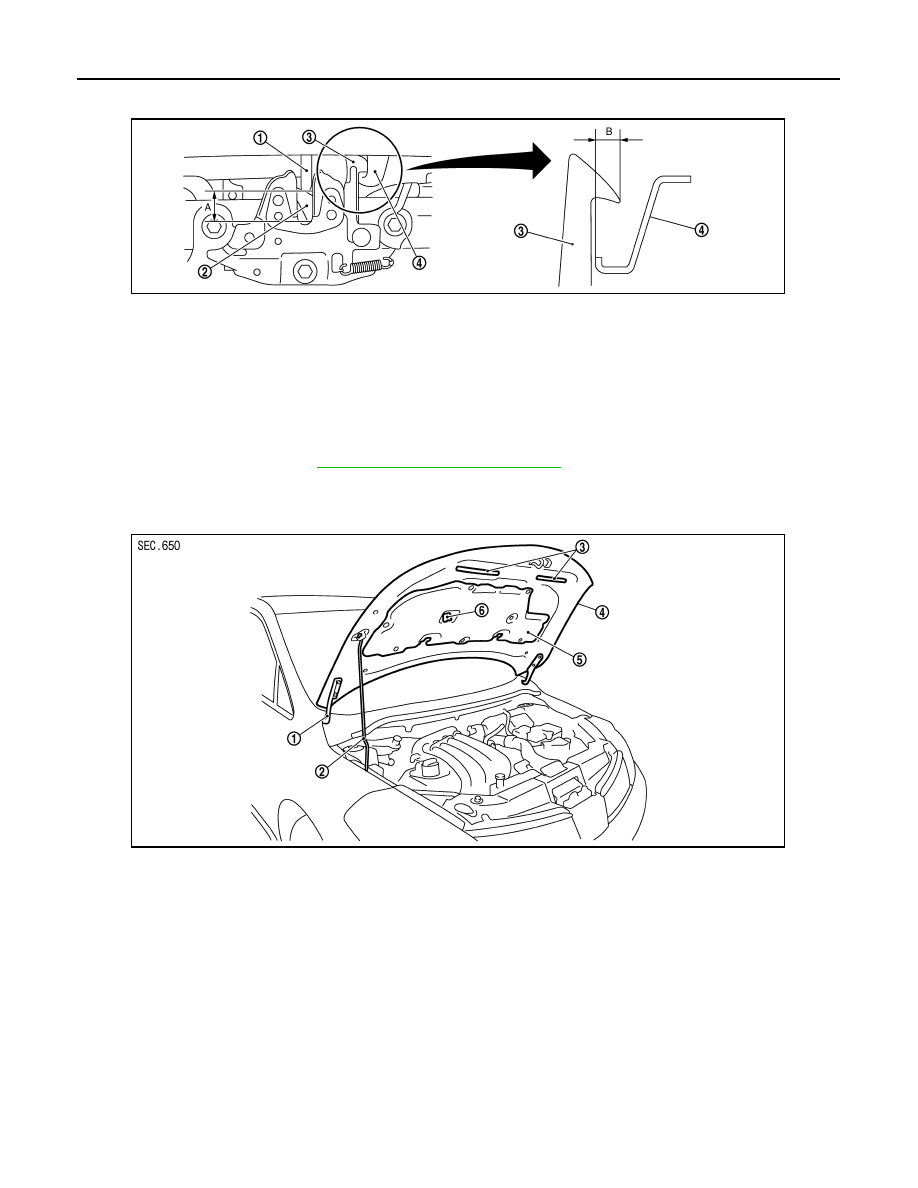
1.
Hood striker
2.
Primary latch
3.
Secondary striker
4.
Secondary latch
A
: 20 mm (0.79 in)
B
: 6.8 mm (0.268 in) min.
PIIB5794E
1.
Hood hinge
2.
Hood stay
3.
Radiator core seal rubber
4.
Hood assembly
5.
Hood insulator
6.
Hood stay holder
PIIB2528J