содержание .. 1058 1059 1060 1061 ..
Nissan Tiida C11. Manual - part 1060
LU-30
< ON-VEHICLE REPAIR >
[K9K]
OIL COOLER
OIL COOLER
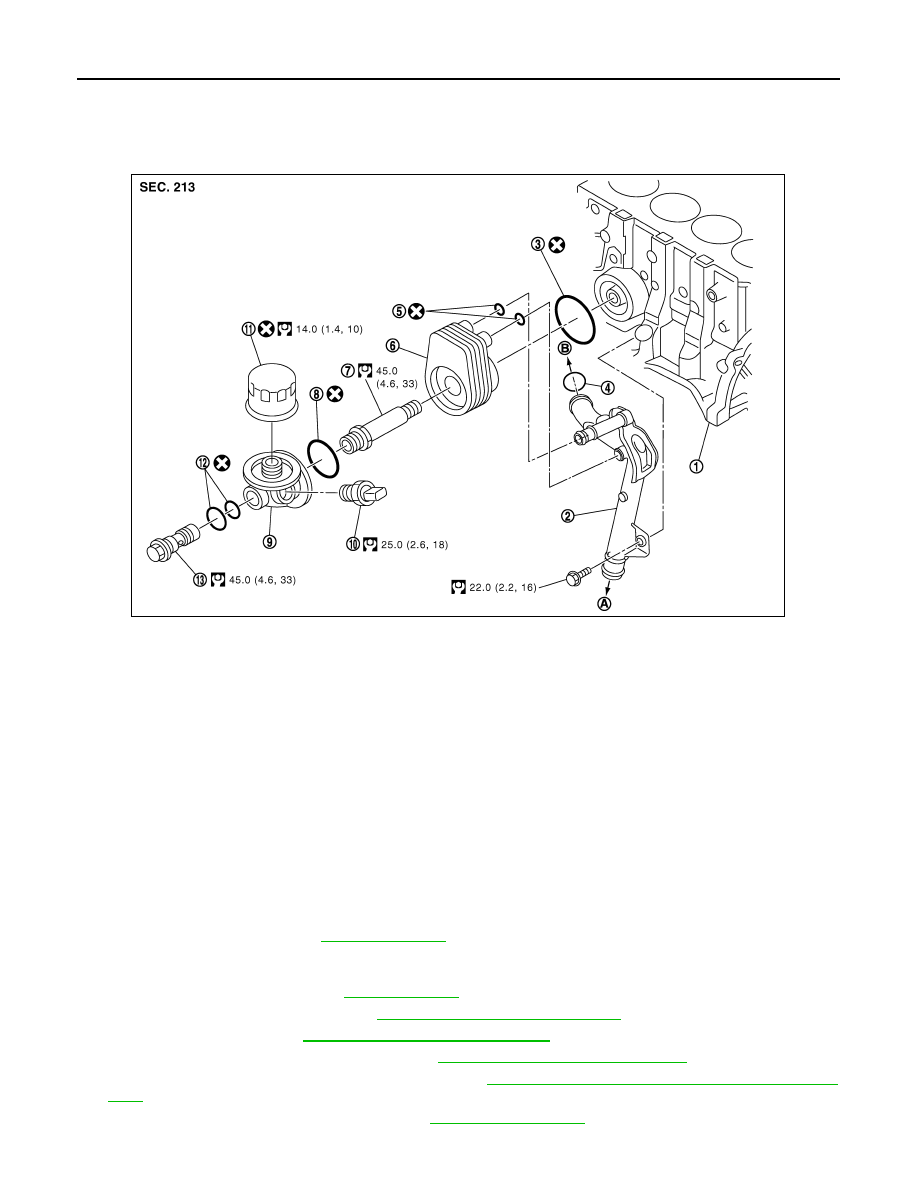
Exploded View
INFOID:0000000001381543
Removal and Installation
INFOID:0000000001381544
CAUTION:
• Be careful not to get burned when the engine and engine oil are hot.
• When removing, prepare a shop cloth to absorb any oil leakage or spillage.
• Completely wipe off any oil that adhere to the engine and the vehicle.
REMOVAL
1.
Remove engine undercover using power tool.
2.
Drain engine coolant. Refer to
CAUTION:
Perform when engine is cold.
3.
Remove RH front wheel. Refer to
.
4.
Remove RH fender protector. Refer to
EXT-22, "Removal and Installation"
5.
Remove drive belt. Refer to
EM-263, "Removal and Installation"
6.
Remove generator and position aside. Refer to
CHG-43, "Removal and Installation"
.
7.
Remove A/C compressor and position aside. Refer to
HA-35, "Removal and Installation of Compressor -
.
8.
Remove oil filter and oil filter bracket. Refer to
.
1.
Cylinder block
2.
Water pipe
3.
O-ring
4.
O-ring
5.
O-ring
6.
Oil cooler
7.
Connecting stud
8.
O-ring
9.
Oil filter bracket
10. Oil pressure switch
11.
Oil filter
12. O-ring
13. Connecting bolt
A.
To radiator lower hose
B.
To water pump
E1BIA0011GB