Mitsubishi Outlander PHEV (2022 year). Manual in english - page 17

Interior lights
)RU YHKLFOHV VROG LQ 0H[LFR
,QWHULRU OLJKWV
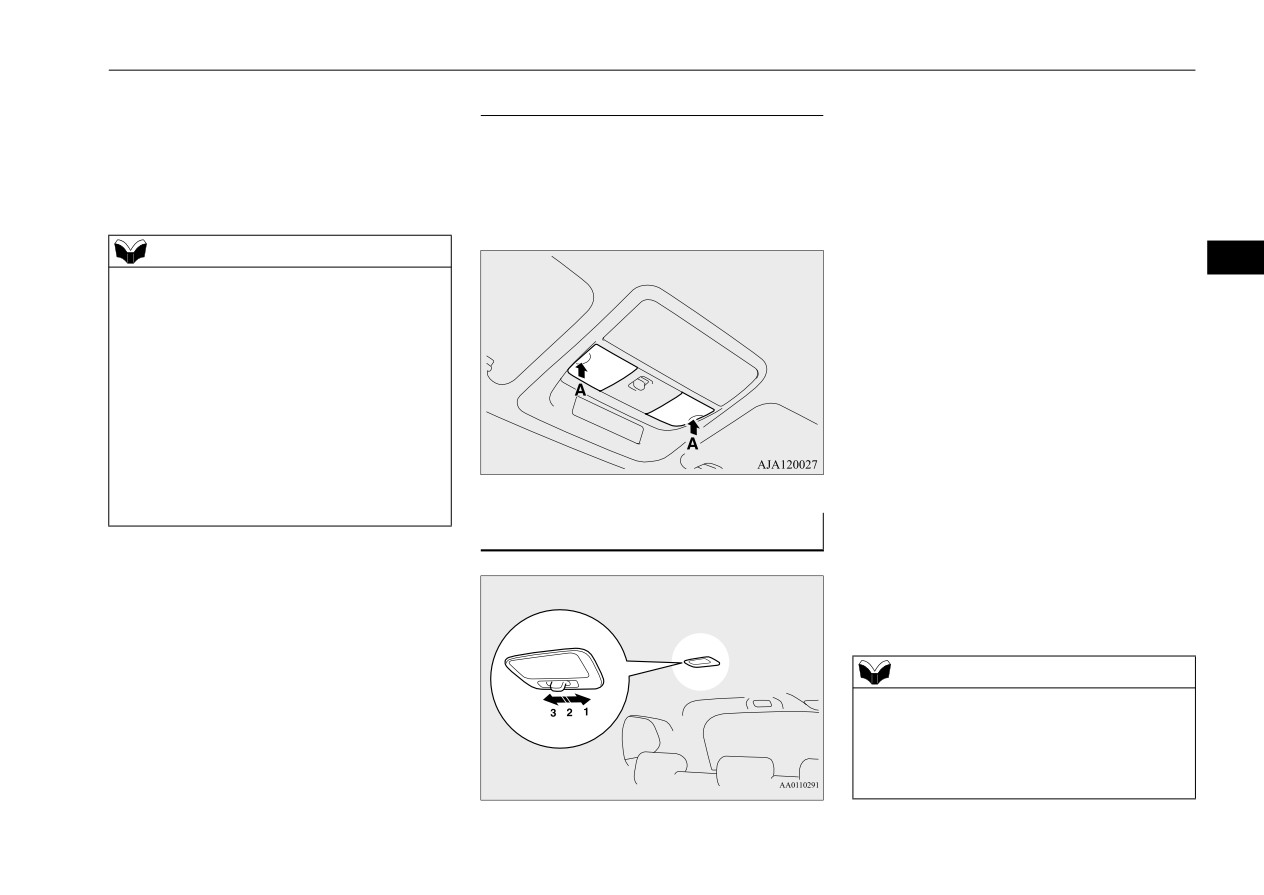
'RPH OLJKW IURQW
5HDGLQJ
N00525301758
OLJKWV
N00525401599
NOTE
z Be aware that leaving the light illuminated
'RPH OLJKW IURQW
with the ready indicator off may run the 12 V
starter battery down.
Never leave the vehicle without checking
5
that the light is off.
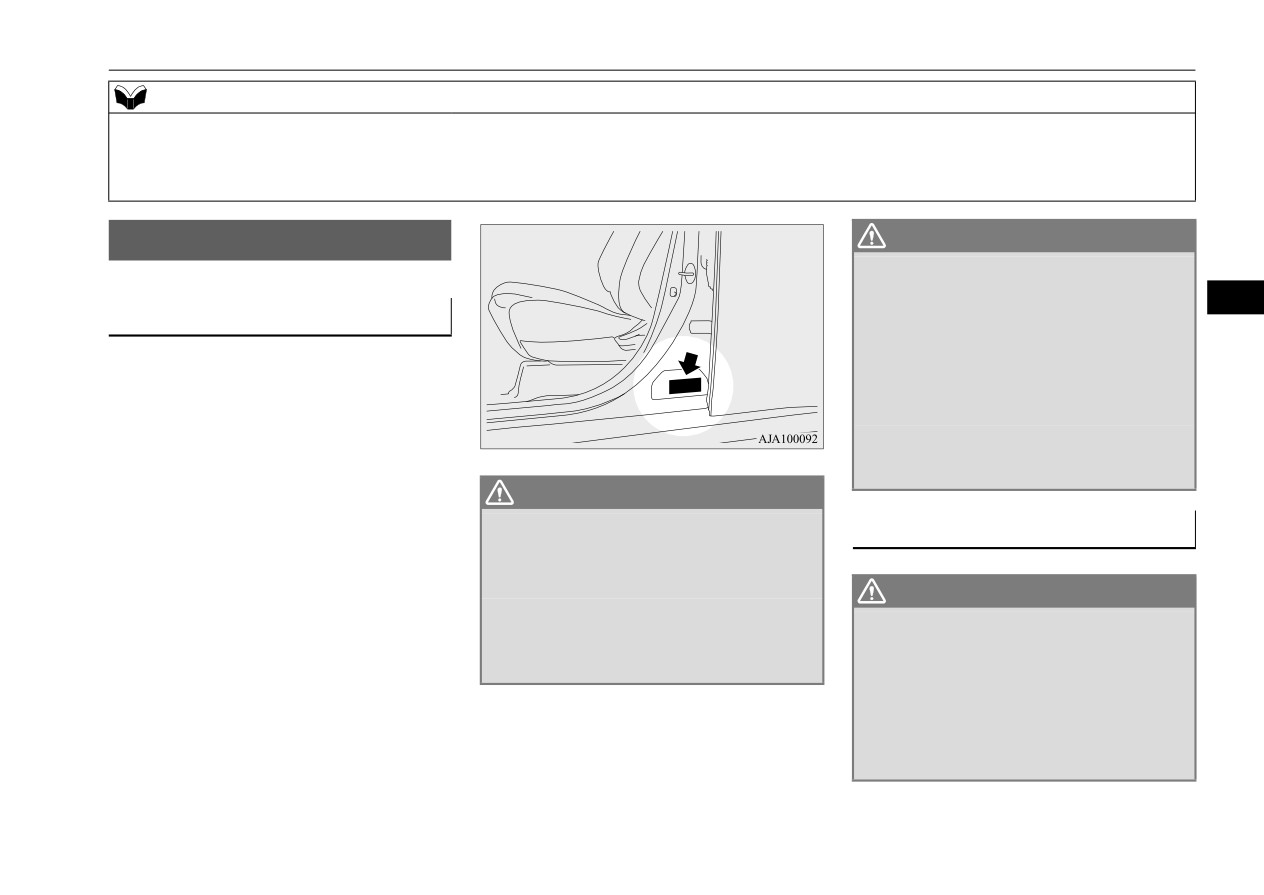
1- (DOOR)
When any of the doors or the liftgate is
opened, the dome light illuminates; when
any of them are closed, the dome light
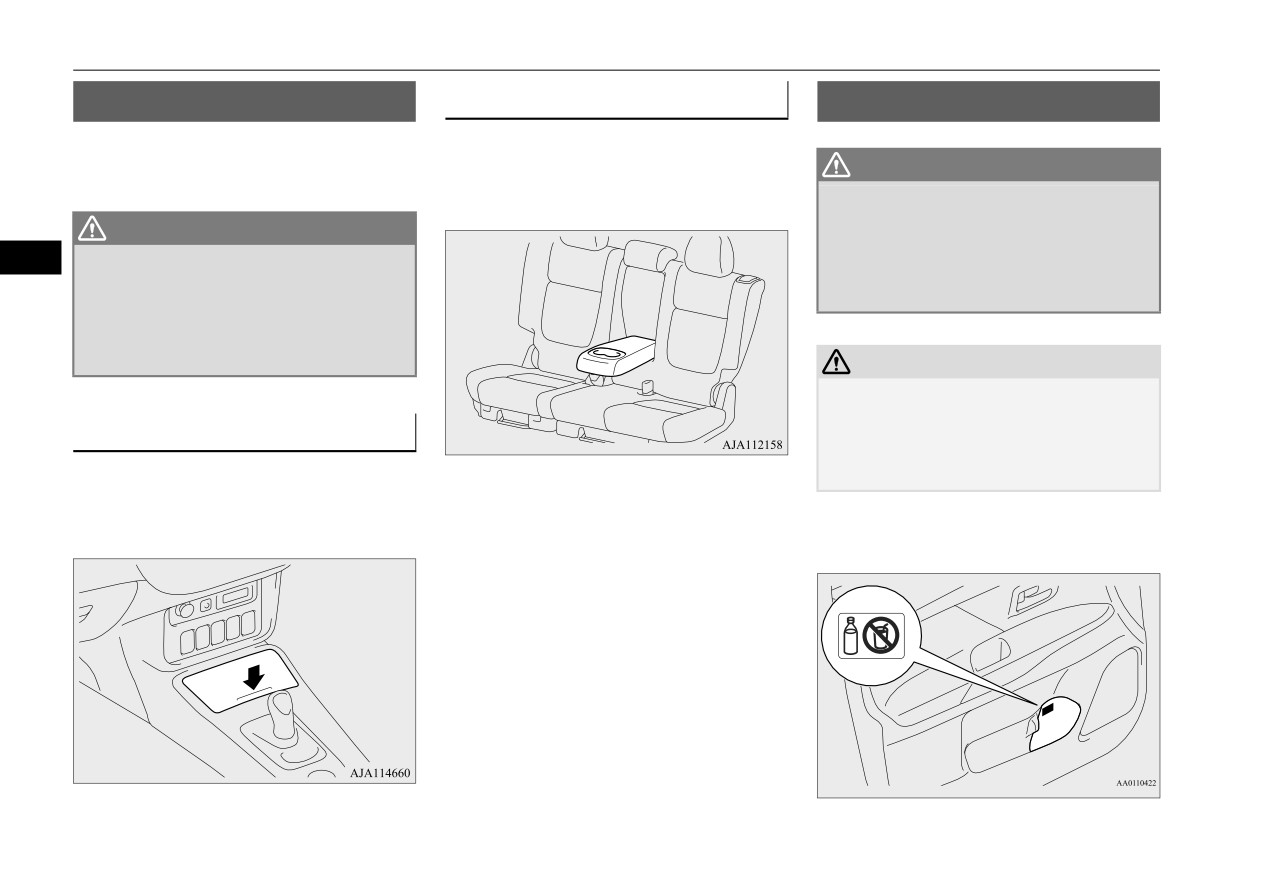
1- Cargo room light P.5-222
goes off after approximately 30 seconds.
2- Dome light (rear) P.5-221
However, the light goes off immediately
3- Dome light (front)/Reading lights
if:
P.5-220
z The doors and the liftgate are closed
4- Downlight P.5-222
while the operation mode of the
5- Front foot lights P.5-223
power switch is in ON.
z The driver’s door is closed while the
lock knob is in the lock position, after
all the other doors are closed.
5-220
Features and controls
Interior lights
z The doors and the liftgate are closed
5HDGLQJ OLJKWV
1- (ON)
and the power door lock function is
N00537601211
The dome light illuminates regardless of
used to lock the doors.
Regardless of the dome light switch position,
any door or the liftgate being opened or
z The doors and the liftgate are locked
when you press the lens (A), the light on the
closed.
using the F.A.S.T.-key switch or
side that is pressed illuminates; when you
2- (z )
F.A.S.T.-key operation.
press the lens (A) again, the light goes out.
When any of the doors or the liftgate is
opened, the dome light illuminates;
NOTE
when any of them are closed, the dome
5
z
When the operation mode of the power
light goes off after approximately 30 sec-
switch is put in OFF while the doors and lift-
onds. However, the light goes off imme-
gate are closed, the dome light will illumi-
diately if:
nate for approximately 30 seconds and then
z The door and the liftgate are closed
go off.
while the operation mode of the
z
The time until the light goes off can be
power switch is in ON.
adjusted. See a certified Mitsubishi EV
z The driver’s door is closed while the
dealer for details. For vehicles equipped with
the Smartphone-link Display Audio (SDA),
lock knob is in the lock position,
adjustments can be made using screen opera-
after all the other doors are closed.
tions. For details, refer to the separate
z The door and the liftgate are closed
owner’s manual.
and the power door lock function is
'RPH OLJKW
UHDU
used to lock the doors.
N00525801405
z The doors and the liftgate are locked
2- (OFF)
The dome light stays off regardless of any
using the F.A.S.T.-key switch or
door or the liftgate being opened or closed.
F.A.S.T.-key operation.
NOTE
z When the operation mode of the power
switch is put in OFF while the doors and lift-
gate are closed, the dome light will illumi-
nate for approximately 30 seconds and then
go off.
Features and controls
5-221
Interior lights
2- (z )
NOTE
'RZQOLJKW
When the liftgate is opened, the cargo
z When the dome light switch is in the “ON”
N00596000059
room light illuminates; when it is closed,
position, the light will not go off, even when
The downlight illuminates when the light
it goes out.
all the doors and the liftgate are closed.
switch is in the
“
” or
“
” position.
3- (OFF)
z The time until the light goes off can be
When the light switch is in the “AUTO” posi-
The cargo room light stays out regardless
adjusted. See a certified Mitsubishi EV
tion, the downlight illuminates when the
of the liftgate being opened or closed.
dealer for details. For vehicles equipped with
parking lights illuminate.
the Smartphone-link Display Audio (SDA),
5
adjustments can be made using screen opera-
tions. For details, refer to the separate
owner’s manual.
3- (OFF)
The dome light stays off regardless of any
door or the liftgate being opened or closed.
&DUJR URRP OLJKW
N00526101186
1- (ON)
The cargo room light illuminates regard-
less of the liftgate being opened or closed.
5-222
Features and controls
Storage spaces
)URQW IRRW OLJKWV
NOTE
N00536901086
z The interior light auto-cutout function can be
The front foot lights (A) come on when the
deactivated. The time until the lights auto-
front door is opened and go off when the door
matically go off can be adjusted. See a certi-
is closed.
fied Mitsubishi EV dealer for details.
For vehicles equipped with the Smartphone-
link Display Audio (SDA), adjustments can
be made using screen operations. For details,
5
refer to the separate owner’s manual.
1-
Luggage floor box
6WRUDJH VSDFHV
2-
Floor console box
N00526401596
3-
Glove compartment
4-
Sunglasses holder (if so equipped)
CAUTION
z
Never leave lighters, carbonated drink cans,
or spectacles in the cabin when parking the
vehicle in hot sunshine. The cabin will
become extremely hot, so lighters and other
,QWHULRU OLJKW DXWR FXWRXW
flammable items may catch fire and
IXQFWLRQ
unopened drink cans (including beer cans)
N00526301553
may rupture. The heat may also deform or
crack plastic spectacle lenses and other spec-
: Dome light (front)/Reading lights, dome
tacle parts that are made of plastic.
light (rear) and cargo room light
z
Keep the lids of storage spaces closed while
driving the vehicle. A lid or the contents of a
z If interior lights are left on with the opera-
storage space could otherwise cause injuries
tion mode of the power switch in OFF, the
during a sudden stop.
lights go off automatically after approxi-
mately 30 minutes.
z The lights come on again if the power
NOTE
switch is operated, if any door or liftgate
z
Do not leave valuables in any storage space
is opened or closed, or if the F.A.S.T.-key
when leaving the vehicle.
is operated.
Features and controls
5-223

Storage spaces
*ORYH FRPSDUWPHQW
&DUG KROGHU
)ORRU FRQVROH ER[
N00551501328
N00551601332
There is a card holder on the inside of the
To open the console box, lift the release lever
WARNING
(A) and raise the lid.
glove compartment.
z $Q RSHQ JORYH FRPSDUWPHQW GRRU FDQ
The floor console box can also be used as an
FDXVH D VHULRXV LQMXU\ RU GHDWK WR WKH IURQW
arm rest.
SDVVHQJHU LQ DQ DFFLGHQW HYHQ LI WKH SDV
VHQJHU LV ZHDULQJ KLV KHU VHDW EHOW $OZD\V
5
NHHS WKH JORYH FRPSDUWPHQW GRRU FORVHG
ZKHQ GULYLQJ
To open, pull the lever (A).
NOTE
z When the lights are illuminated with the
light switch in the “
”, “
”or “AUTO”
position, the glove compartment light illumi-
nates.
5-224
Features and controls
Storage spaces
/XJJDJH IORRU ER[
WARNING
CAUTION
N00552301062
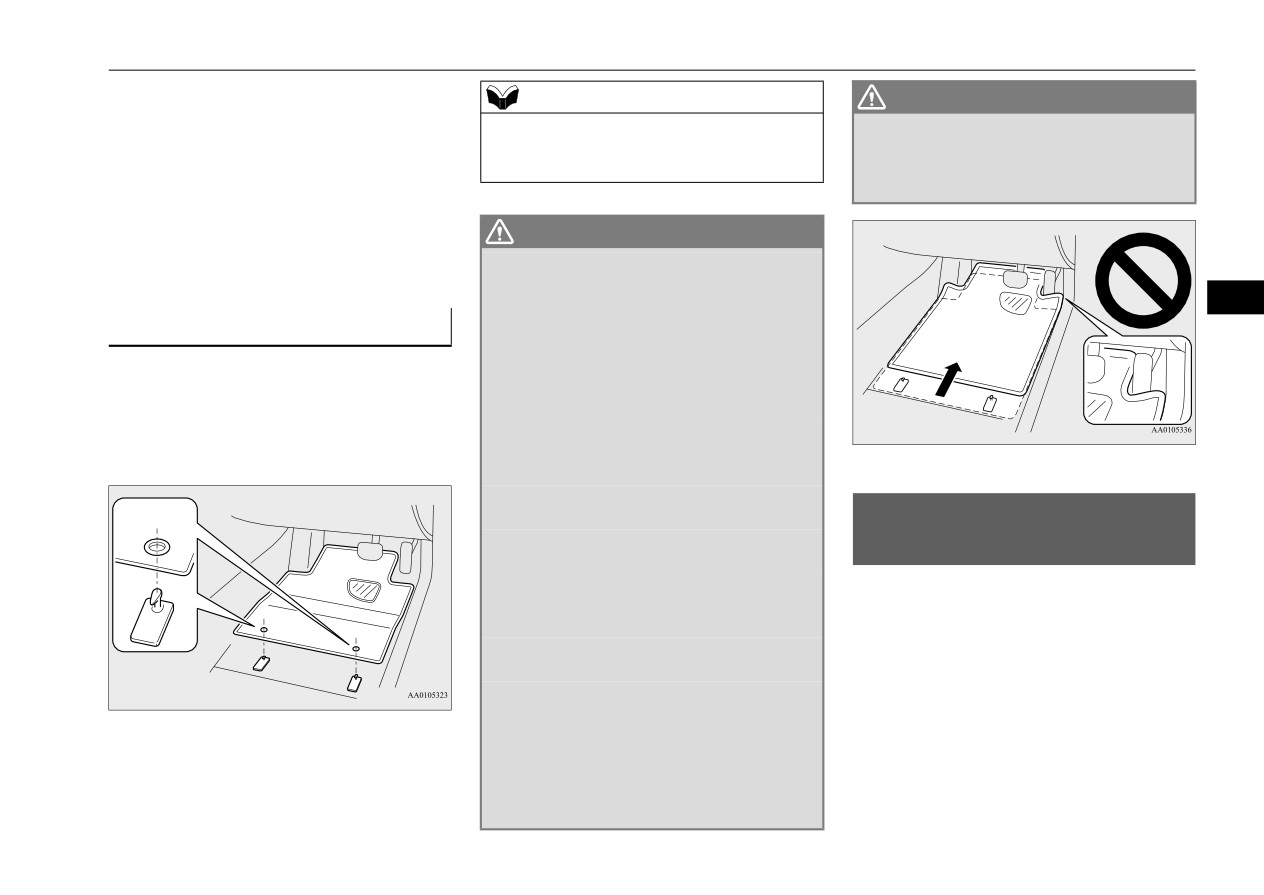
z 'R QRW SODFH DQ\ REMHFW DURXQG WKH
z Do not use for storing objects heavier than
There is a luggage floor box under the lug-
typical sunglasses.
³
´PDUN VLQFH WKHUH LV WKH
9 VWDUWHU
gage floor board.
There is risk that the holder lid will open
EDWWHU\ XQGHU WKH OXJJDJH IORRU ER[ ,I WKH
To use the box, raise the luggage floor board
EDWWHU\ FRYHU LV EURNHQ D EDWWHU\ IOXLG
accidentally, resulting in an injury due to
falling objects.
(A).
PD\ OHDN ,I LW DGKHUHV WR \RXU VNLQ RU JHWV
LQ \RXU H\HV VHULRXV LQMXU\ PD\ UHVXOW
5
NOTE
z Some types of sunglasses cannot fit snugly in
the holder.
Before storing, check the shape to make sure
they fit.
6XQJODVVHV KROGHU LI VR HTXLSSHG
To use the luggage floor box in the rear seat
N00502601103
side, insert your hand in the gap (B) and raise
the board (A) to the seat side.
To open, push the lid.
Features and controls
5-225
Cup holders
&XS KROGHUV
)RU WKH UHDU VHDW
%RWWOH KROGHUV
N00527301550
N00537001202
N00527301505
This cup holder is located in the rear seat arm
The cup holder is designed for holding cups
rest.
WARNING
or drink-cans securely in its holes.
Pull the arm rest down to use the cup holder.
z
'R QRW VSUD\ ZDWHU RU VSLOO EHYHUDJHV
LQVLGH WKH YHKLFOH
,I VZLWFKHV ZLUHV RU
WARNING
HOHFWULFDO FRPSRQHQWV EHFRPH ZHW WKH\
z 'R QRW VSUD\ ZDWHU RU VSLOO EHYHUDJHV
FRXOG PDOIXQFWLRQ RU FDXVH D YHKLFOH ILUH
5
LQVLGH WKH YHKLFOH
,I VZLWFKHV ZLUHV RU
,I \RX DFFLGHQWDOO\ VSLOO D EHYHUDJH ZLSH
HOHFWULFDO FRPSRQHQWV EHFRPH ZHW WKH\
XS DV PXFK OLTXLG DV SRVVLEOH
FRXOG PDOIXQFWLRQ RU FDXVH D YHKLFOH ILUH
,I \RX DFFLGHQWDOO\ VSLOO D EHYHUDJH ZLSH
XS DV PXFK OLTXLG DV SRVVLEOH
CAUTION
z
Drink beverages while driving your vehicle
is distracting and can cause an accident.
)RU WKH IURQW VHDW
z
Vibration and shaking while driving may
cause beverages to spill. Be very careful, as
The cup holder is located in front of the floor
spilling hot beverages could cause burns.
console.
There are bottle holders located on both sides
To use the cup holder, push the lid.
of
front and rear doors.
5-226
Features and controls

Cargo area cover (if so equipped)
NOTE
&DUJR DUHD FRYHU LI VR
7R FKDQJH SRVLWLRQ
z Do not store cup or drink can in the bottle
HTXLSSHG
holder.
There are
2 installation holes
(B) for the
N00528301166
z Make sure all lids are tightly closed when
cargo area cover.
storing beverages that are in plastic bottles,
etc.
7R XVH
z Some beverages may not be stored, depend-
ing on the size and shape of the plastic bot-
1. Pull out the spring-loaded cover and insert
5
tles, etc.
it in the mounting grooves (A) on both
sides.
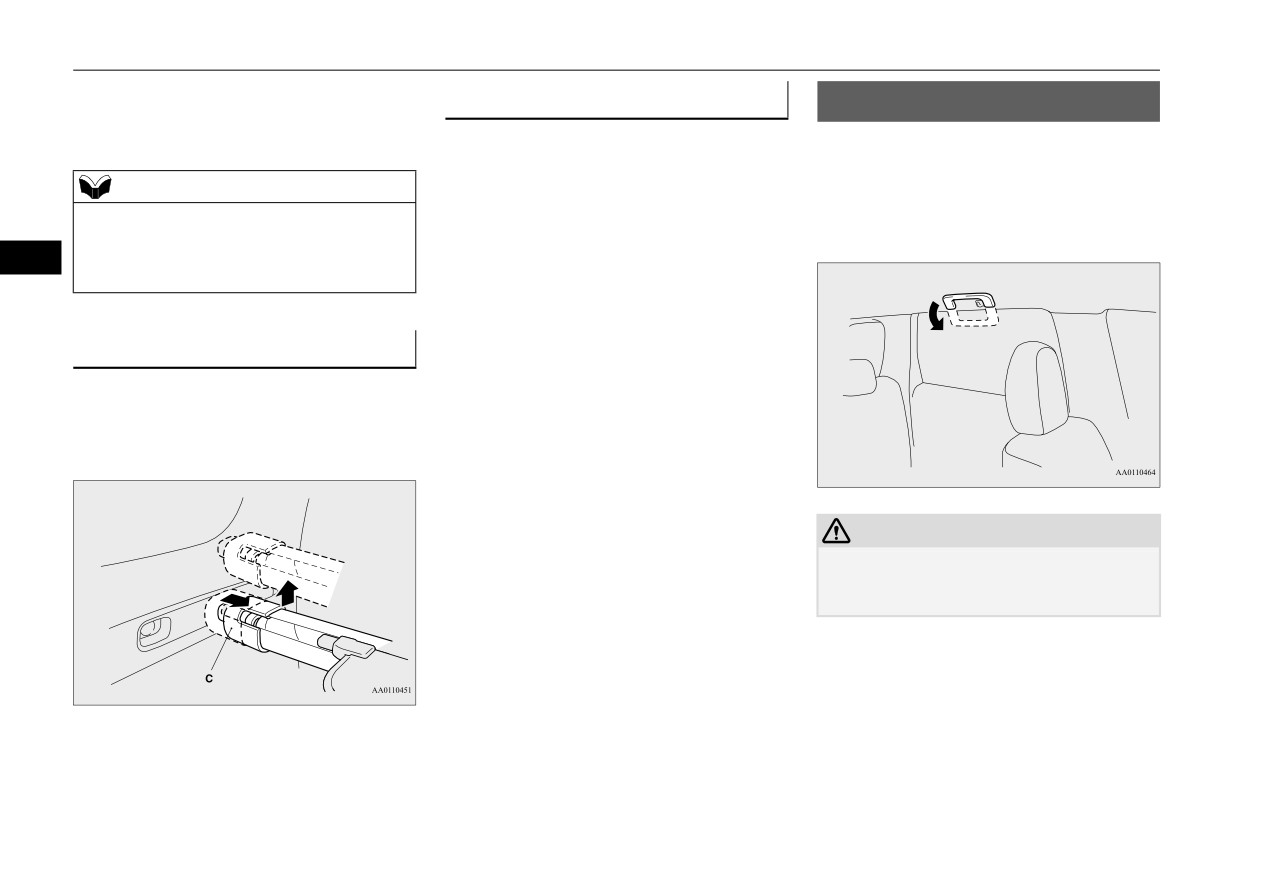
1. Move one of the sliders (C) toward the
inside of the vehicle, and fit the protrud-
ing portion (D) into the installation hole
that is to be used. Move the opposite
slider in the same fashion.
2. Remove the cover from the mounting
grooves, and the cover will be rolled back
into the retracted position.
NOTE
z Do not place anything on the cargo area
cover.
Features and controls
5-227
Assist grips
2. After changing the position, gently shake
7R UHILW
$VVLVW JULSV
the entire cargo area cover to make sure it
N00559001084
is securely retained.
To refit the cargo area cover, follow the
The assist grips (located above the doors on
removal steps in reverse. Gently shake the
the headliner) are not designed to support
NOTE
entire cargo area cover after fitting it to make
body weight. They are intended for use only
z If the rear seat touches the cargo area cover,
sure it is securely retained.
while seated in the vehicle.
move the cargo area cover rearward.
The cargo area cover could be damaged if it
5
supports the seatback of the rear seats.
7R UHPRYH
1. Roll back the cargo area cover.
2. Move one of the sliders (C) toward the
inside of the vehicle and lift it to remove
the cargo area cover.
CAUTION
z Do not use the assist grips when getting into
or out of the vehicle. The assist grips could
detach causing you to fall.
5-228
Features and controls

Coat hooks
&RDW KRRNV
/XJJDJH KRRNV
N00553601176
N00528501269
There is a coat hook on the rear seat assist
There are hooks on the sides of the luggage
grip.
area for use in securing luggage.
5
WARNING
CAUTION
z 'R QRW SXW D KDQJHU RU DQ\ KHDY\ RU
z Do not load the luggage higher than the top
SRLQWHG REMHFW RQ WKH FRDW KRRN ,I WKH FXU
of the seatback.
WDLQ DLUEDJ ZDV DFWLYDWHG DQ\ VXFK LWHP
Be sure that luggage is firmly secured.
FRXOG EH SURSHOOHG DZD\ ZLWK JUHDW IRUFH
Restricted rear vision or flying objects enter-
DQG FRXOG SUHYHQW WKH FXUWDLQ DLUEDJ IURP
ing the passenger compartment during sud-
LQIODWLQJ FRUUHFWO\
+DQJ FORWKHV GLUHFWO\
den braking could result in a serious
RQ WKH FRDW KRRN ZLWKRXW XVLQJ D KDQJHU
accident.
0DNH VXUH WKHUH DUH QR KHDY\ RU VKDUS
REMHFWV LQ WKH SRFNHWV RI FORWKHV WKDW \RX
KDQJ RQ WKH FRDW KRRN
Features and controls
5-229
Driving safety
Driving precaution
6-2
Fuel economy
6-2
Driving, alcohol and drugs
6-2
Floor mat
6-2
6
Vehicle preparation before driving
6-3
Safe driving techniques
6-4
Driving during cold weather
6-5
Braking
6-5
Parking
6-6
Loading information
6-6
Cargo loads
6-11
Trailer towing
6-13
Dinghy towing
6-17
Driving precaution
cle, always make certain that you and all your
'ULYLQJ SUHFDXWLRQ
'ULYLQJ DOFRKRO DQG GUXJV
passengers are properly wearing their seat
N00629300053
N00628900049
belts (with children in the rear seat, in appro-
priate restraints).
Drunk driving is one of the most frequent
WARNING
causes of accidents.
z 8WLOLW\ YHKLFOHV KDYH D VLJQLILFDQWO\ KLJKHU
Your driving ability can be seriously impaired
UROORYHU UDWH WKDQ RWKHU W\SHV RI YHKLFOHV
)XHO HFRQRP\
even with blood alcohol levels far below the
$YRLG DEUXSW PDQHXYHUV DQG H[FHVVLYH
N00628801205
legal minimum. If you have been drinking,
VSHHG $OZD\V EXFNOH XS
Fuel economy is dependent on many factors.
don’t drive. Ride with a designated non-
Your personal driving habits can have a sig-
drinking driver, call a cab or a friend, or use
6
Utility vehicles have higher ground clearance
nificant effect on your fuel consumption.
public transportation. Drinking coffee or tak-
and a narrower track, which enables them to
Several recommendations for achieving the
ing a cold shower will not make you sober.
perform in a wide variety of off-road situa-
greatest fuel economy are listed below.
Similarly, prescription and nonprescription
tions. Because of the higher ground clear-
drugs affect your alertness, perception and
ance, these vehicles have a higher center of
z
Whenever accelerating from a stop,
reaction time. Consult with your doctor or
gravity, which makes them handle differently
always accelerate slowly and smoothly.
pharmacist before driving while under the
than ordinary vehicles when driving on pave-
z
Plan your trips to avoid unnecessary
influence of any of these medications.
ment. They are not designed to maneuver or
stops.
corner at the same speed on pavement as con-
z
Keep your tires inflated to the recom-
ventional 2-wheel drive passenger cars any
mended pressures.
WARNING
more than low-slung sports cars are designed
z
For freeway driving, maintain a speed of
z 1(9(5 '5,1. $1' '5,9(
<RXU SHUFHSWLRQV DUH OHVV DFFXUDWH
\RXU
to perform satisfactorily in off-road condi-
approximately 50 mph (80 km/h) when
UHIOH[HV DUH VORZHU DQG \RXU MXGJPHQW LV
tions.
traffic, roadway and weather conditions
LPSDLUHG
Always drive safely and steer the vehicle
safely permit.
carefully. Avoid operating the vehicle in a
z
Keep your air filter clean and your vehicle
manner that might require sharp turns or
lubricated according to the recommenda-
abrupt maneuvers. As with other vehicles of
tions in this manual.
)ORRU PDW
this type, failure to operate this vehicle cor-
z
Always keep your vehicle well main-
N00628600033
rectly can result in loss of control or vehicle
tained. A poorly maintained engine
The original equipment floor mat provided
rollover.
wastes fuel and costs money.
with your vehicle was specifically designed
In a rollover crash, an unbelted person is sig-
z
Never overload your vehicle.
for your vehicle.
nificantly more likely to die than a person
Always properly position the floor mat and
wearing a seat belt. Before starting the vehi-
assure it does not interfere with operation of
6-2
Driving safety
Vehicle preparation before driving
the pedals. Always use the retaining clip on
NOTE
WARNING
the driver’s floorboard to secure the floor
z
The shape of the mat and the number of
:KLOH WKH YHKLFOH LV VWRSSHG ZLWK WKH
mat. When used, this clip will help prevent
retaining clips may vary depending on the
3OXJ LQ +\EULG (9 V\VWHP RII FKHFN WKDW
the floor mat from moving forward and possi-
vehicle model.
WKH IORRU PDW LV QRW LQWHUIHULQJ ZLWK WKH
bly interfering with the operation of the ped-
SHGDOV E\ GHSUHVVLQJ WKH SHGDOV IXOO\
als. To prevent the floor mat from moving
forward and possibly interfering with the
WARNING
operation of the pedals, Mitsubishi genuine
z
,I D IORRU PDW LV WKH ZURQJ VL]H RU LV QRW
floor mats are recommended.
SURSHUO\ LQVWDOOHG LW FDQ LQWHUIHUH ZLWK WKH
RSHUDWLRQ RI WKH SHGDOV
,QWHUIHUHQFH ZLWK
6
7R LQVWDOO WKH IORRU PDW
WKH SHGDOV FDQ FDXVH XQLQWHQGHG DFFHOHUD
WLRQ DQG RU LQFUHDVHG VWRSSLQJ GLVWDQFHV
N00628701086
UHVXOWLQJ LQ D FUDVK DQG LQMXU\
$OZD\V
1. Place the floor mat to fit the shape of the
PDNH VXUH WKH IORRU PDW GRHV QRW LQWHUIHUH
floorboard.
ZLWK WKH DFFHOHUDWRU RU EUDNH SHGDO
2. Align the floor mat with the installation
z
$OZD\V XVH WKH UHWDLQLQJ FOLS RQ WKH
holes over the retaining clips.
GULYHU¶V IORRUERDUG WR VHFXUH WKH IORRU
3. Secure the floor mat with retaining clips.
PDW
z
$OZD\V LQVWDOO WKH PDW ZLWK WKH FRUUHFW
VLGH IDFLQJ GRZQ
9HKLFOH SUHSDUDWLRQ EHIRUH
z
1HYHU LQVWDOO D VHFRQG PDW RYHU RU XQGHU
GULYLQJ
DQ H[LVWLQJ IORRU PDW
N00629001813
z
'R QRW XVH D IORRU PDW GHVLJQHG IRU
DQRWKHU PRGHO YHKLFOH HYHQ LI LW LV D 0LW
For a safer and more enjoyable trip, always
VXELVKL JHQXLQH IORRU PDW
check for the following:
z
%HIRUH GULYLQJ EH VXUH WR FKHFN WKH IRO
ORZLQJ
3HULRGLFDOO\ FKHFN WKDW WKH IORRU PDW LV
SURSHUO\ VHFXUHG ZLWK WKH UHWDLQLQJ FOLSV
,I \RX UHPRYH WKH IORRU PDW ZKLOH FOHDQ
LQJ WKH LQVLGH RI \RXU YHKLFOH RU IRU DQ\
RWKHU UHDVRQ DOZD\V FKHFN WKH FRQGLWLRQ
RI WKH IORRU PDW DIWHU LW KDV EHHQ UHLQ
VWDOOHG
Driving safety
6-3
Safe driving techniques
to find out why immediately and have it
6HDW EHOWV DQG VHDWV
7LUHV
fixed.
z
Before starting the vehicle, make certain
Check all the tires for heavy tread wear or
that you and all passengers are seated and
uneven wear patterns. Look for stones, nails,
6DIH GULYLQJ WHFKQLTXHV
wearing their seat belts properly
(with
glass, or other objects stuck in the tread. Look
N00629201134
children in the rear seat, in appropriate
for any tread cuts or sidewall cracks. Check
Even this vehicle’s safety equipment, and
restraints), and that all the doors and the
the wheel nuts for tightness, and the tires for
your safest driving, cannot guarantee that you
liftgate are locked.
proper pressure. Replace your tires before
can avoid an accident or injury. However, if
z
Move the driver’s seat as far backward as
they are heavily worn out.
you give extra attention to the following
6
possible, while keeping good visibility,
As your vehicle is equipped with a tire pres-
areas, you can better protect yourself and
and good control of the steering wheel,
sure monitoring system (TPMS), there is a
your passengers:
brakes, accelerator, and controls. Check
risk of damage to the tire inflation pressure
the instrument panel indicators and multi-
sensors when the tire is replaced on the rim.
z
Drive defensively. Be aware of traffic,
information display for any possible prob-
Tire replacement should, only, be performed
road and weather conditions. Leave plenty
lem.
by a certified Mitsubishi EV dealer.
of stopping distance between your vehicle
z
Similarly, the front passenger seat should
and the vehicle ahead.
also be moved as far back as possible.
z
Before changing lanes, check your mir-
z
Make sure that infants and small children
/LJKWV
rors, blind spots, and use your turn-signal
are properly restrained in accordance with
light.
all laws and regulations.
Have someone watch while you turn all the
z
While driving, watch the behavior of
exterior lights on and off. Also check the turn
other drivers, bicyclists, and pedestrians.
signal indicators and high-beam indicators on
z
Always obey applicable laws and regula-
'HIURVWHUV
the instrument panel.
tions. Be a polite and alert driver. Always
leave room for unexpected events, such as
Check these by selecting the defroster mode,
sudden braking.
and set the blower switch on high. You should
)OXLG OHDNV
z
If you plan to drive in another country,
be able to feel the air blowing against the
obey their vehicle registration laws and
windshield.
Check the ground under the vehicle after
make sure you will be able to get the right
Refer to “Defrosting or defogging (wind-
parking overnight, for fuel, water, oil, or
fuel.
shield, door windows)” on page 7-13
other leaks. Make sure all the fluid levels are
correct. Also, if you can smell fuel, you need
6-4
Driving safety
Driving during cold weather
If there is not enough coolant because of a
after the vehicle is washed. If this occurs, dry
'ULYLQJ GXULQJ FROG ZHDWKHU
leak or from engine overheating, add Mit-
the brakes out by driving slowly while lightly
N00629401501
subishi Motors Genuine Super Long Life
depressing the brake pedal.
z Check the 12 V starter battery, including
Coolant Premium or equivalent.
terminals and cables. During extremely
Please read this section in conjunction
:KHQ GULYLQJ LQ FROG ZHDWKHU
cold weather, the 12 V starter battery will
with the “Engine coolant/Plug-in Hybrid
not be as strong and its power level may
EV system coolant” on page 9-8.
drop.
On snowy roads, ice can form on the braking
Before driving the vehicle, check to see if
system, making the brakes less effective.
WARNING
the headlights are as bright as normally.
While driving in such conditions, pay close
z 1HYHU RSHQ WKH UDGLDWRU FDS ZKHQ WKH
6
Charge or replace the 12 V starter battery
attention to surrounding vehicles and to the
UDGLDWRU LV KRW
<RX FRXOG EH VHULRXVO\
if
necessary. During extreme cold
EXUQHG
condition of the road surface. From time to
weather, it is possible that a very low 12 V
time, lightly depress the brake pedal and
starter battery could freeze.
check how effective the brakes are.
%UDNLQJ
WARNING
N00629501560
:KHQ GULYLQJ GRZQ D ORQJ KLOO
z 7KH
9 VWDUWHU EDWWHU\ JLYHV RII H[SOR
All the parts of the brake system are critical
VLYH K\GURJHQ JDV $Q\ VSDUN RU IODPH FDQ
FDXVH WKH EDWWHU\ WR H[SORGH ZKLFK FRXOG
to safety. Have the vehicle serviced by a certi-
Put the select position to “B” (REGENERA-
FDXVH VHULRXV LQMXU\ RU GHDWK
fied Mitsubishi EV dealer at regular intervals
TIVE BRAKE) according to the grade of the
$OZD\V ZHDU SURWHFWLYH FORWKHV DQG D IDFH
according to the
“WARRANTY AND
slope and vehicle speed, and use the service
PDVN ZKHQ ZRUNLQJ ZLWK
\RXU
9
MAINTENANCE MANUAL”.
brake in combination with the regenerative
VWDUWHU EDWWHU\ RU OHW D VNLOOHG PHFKDQLF
brake as required.
GR LW
:KHQ EUDNHV DUH ZHW
NOTE
z
Stay at low speeds at first so that the
z If the brake pedal is continuously or fre-
transaxle, transfer case and rear axle oil
Check the brake system while driving at a
quently depressed on downhill roads, the ser-
have time to spread to all lubrication
low speed immediately after starting, espe-
vice brake could overheat and the brake
points.
cially when the brakes are wet, to confirm
performance will be reduced.
z
Check the engine antifreeze.
they work normally.
z If regenerative braking is applied continu-
A film of water can be formed on the brake
ously on downhill roads, the regenerative
discs and prevent normal braking after driv-
brake may temporarily turn off.
ing in heavy rain or through large puddles, or
Driving safety
6-5
Parking
If necessary, apply chocks to the wheels.
NOTE
WARNING
Be sure that the parking brake is firmly set
z
When the main drive lithium-ion battery
z 'R QRW SDUN \RXU YHKLFOH LQ DUHDV ZKHUH
when parked and that the electrical parking
level is full or nearly full, or the main drive
FRPEXVWLEOH PDWHULDOV VXFK DV GU\ JUDVV RU
switch is pressed.
lithium-ion battery temperature is too high or
OHDYHV FDQ FRPH LQ FRQWDFW ZLWK D KRW
too low, the regenerative braking force may
H[KDXVW VLQFH D ILUH FRXOG RFFXU
temporarily be reduced or eliminated. Refer
3DUNLQJ ZLWK WKH 3OXJ LQ
to “Regenerative braking” on page 3-4.
+\EULG (9 V\VWHP UXQQLQJ
z
If the needle in the energy usage indicator
:KHQ OHDYLQJ WKH YHKLFOH
does not move to the left of the neutral point
(A) while the accelerator pedal is released,
Never leave the Plug-in Hybrid EV system
6
the regenerative brake will not work. Refer
running while you take a short nap or rest.
Always carry the key and lock all doors and
to “Energy usage indicator” on page 5-138.
Also, never leave the Plug-in Hybrid EV sys-
the liftgate when leaving the vehicle unat-
In the such case, before approaching a long
tended.
tem running in a closed or poorly ventilated
downhill road, reduce speed to prevent the
Always try to park your vehicle in a well lit
place.
service brake from overheating.
area.
WARNING
z /HDYLQJ WKH 3OXJ LQ +\EULG (9 V\VWHP
'R QRW NHHS WKH VWHHULQJ ZKHHO
UXQQLQJ ULVNV LQMXU\ RU GHDWK IURP DFFL
IXOO\ WXUQHG IRU D ORQJ WLPH
GHQWDOO\ PRYLQJ WKH VHOHFWRU OHYHU RU WKH
DFFXPXODWLRQ RI WR[LF H[KDXVW IXPHV LQ WKH
Move effort could be required to turn the
SDVVHQJHU FRPSDUWPHQW
steering wheel.
Refer to
“Electric power steering system
(EPS)” on page 5-80.
:KHUH \RX SDUN
3DUNLQJ
N00629601369
Your front bumper can be damaged if you
/RDGLQJ LQIRUPDWLRQ
scrape it over curbs or parking stop blocks.
N00629901489
3DUNLQJ RQ D KLOO
Be careful when traveling up or down steep
It is very important to know how
slopes where your bumper can scrape the
much weight your vehicle can carry.
road.
When parking on a hill, set the parking brake,
This weight is called the vehicle
and turn the front wheels toward the curb on a
capacity weight and includes the
downhill, or away from the curb on an uphill.
6-6
Driving safety
Loading information
weight of all occupants, cargo
z
Vehicle maximum load on the tire:
z
Accessory weight: the combined
(including the roof load), non-fac-
load on an individual tire that is
weight (in excess of those stan-
tory-installed options, and the tongue
determined by distributing to each
dard items which may be
weight of the trailer, if any, being
axle its share of the maximum
replaced) of transaxle, power
towed. The tire and loading informa-
loaded vehicle weight and divid-
steering, power brakes, power
tion placard located on the driver’s
ing by two.
windows, power seats, radio, and
door sill of your vehicle will show
z
Vehicle normal load on the tire:
heater, to the extent that these
how much weight it may properly
load on an individual tire that is
items are available as factory-
6
carry.
determined by distributing to each
installed equipment
(whether
axle its share of the curb weight,
installed or not).
WARNING
accessory weight, and normal
z
Vehicle capacity weight: the rated
z 1HYHU RYHUORDG
\RXU YHKLFOH
occupant weight and dividing by
cargo and luggage load plus
2YHUORDGLQJ FDQ GDPDJH \RXU
two.
150 lbs (68 kg) times the vehi-
YHKLFOH DGYHUVHO\ DIIHFW YHKL
z
Maximum loaded vehicle weight:
cle’s designated seating capacity.
FOH SHUIRUPDQFH LQFOXGLQJ
the sum of -
z
Production options weight: the
KDQGOLQJ DQG EUDNLQJ FDXVH
(a) Curb weight;
combined weight of those
WLUH IDLOXUH DQG UHVXOW LQ DQ
(b) Accessory weight;
installed
regular
production
DFFLGHQW
(c) Vehicle capacity weight; and
options weighing over
5 lbs
(d) Production options weight.
(2.3 kg) in excess of those stan-
It is important to familiarize yourself
z
Curb weight: the weight of a
dard items which they replace, not
with the following terms before load-
motor vehicle with standard
previously considered in curb
ing your vehicle:
equipment including the maxi-
weight or accessory weight,
mum capacity of fuel, oil, and
including heavy duty brakes, ride
coolant.
levelers, roof rack, heavy duty
battery, and special trim.
Driving safety
6-7
Loading information
z Normal occupant weight: 150 lbs
7\SH
(68 kg) times the number of
specified occupants (3 in the case
of your vehicle)
z Occupant distribution: Occupant
distribution within the passenger
compartment (In your vehicle the
distribution is 2 in front, 1 in rear
6
seat)
:150 lbs (68 kg) is the weight of
This placard shows the maximum
one person as defined by U.S.A.
number of occupants permitted to
7\SH
and Canadian regulations.
ride in your vehicle as well as “the
combined weight of occupants and
cargo” (A), which is called the vehi-
7LUH DQG ORDGLQJ LQIRUPDWLRQ
cle capacity weight. The weight of
SODFDUG
any non-factory installed options, as
N00630101449
well as the tongue weight of a trailer
The tire and loading information
being towed and roof load is included
placard is located on the inside sill of
in the definition of
“cargo” when
the driver’s door.
determining the vehicle capacity
weight. This placard also tells you
the size and recommended inflation
pressure for the original equipment
tires on your vehicle. For more infor-
mation, refer to “Tires” on page 9-12.
6-8
Driving safety
Loading information
5. Determine the combined weight
6WHSV IRU 'HWHUPLQLQJ &RUUHFW
of luggage and cargo being loaded
/RDG /LPLW
on the vehicle. That weight may
N00630201293
not safely exceed the available
1. Locate the statement “The com-
cargo and luggage load capacity
bined weight of occupants and
calculated in Step 4.
cargo should never exceed XXX
6. If your vehicle will be towing a
kg or XXX lbs.” on your vehicle’s
trailer, load from your trailer will
placard.
6
be transferred to your vehicle.
2. Determine the combined weight
Consult this manual to determine
of the driver and passengers that
how this reduces the available
will be riding in your vehicle.
cargo and luggage load capacity
3. Subtract the combined weight of
of your vehicle.
the driver and passengers from
XXX kg or XXX lbs.
4. The resulting figure equals the
available amount of cargo and
luggage load capacity. For exam-
ple, if the “XXX” amount equals
1400 lbs. and there will be five
150 lbs. passengers in your vehi-
cle, the amount of available cargo
and luggage load capacity is
650 lbs. (1400 - 750 (5 x 150) =
650 lbs.)
Driving safety
6-9
Loading information
NOTE
z The following table shows examples on how to calculate total load, cargo/luggage and towing capacities of your
vehicle with varying seating configurations and number and size of occupants. This table is for illustration pur-
poses only and may not be accurate for the seating and load carry capacity of your vehicle.
z For the following example the combined weight of occupants and cargo should never exceed 865 lbs (392 kg).
6
6-10
Driving safety
Cargo loads
NOTE
z Under a maximum loaded vehicle condition, gross axle weight ratings (GAWR’s) for the front and rear axles
must not be exceeded. For further information on GAWR’s, vehicle loading and trailer towing, see the “Specifi-
cations” section of this manual.
&DUJR ORDGV
WARNING
N00629700435
z 'R QRW ORDG FDUJR RU OXJJDJH KLJKHU WKDQ
WKH WRS RI WKH VHDWEDFN
%H VXUH WKDW \RXU
FDUJR RU OXJJDJH FDQQRW PRYH ZKHQ \RXU
6
&DUJR ORDG SUHFDXWLRQV
YHKLFOH LV LQ PRWLRQ
N00630301151
+DYLQJ HLWKHU WKH UHDU YLHZ EORFNHG RU
To determine the cargo load capacity for your
\RXU FDUJR EHLQJ WKURZQ LQVLGH WKH FDELQ
vehicle, subtract the weight of all vehicle
LI \RX VXGGHQO\ KDYH WR EUDNH FDQ FDXVH D
occupants from the vehicle capacity weight.
VHULRXV DFFLGHQW RU LQMXU\ RU GHDWK
For additional information, if needed, refer to
z 3XW FDUJR RU OXJJDJH LQ WKH FDUJR DUHD RI
\RXU YHKLFOH
7U\ WR VSUHDG WKH ZHLJKW
“Steps for Determining Correct Load Limit”
HYHQO\
on page 6-9.
WARNING
DO NOT USE the Gross Vehicle Weight Rat-
z
7R UHGXFH WKH ULVN RI VHULRXV LQMXU\ RU
ing and Gross Axle Weight Rating numbers
/RDGLQJ FDUJR RQ WKH URRI
GHDWK WKH FRPELQHG ZHLJKWV RI WKH GULYHU
listed on the safety certification label located
N00630401152
SDVVHQJHUV DQG FDUJR PXVW QHYHU H[FHHG
on the inside sill of the driver’s door as the
WKH YHKLFOH FDSDFLW\ ZHLJKW
guide for passengers and/or cargo weight.
WARNING
z
([FHHGLQJ WKH YHKLFOH FDSDFLW\ ZHLJKW ZLOO
z :HLJKW SODFHG RQ WKH URRI RI WKH YHKLFOH
DGYHUVHO\ DIIHFW YHKLFOH SHUIRUPDQFH
ZLOO UDLVH WKH YHKLFOH¶V FHQWHU RI JUDYLW\
LQFOXGLQJ KDQGOLQJ DQG EUDNLQJ DQG PD\
DQG DGYHUVHO\ DIIHFW LWV KDQGOLQJ FKDUDF
FDXVH DQ DFFLGHQW
WHULVWLFV
$V D UHVXOW GULYLQJ HUURUV RU
HPHUJHQF\ PDQHXYHUV FRXOG OHDG WR D ORVV
RI FRQWURO DQG UHVXOW LQ DQ DFFLGHQW 'ULYH
VORZO\ DQG DYRLG H[FHVVLYH PDQHXYHUV
VXFK DV VXGGHQ EUDNLQJ RU TXLFN WXUQLQJ
Driving safety
6-11