Mitsubishi Outlander XL. Manual - part 165
ZC600312AA00
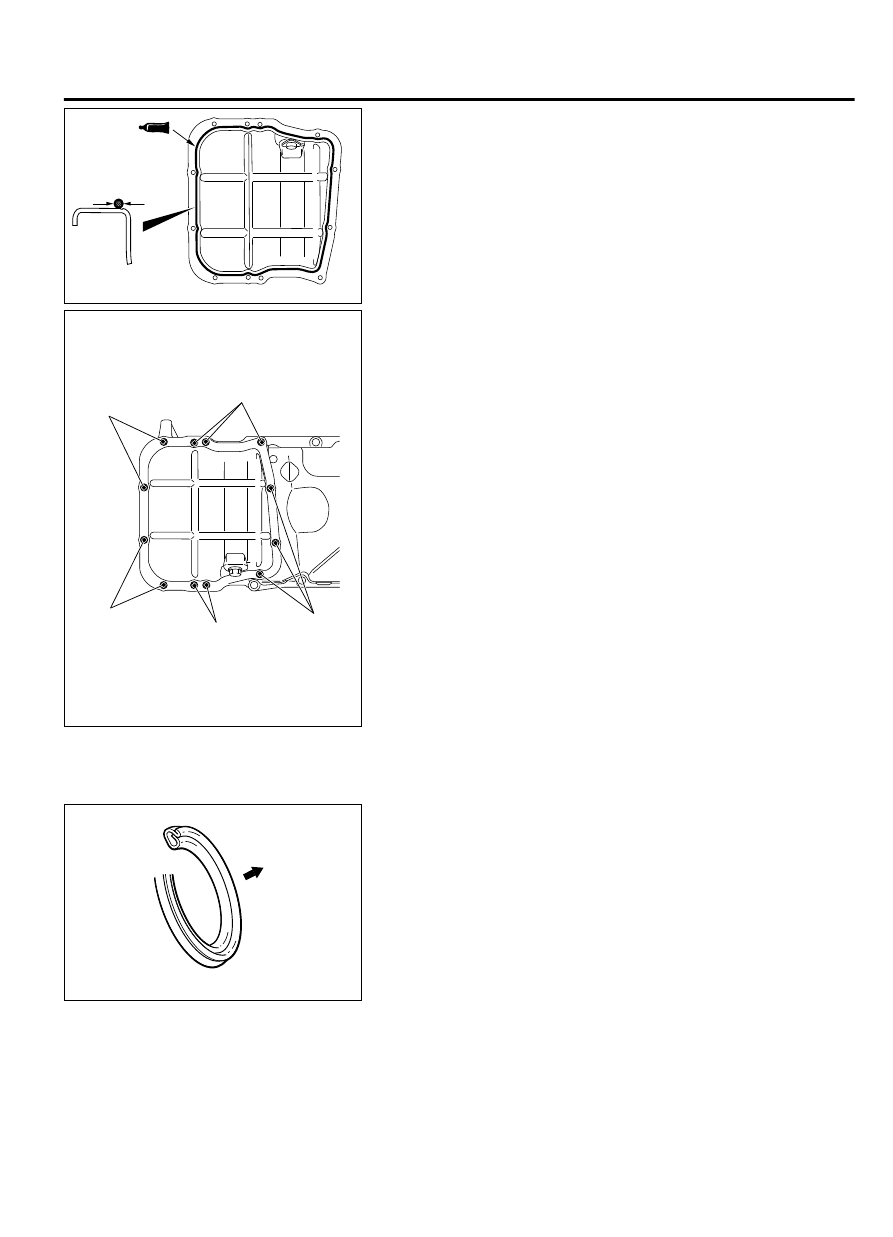
Ø2 mm or Ø3 mm
(Ø0.08 in or
Ø0.12 in)
2.
Apply a bead of the sealant to the mating surface of the engine
lower oil pan as shown.
Specified sealant: 3M™ AAD Part No.8672, 8704,
3M™ AAD Part No.8679/8678 or equivalent
NOTE:
Install the engine lower oil pan within 15 minutes
after applying sealant.
3.
Assemble the engine lower oil pan to the engine upper oil pan.
ZC600313
Bolt specifications
Thread diameter × Length mm
M6 × 10
M6 × 10
M6 × 91
M6 × 91
M6 × 10
AA00
4.
Install the bolts to the lower oil pan as shown, and tighten them
to the specified torque.
Tightening torque: 9.5 ± 2.5 N·m (84 ± 22 in-lb)
>>C<< ENGINE OIL PAN DRAIN PLUG INSTALLATION
ZC6024380000
Engine lower
oil pan side
Replace the gasket with a new gasket. Install the new gasket in
the direction shown in the illustration.
INSPECTION
M11102000026USA0000010000
⦆
Check the oil pan for cracks.
ENGINE MECHANICAL
11A-41
OIL PAN AND OIL STRAINER