Mitsubishi Outlander GS45X. Manual - part 1741


  Index      Mitsubishi     Mitsubishi Outlander GS45X - service repair manual


Search            


Content   ..  1739  1740  1741  1742   ..


Mitsubishi Outlander GS45X. Manual - part 1741


ON-VEHICLE SERVICE

TSB Revision

AUTOMATIC TRANSAXLE

23C-269

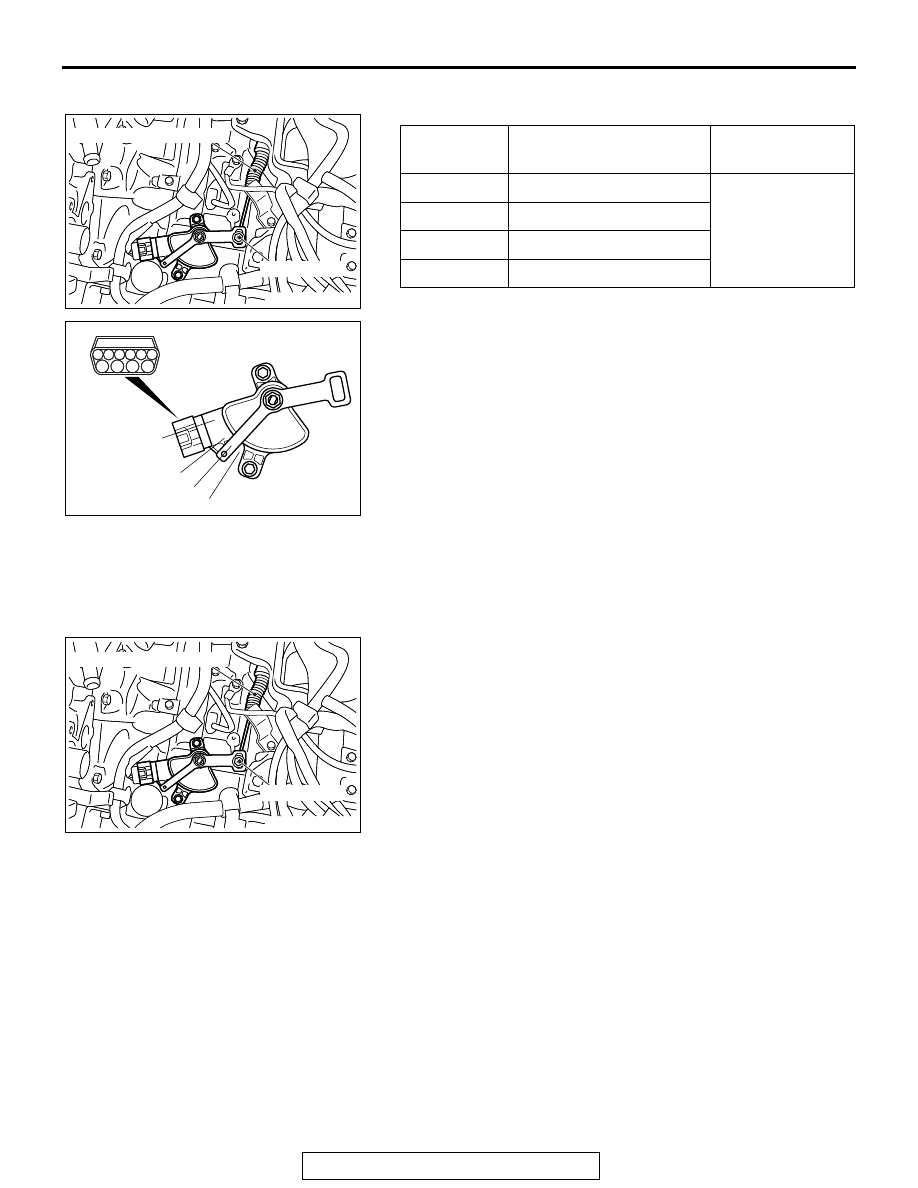
TRANSMISSION RANGE SWITCH CHECK

M1231021600269

TRANSMISSION RANGE SWITCH AND CONTROL 
CABLE ADJUSTMENT

M1231021700192

1. Set the selector lever to the "N" position.
2. Loosen the control cable to the manual control lever 

adjusting nut to free the cable and lever.

3. Set the manual control lever to the neutral position.

Transmissio
n range

Terminal connection of 
tester

Specified 
condition

P

− 2, 7 − 10

Less than 2 ohms.

R

− 9

N

− 8, 7 − 10

D

− 5

AC607760

AB

AC607760

Transaxle control cable

Adjusting nut

AC607761

2

2

1

1

7

7

3

3

8

8

5

5

4

4

9

9

6

6

10

10

R

P

D

N

AB

AC607760

AB

AC607760

Transaxle control cable

Adjusting nut

ON-VEHICLE SERVICE

TSB Revision

AUTOMATIC TRANSAXLE

23C-270

4. Align the hole at the end of the manual control lever and the 

hole in the Transmission range switch body flange (section 

− A).

NOTE: Insert a 

φ

5 bar into the aligned holes in the Transmis-

sion range switch body flange and on the tip of the manual 
control lever to position the Transmission range switch body. 

5. Tighten the transaxle control cable using the adjusting nut 

with the specified torque. 

Tightening torque: 9.5 

± 3.5 Nm (84 ± 30 in-lb)

6. Check that the selector lever is in the N position.
7. Check that each position of the manual control lever 

matches each position of the selector lever using M.U.T.-III 
MB991958 (M.U.T.-III sub assembly).

AC607762AC

Manual
control lever

Inhibitor switch
body

Manual
control lever

Flange hole

End hole

Section A - A

A

A

AC607760

AB

AC607760

Transaxle control cable

Adjusting nut

ON-VEHICLE SERVICE

TSB Revision

AUTOMATIC TRANSAXLE

23C-271

TRANSFER OIL LEVEL CHECK

M1231001100552

1. Remove the filler plug and gasket.

2. Check that the oil level is in between the upper limit (bottom 

of the filler plug hole) and the lower limit as shown.

3. Check that the oil is not excessively foul and has moderate 

viscosity.

4. If the oil level is not in between the upper limit and the lower 

limit, refill the specified gear oil to the bottom of the oil filler 
plug hole.

Brand name: Hypoid gear oil API classification GL-5 
SAE80

5. Install the filler plug and new gasket, then tighten them to 

the specified torque.

Tightening torque : 32 

± 2 Nm (24 ± 1 ft-lb)

AC607764AC

Filler plug

<ELECTRONIC CONTROL 4WD>

Drain plug

Front exhaust pipe

AC900388AB

Filler plug

<S-AWC>

Drain plug

Front exhaust pipe

AC700330 AW

Gasket

Transfer oil

14 mm

Filler plug hole

Oil filler plug

Lower
limit

Upper
limit

<ELECTRONIC CONTROL 4WD>

AC902991 AB

Gasket

Transfer oil

7 mm

Filler plug hole

Oil filler plug

Lower
limit

Upper
limit

<S-AWC>

ON-VEHICLE SERVICE

TSB Revision

AUTOMATIC TRANSAXLE

23C-272

TRANSFER OIL REPLACEMENT

M1231001200504

1. Remove the drain plug and gasket, to drain the transfer oil.
2. Install the drain plug and new gasket, and tighten to the 

specified torque.

Tightening torque: 32 

± 2 Nm (24 ± 1 ft-lb)

3.  Remove the filler plug and gasket, and fill the transfer oil up 

to the lower edge of the filler plug hole.

Brand name: Hypoid gear oil API classification GL-5 

SAE80

Filling amount: 0.49 dm

3

 (0.52 quarts) 

4. Install the filler plug and a new gasket, and tighten them to 

the specified torque.

Tightening torque: 32 

± 2 Nm (24 ± 1 ft-lb)

ELECTRONIC CONTROL COUPLING (FRONT) 
OPERATION CHECK <VEHICLES WITH S-AWC>

M1235004900010

1. Raise the vehicle.
2. For easy identification of tire rotation, mark the front and rear 

tires as shown in the figure.

3. Set the shift position to the P-position, and turn ON the 

ignition switch.

4. Set the wheel to the neutral position, and carry out the 

special function test No. 4 "Control OFF".

5. Rotate the left-front tire counterclockwise by your hand, and 

check that the right-front tire makes reverse rotation against 
the left-front tire.

6. Set the shift position to the N-position, and turn ON the 

ignition switch.

7. Set the wheel to the neutral position, and carry out the 

special function test No. 5 "Front coupling operation check".

AC607764AC

Filler plug

<ELECTRONIC CONTROL 4WD>

Drain plug

Front exhaust pipe

AC900388AB

Filler plug

<S-AWC>

Drain plug

Front exhaust pipe

AC700330AM

Gasket

Transfer oil

Filler plug hole

Filler plug

AC809406 AB

Marking


Content   ..  1739  1740  1741  1742   ..