Content .. 1555 1556 1557 1558 ..
Mitsubishi Outlander GS45X. Manual - part 1557
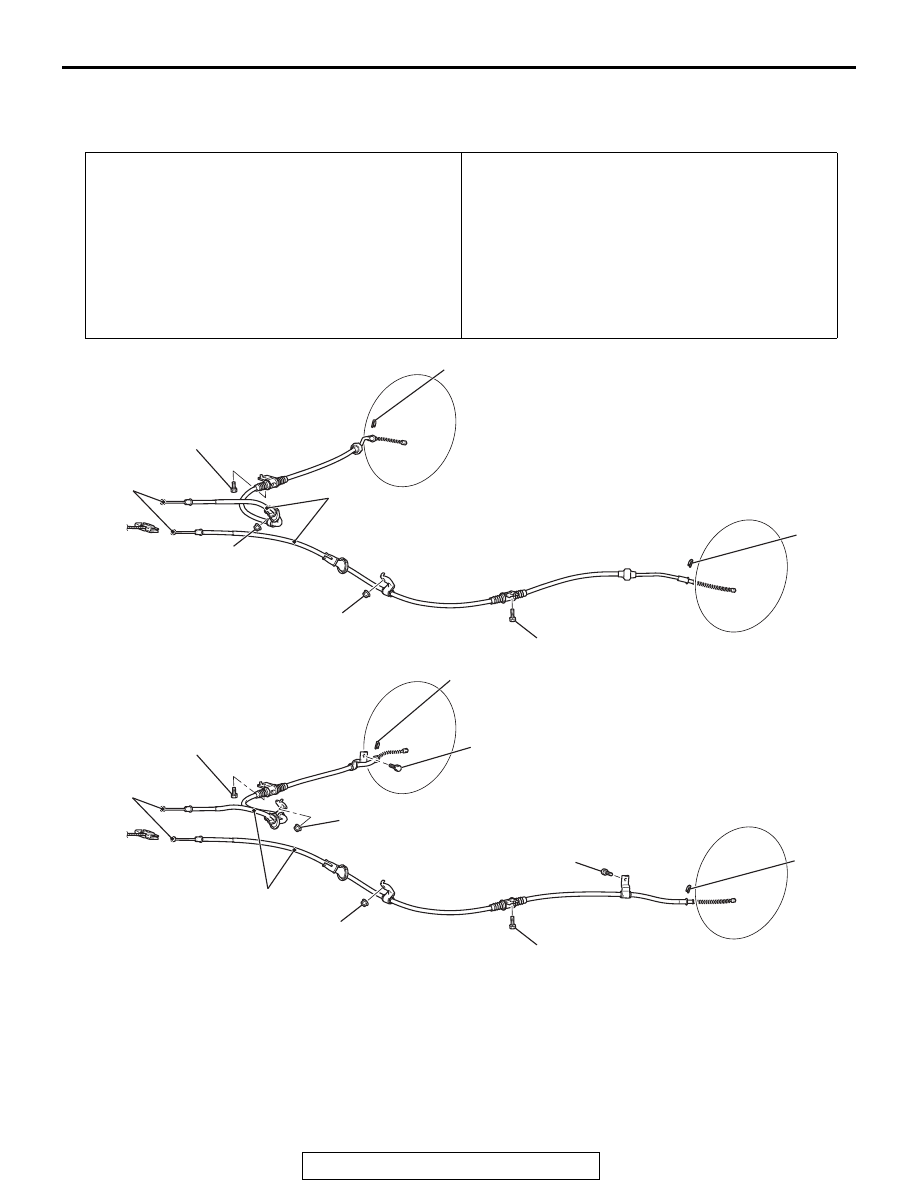
PARKING BRAKE CABLE
TSB Revision
PARKING BRAKES
36-13
PARKING BRAKE CABLE
REMOVAL AND INSTALLATION
M1361001901562
Pre-removal operation
• Rear Floor Console Assembly Removal (Refer to GROUP
52A
• Second Seat Assembly Removal (Refer to GROUP 52A −
Second Seat Assembly
• Shoe and Lining Assembly Removal (Refer to
<2.4L Engine: 5 persons seat> or
<2.4L Engine:
7 persons seat, 3.0L Engine>).
Post-installation operation
• Shoe and Lining Assembly Installation (Refer to
<2.4L Engine: 5 persons seat> or
<2.4L Engine:
7 persons seat, 3.0L Engine>).
• Second Seat Assembly Installation (Refer to GROUP 52A
− Second Seat Assembly
• Parking Brake Lever Stroke Check and Adjustment (Refer
).
• Rear Floor Console Assembly Installation (Refer to
GROUP 52A
− Rear Floor Console Assembly
).
• Parking brake lining seating procedure (Refer to
).
AC709969
2
AE
2
3
2
2
3
1
1
13 ± 2 N·m
111 ± 22 in-lb
13 ± 2 N·m
111 ± 22 in-lb
13 ± 2 N·m
111 ± 22 in-lb
13 ± 2 N·m
111 ± 22 in-lb
11 ± 2 N·m
98 ± 17 in-lb
11 ± 2 N·m
98 ± 17 in-lb
11 ± 2 N·m
98 ± 17 in-lb
11 ± 2 N·m
98 ± 17 in-lb
11 ± 2 N·m
98 ± 17 in-lb
11 ± 2 N·m
98 ± 17 in-lb
<2.4L Engine: 5 persons seat>
<2.4L Engine: 7 persons seat, 3.0L Engine>
Removal steps
•
Release the parking brake lever.
•
Loosen the adjusting nut.
>>
A
<< 1.
Parking brake rear cable assembly
connection
2.
Clip
3.
Parking brake rear cable assembly
Removal steps (Continued)