Mitsubishi Outlander GS45X. Manual - part 1349


  Index      Mitsubishi     Mitsubishi Outlander GS45X - service repair manual


Search            


Content   ..  1347  1348  1349  1350   ..


Mitsubishi Outlander GS45X. Manual - part 1349


DOOR SASH TAPE

TSB Revision

EXTERIOR

51-19

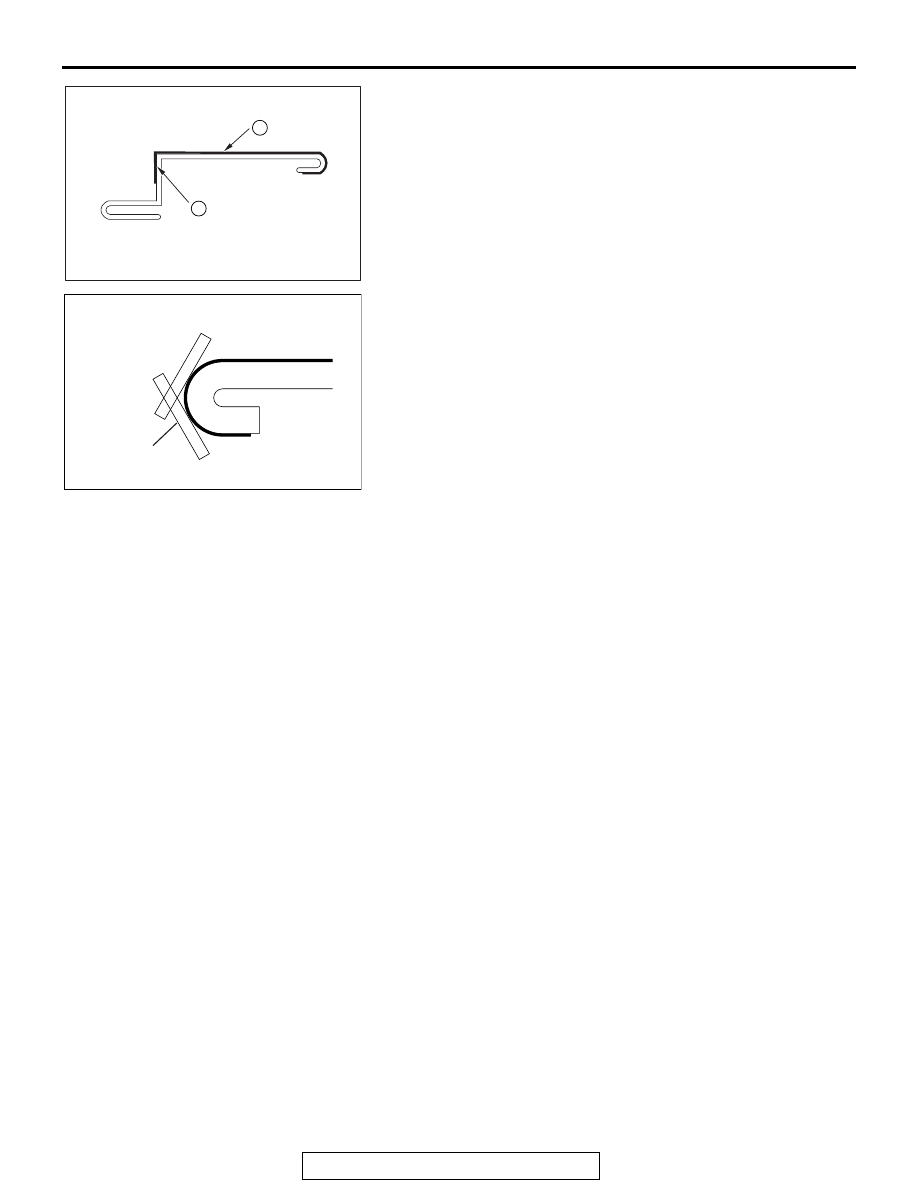
(5) For the front rear door sash tape, apply it to plain surface 

(A). Then apply it to stepped surface (B).

(6) Press the folded area of the tape by three stages (60

°, 

120

° and holding), rolling in toward the vehicle inside 

direction.

AC506860

AB

A

B

Rear door sash tape front

Stepped part

Plain part

AC303415

AG

MB990528

120˚

60˚

Hemming part

SIDE AIR DAM

TSB Revision

EXTERIOR

51-20

SIDE AIR DAM

REMOVAL AND INSTALLATION

M1511005500993

REMOVAL SERVICE POINT

.

<<A>> SIDE AIR DAM REMOVAL

Gently lift and remove the side air dam. If there is any dou-
ble-sided tape remaining on the side air dam, remove accord-
ing to the following instructions.
Remove double-sided tape remaining on the body surface 
(when replacing side air dam). 

AC901159

1

1

1

1

AB

B

A

A

B

Double-sided tape affixed locations

Double-sided tape: Generic products  
4.0 (0.16 in) mm width and 1.2 mm (0.05 in) thickness

Clip

Clip

Grommet

Screw

Section A – A

Section B – B

Front 
fender

Splash 
shield

Side outer 
panel

Removal 

<<A>>

>>A<<

1.

Side air dam

SIDE AIR DAM

TSB Revision

EXTERIOR

51-21

1. Attach protection tape all the way along the edges of the 

double-sided tape which is still adhering to the body. 

2. Scrape off the double-sided tape with a resin spatula as 

much as possible.

3. Peel off the protection tape.
4. Wipe the body surface and clean it with a rag moistened 

with 3M

™ AAD Part number 8906 or equivalent.

.

Remove double-sided tape remaining on side air dam and 
adhere double-sided tape (when re-using side air dam).
1. Scrape off the double-sided tape on the side air dam with a 

resin spatula as much as possible.

2. Wipe the side air dam surface and clean it with a rag 

moistened with 3M

™ AAD Part number 8906 or equivalent.

3. Remove only a small portion of the residual adhesive.
4. Adhere the double-sided tape as specified on the side air 

dam. 

INSTALLATION SERVICE POINT

.

>>A<< SIDE AIR DAM INSTALLATION

1. Tear off the double-sided tape backing paper.

NOTE: If attach the adhesive tape to the edge of the backing 
paper, it will be easy to tear off.

2. Install the side air dam.

NOTE: If the double-sided tape is difficult to affix in cold tem-
perature, etc., warm the bonding surfaces of the body and 
side air dam to about 40 

 60

°

C (104 

 140

°

F) before affix-

ing the tape.

3. Firmly press in the side air dam.

AC702437

Protection tape

Double-sided tape

AB

AC702438

AB

Double-sided tape

AC702439

AB

AC702440

Backing paper

Adhesive tape

AB

UNDER COVER

TSB Revision

EXTERIOR

51-22

UNDER COVER

REMOVAL AND INSTALLATION

M1511019600948

AC900755

1

7

1

2

6

5

6

4

3

AD

Splash shield

Splash shield

Front bumper assembly

3.5 ± 1.5 N·m
31 ± 13 in-lb

3.5 ± 1.5 N·m
31 ± 13 in-lb

3.5 ± 1.5 N·m
31 ± 13 in-lb

Removal steps 

1.

Front bumper mounting clips and 
bolts

2.

Engine room under cover front A 
<2400 4WD>

3.

Engine room under cover front B

4.

Engine room under cover front C 
<2400>

5.

Engine room side cover <2400>

6.

Engine room side cover <3000>

7.

Front floor under cover

Removal steps (Continued)


Content   ..  1347  1348  1349  1350   ..