Mitsubishi Outlander (2013+). Manual - part 396
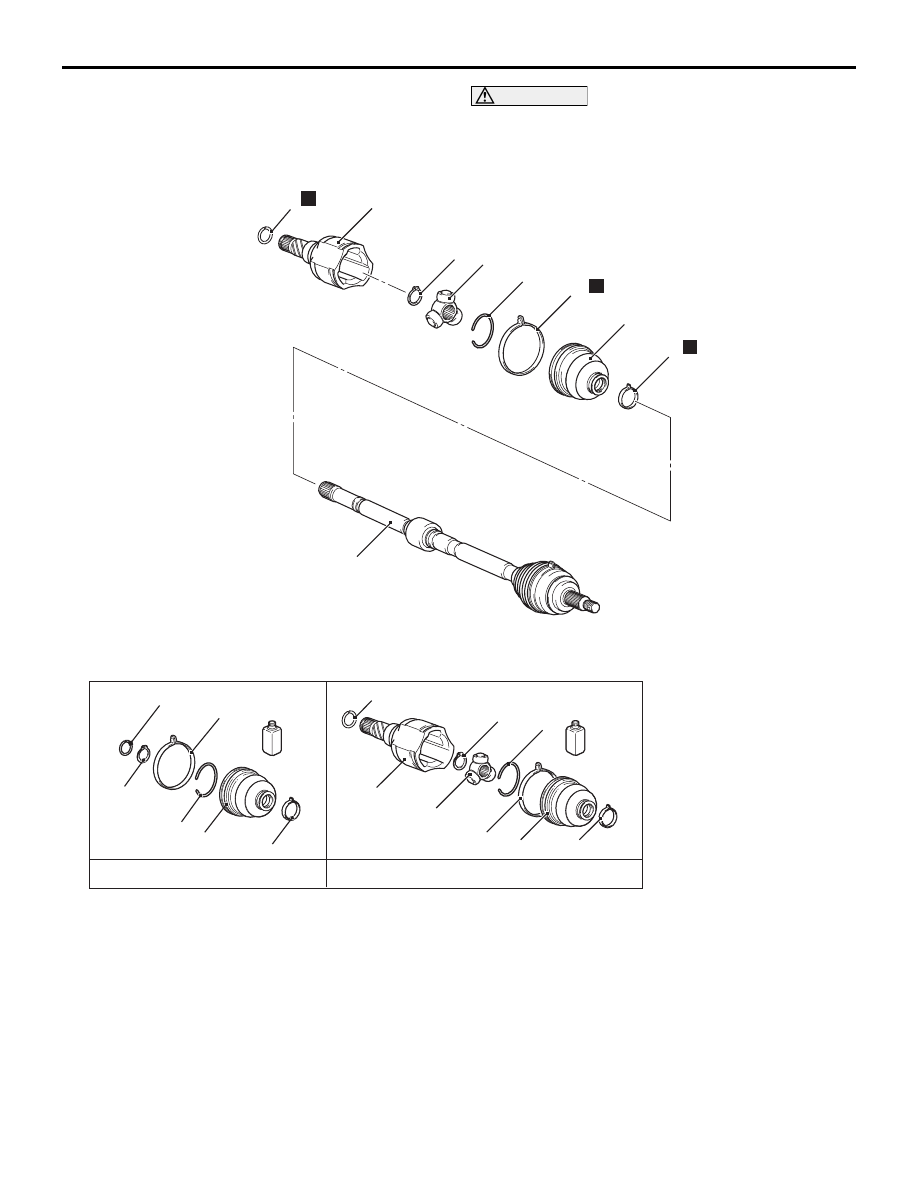
DRIVESHAFT ASSEMBLY
FRONT AXLE
26-22
CAUTION
For the EBJ assembly, parts cannot be disassem-
bled.
<RH>
AC700736
1
2
3
8
1
5
2
3
8
7
2
5
6
8
N
N
4
1
N
7
3
AB
9
4
6
4
6
PTJ boots repair kit
PTJ repair kit
Disassembly steps
1.
Circlip
>>
C
2.
PTJ boot band (large)
>>
C
3.
PTJ boot band (small)
4.
Circlip
<<
A
>>
>>
B
5.
PTJ case
6.
Snap ring
>>
B
7.
Spider assembly
<<
B
>>
>>
A
8.
PTJ boot
9.
EBJ assembly
NOTE:
.
•
PTJ: Pillow Tripod Joint
•
EBJ: High Efficiency Compact Birfield Joint
Disassembly steps (Continued)