Mitsubishi Outlander (2003+). Manual - part 316
DOOR
BODY
42-39
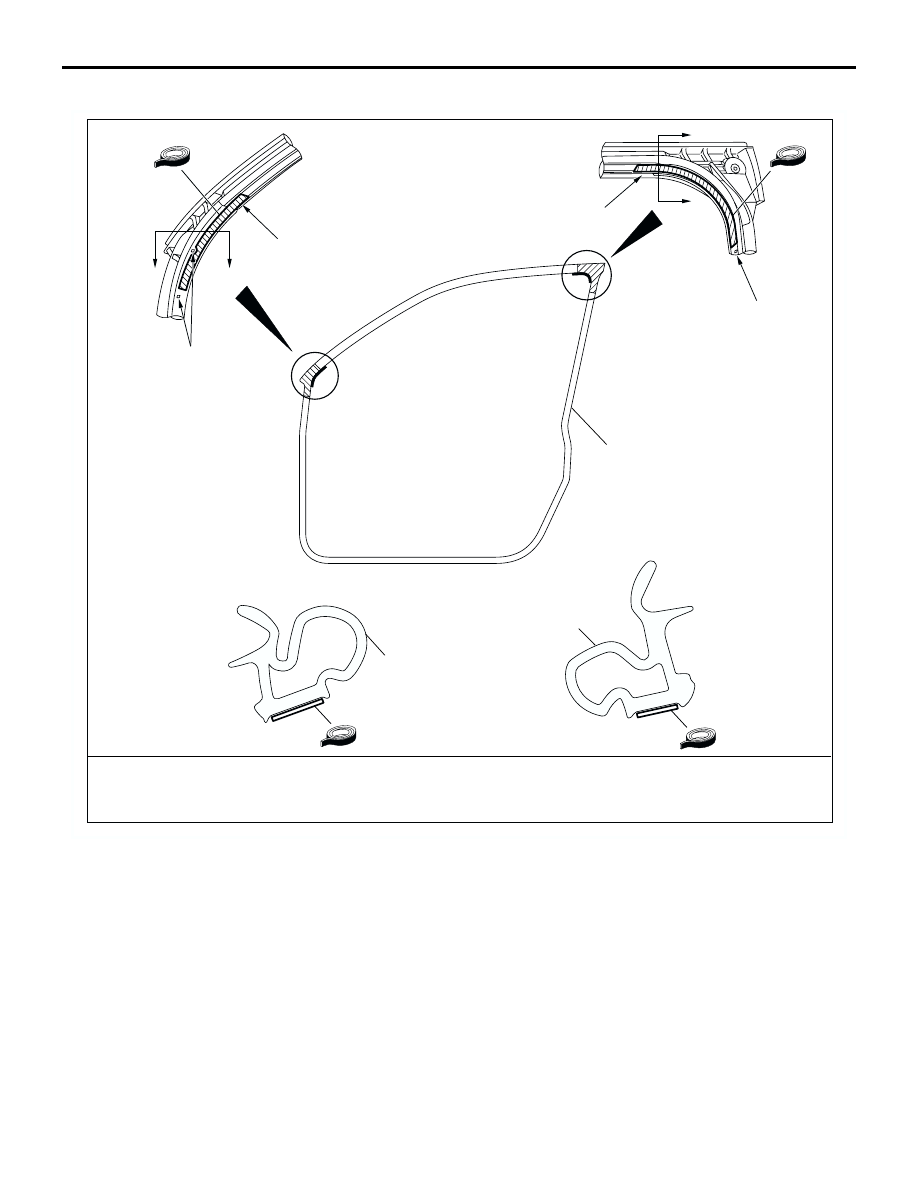
DOUBLE-SIDED TAPE POSITION
AC103492 AD
A
A
B
B
a
b
Section A – A
Section B – B
Adhesive tape: Double-sided tape
a: 7 mm width, 100 mm length and 0.8 mm thickness,
b: 7 mm width, 130 mm length and 0.8 mm thickness
Door outer opening
weatherstrip
Clip hole
Clip hole
Door outer opening
weatherstrip
Door outer opening
weatherstrip