Mitsubishi Outlander (2003+). Manual - part 154
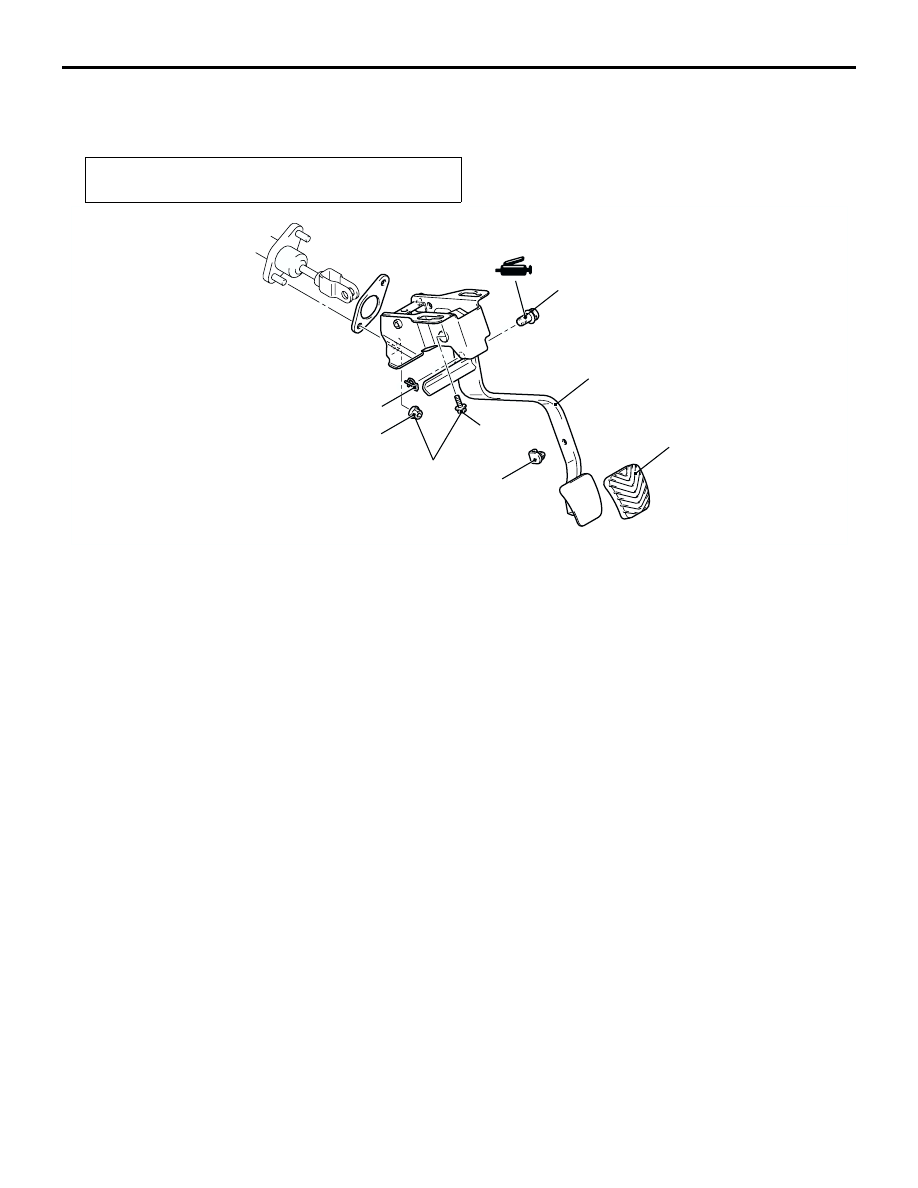
CLUTCH PEDAL
CLUTCH
21A-5
CLUTCH PEDAL
REMOVAL AND INSTALLATION
M1211001600179
Post-installation Operation
•
Clutch Pedal Adjustment (Refer to
AC301004
7
1
2
3
4
5
6
12 ± 2 N·m
AB
Removal steps
•
Instrument panel under cover
(Refer to GROUP 52A, Instrument
panel
1.
Snap pin
2.
Clevis pin
3.
Clutch master cylinder mounting
nut
4.
Clutch pedal assembly mounting
bolt
5.
Pedal pad
6.
Pedal stopper
7.
Clutch pedal assembly
Removal steps (Continued)