Mitsubishi Outlander (2003+). Manual - part 119
ON-VEHICLE SERVICE
FUEL SUPPLY
13C-3
CAUTION
For 4WD: Pay attention not to damage the float
when removing and installing fuel tank pump and
gauge assembly through the service hole.
4. Remove the mounting nuts and fuel pump bracket
plate, and remove the fuel pump assembly
<2WD>, fuel tank pump and gauge assembly
<4WD> from the service hole.
5. Install the fuel pump assembly <2WD>, fuel tank
pump and gauge assembly <4WD> to the fuel
tank through the service hole.
6. Install the fuel pump bracket plate to the fuel tank
and tighten the mounting nuts to the specified
torque.
Tightening torque: 2.5
±
0.4 N
⋅
m
CAUTION
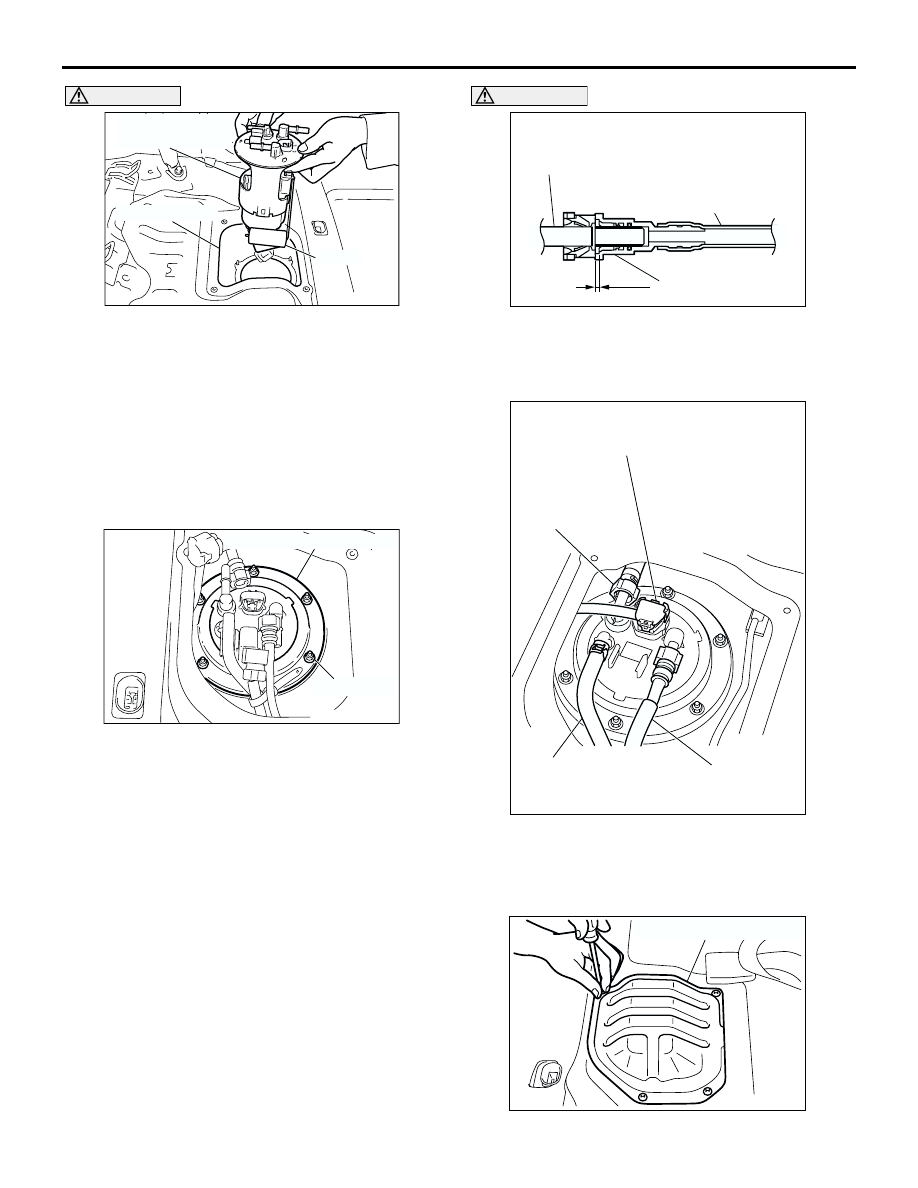
After connecting the fuel high-pressure hose or
fuel pump suction tube <4WD>, slightly pull it to
ensure that it is installed securely. Also confirm
that there is a play approximately 3 mm.
7. Connect the fuel pump assembly <2WD> or fuel
tank pump and gauge assembly <4WD>
connector, fuel return hose, fuel high-pressure
hose and fuel suction tube <4WD>.
AC107193
Fuel tank pump and
gauge assembly
Float
Service hole
AC
AC107194AC
2.5 ± 0.4 N·m
Fuel pump braket plate
AC300047
3 mm
AC
Fuel high-pressure hose or
fuel pump suction tube <4WD>
Corresponding side
Quick connector
AC309286AB
Fuel suction
tube <4WD>
Fuel high-pressure
hose
Fuel pump assembly <2WD>
or fuel tank pump and gauge assembly <4WD>
connector
Fuel return hose
<4G63>
AC102784
Service hole cover
AB