Mitsubishi Montero (2004+). Manual - part 848
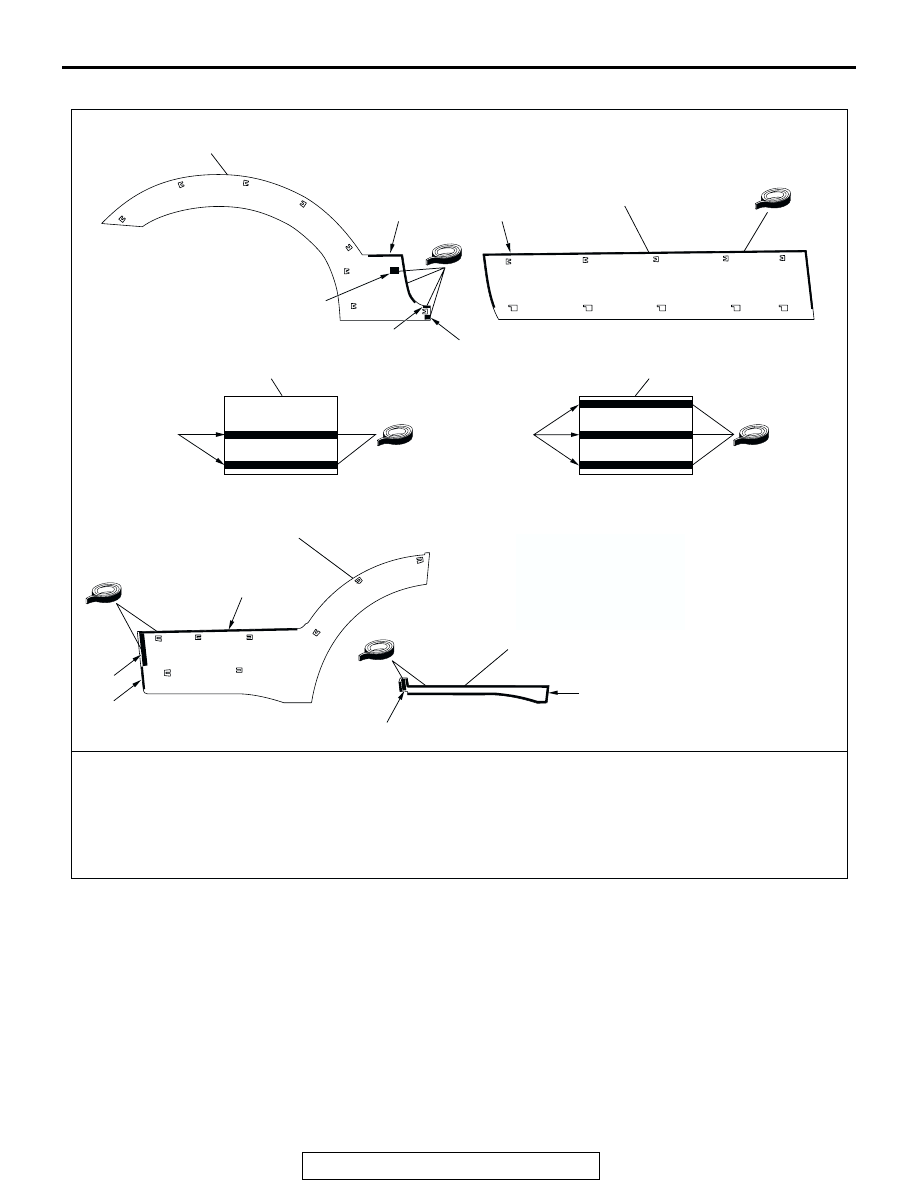
MOLDINGS
TSB Revision
EXTERIOR
51-13
ADHESIVE TAPE POSITION
AC309449
FRONT WHEEL CUT MOLDING
FRONT DOOR MOLDING
REAR DOOR MOLDING
REAR DOOR MOLDING ASSY
AB
D
A
A
D
C
A
A
ADHESIVE TAPE: DOUBLE-SIDED TAPE A : 4.0 mm ( 0.16 in ) WIDTH AND 1.2 mm ( 0.05 in ) THICKNESS
B : 5.0 mm ( 0.20 in ) WIDTH AND 2.0 mm ( 0.08 in ) THICKNESS
C : 10.0 mm ( 0.39 in ) WIDTH AND 1.2 mm ( 0.05 in ) THICKNESS
D : 24.0 mm ( 0.95 in ) WIDTH AND 1.2 mm ( 0.05 in ) THICKNESS
E : 30.0 mm ( 1.18 in ) WIDTH AND 0.8 mm ( 0.03 in ) THICKNESS
F : 35.0 mm ( 1.38 in ) WIDTH AND 1.2 mm ( 0.05 in ) THICKNESS
FRONT DOOR CORE
(FRONT DOOR MOLDING SIDE)
FRONT DOOR CORE
(FRONT DOOR SIDE)
B
B
F
E
A