Mitsubishi Montero (1998+). Manual - part 87
replace ECU.
4) Check harness connectors to junction block and ignition
switch. Repair as necessary. If connectors are okay, check circuit
between ignition switch and junction block, and between fusible link
No. 2 and junction block. See WIRING DIAGRAMS. Repair as necessary.
COMPONENT TESTS
DEFOGGER RELAY TEST
Diamante & Eclipse
1) Remove defogger relay. See COMPONENT LOCATIONS. Ground
relay terminal No. 1, and apply battery voltage to terminal No. 3. See
Fig. 2. Check relay continuity using ohmmeter.
2) Continuity should exist between terminals No. 2 and 5.
With voltage disconnected, continuity should not exist between
terminals No. 2 and 5. Ensure continuity exists between terminals No.
1 and 3. If continuity is not as specified, replace relay.
Galant, Mirage & Montero Sport
1) Remove defogger relay. See COMPONENT LOCATIONS. Ground
relay terminal No. 3, and apply battery voltage to terminal No. 1. See
Fig. 2. Check relay continuity using ohmmeter.
2) Continuity should exist between terminals No. 2 and 5.
With voltage disconnected, continuity should not exist between
terminals No. 2and 5. Ensure continuity exists between terminals No. 1
and 3. If continuity is not as specified, replace relay.
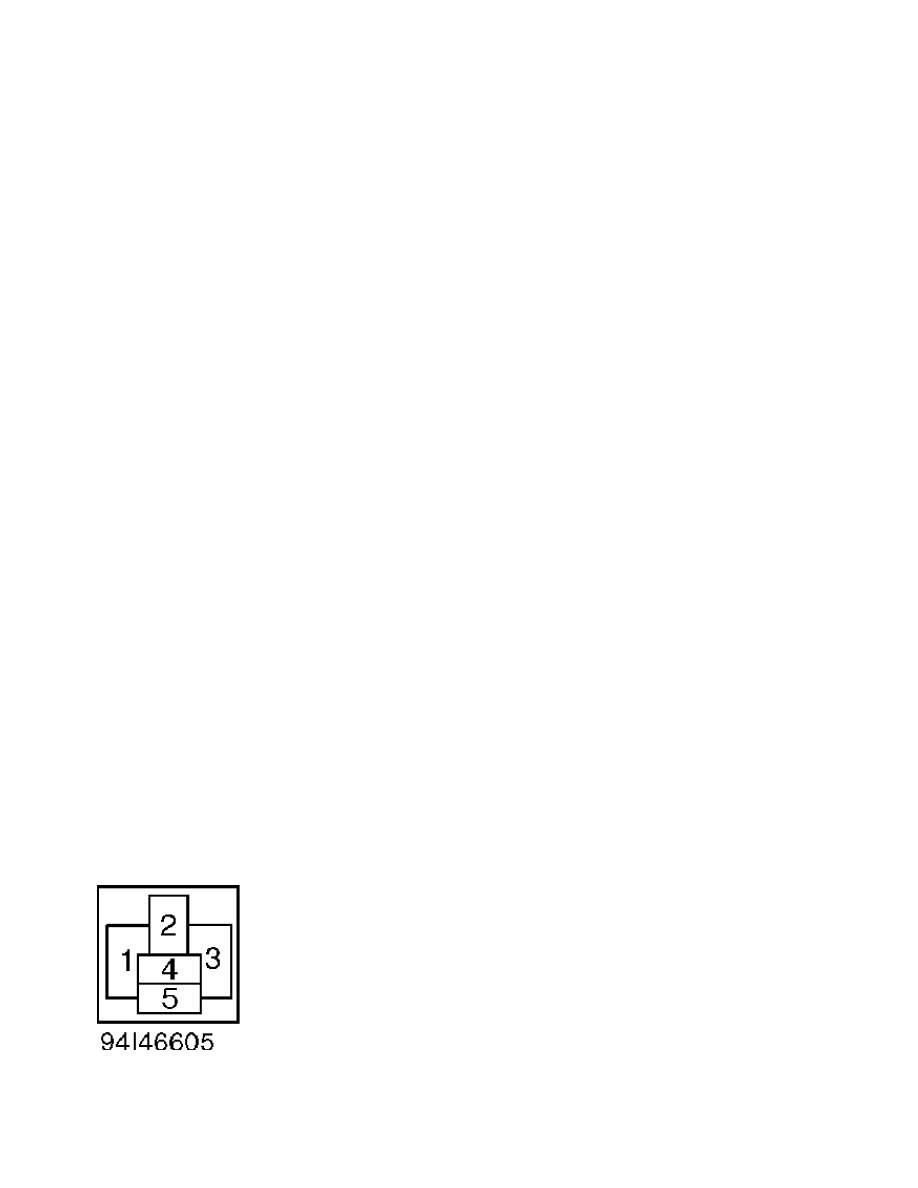
Montero
1) Remove defogger relay. See COMPONENT LOCATIONS. Ground
relay terminal No. 3 and apply battery voltage to terminal No. 1. See
Fig. 3. Check relay continuity using ohmmeter.
2) Continuity should exist between terminals No. 4 and 5.
With voltage disconnected, continuity should not exist between
terminals No. 4and 5. Ensure continuity exists between terminals No. 1
and 3. If continuity is not as specified, replace relay.
3000GT
1) Remove defogger relay. See COMPONENT LOCATIONS. Ground
relay terminal No. 3, and apply battery voltage to terminal No. 5. See
Fig. 4. Check relay continuity using ohmmeter.
2) Continuity should exist between terminals No. 1 and 2.
With voltage disconnected, continuity should not exist between
terminals No. 1and 2. Ensure continuity exists between terminals No. 3
and 5. If continuity is not as specified, replace relay.
Fig. 2: Identifying Defogger Relay Terminals (Diamante, Eclipse,
Galant, Mirage & Montero Sport)
Courtesy of Mitsubishi Motor Sales of America