Mitsubishi Pajero Pinin. Manual - part 187


  Index      Mitsubishi     Mitsubishi Pajero Pinin - service repair manual 2001 year


Search            


Content   ..  185  186  187  188   ..


Mitsubishi Pajero Pinin. Manual - part 187


AUTOMATIC TRANSMISSION – 

Transmission Assembly

23-58

REMOVAL SERVICE POINTS

A

A

"

STARTER MOTOR REMOVAL

Remove the starter motor with the starter motor harnesses
still connected, and secure it inside the engine compartment.

A

B

"

DRIVE PLATE CONNECTION BOLTS REMOVAL

1.

Remove the connection bolts (6 places) while turning the
crankshaft.

2.

Press in the torque converter to the transmission side
so the torque converter does not remain on the engine
side.

INSTALLATION SERVICE POINTS

"

A

A

TRANSMISSION ASSEMBLY INSTALLATION

Press in the torque converter to the transmission side
completely, and then install the transmission assembly to the
engine.

"

B

A

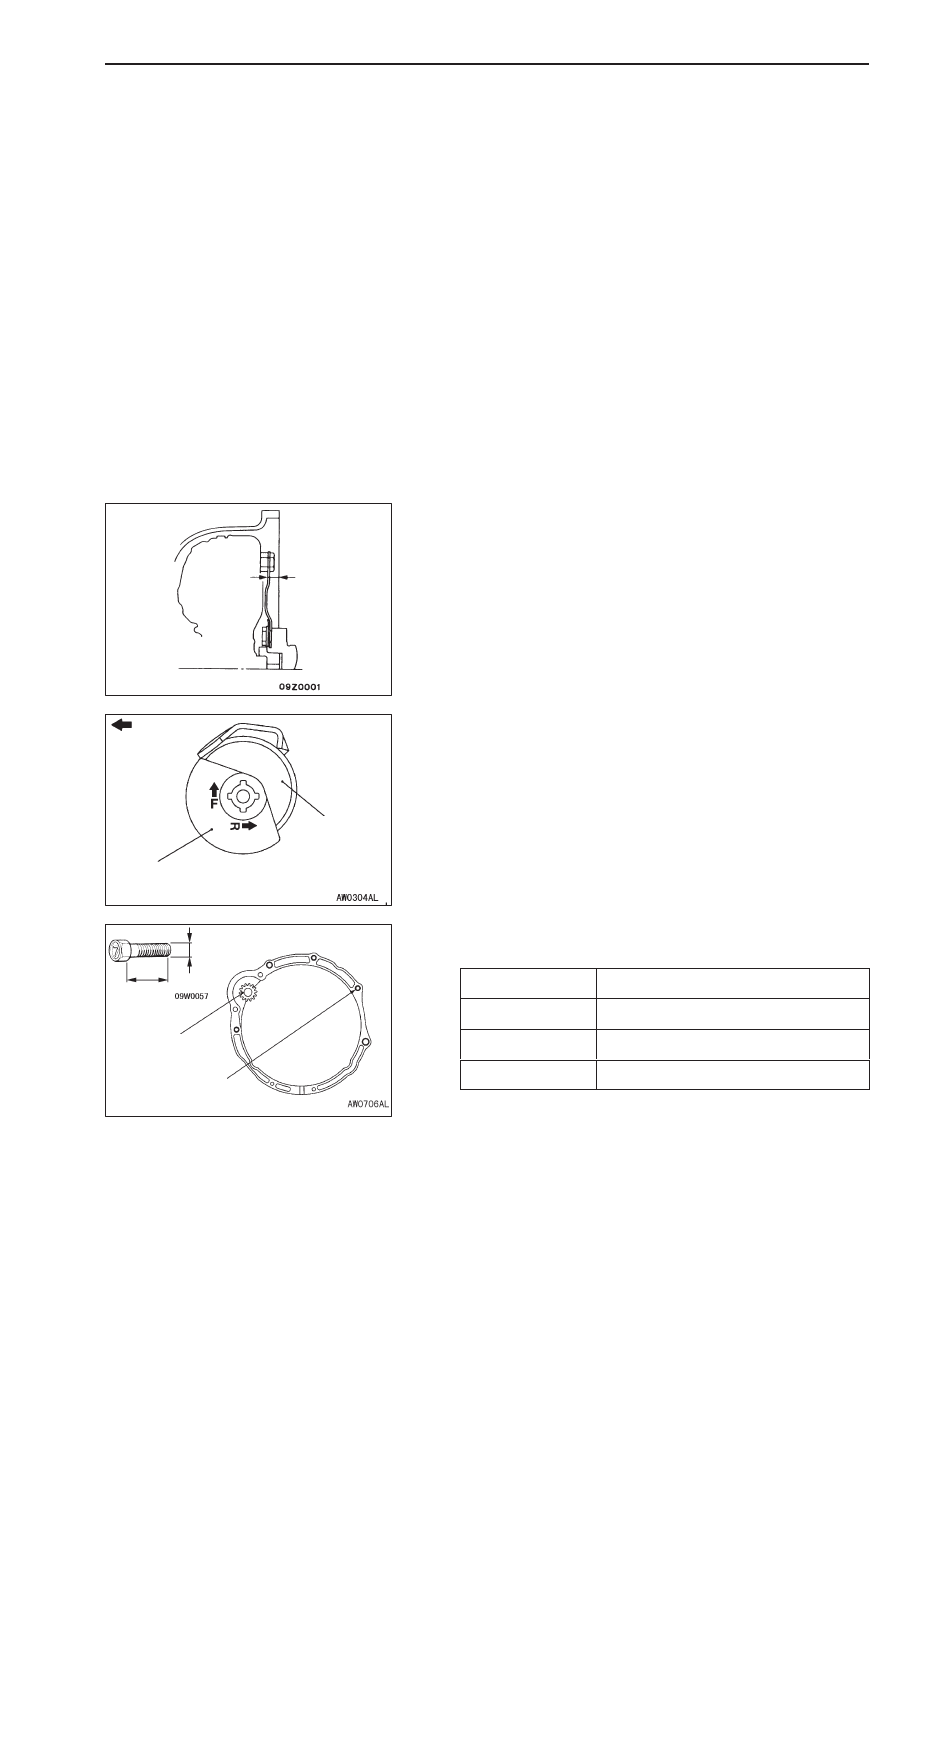
TRANSMISSION MOUNT STOPPER INSTALLATION

1.

Install the transmission mount stopper so that the arrow
faces the direction shown.

NOTE
Disregard F and R stamped as a shared part.

2.

The sizes of the mounting bolts are different. So be sure
not to confuse them.

Bolt

Diameter x Length mm

A

10 x 50

B

10 x 60

C

10 x 40

25.9 mm

Transmission
mount stopper

Front  of
vehicle

Transmission
mount insulator
assembly

A

B

B

A

C

Starter motor

4G9 only

Diameter

Length

AUTOMATIC TRANSMISSION – 

Transmission Oil Cooler

23-59

TRANSMISSION OIL COOLER

REMOVAL AND INSTALLATION

Pre-removal and Post-installation Operation

D

Transmission Fluid Draining and Supplying 
(Refer to P.23-35.)

D

Under Cover Removal and Installation

2

3

4

6

44 Nm

5

1

Removal steps

1. Return hose
2. Feed hose
3. Oil cooler pipe assembly
4. Hose assembly

D

Transmission assembly (Refer to
P.23-56.)

5. Oil return pipe
6. Oil feed pipe

AUTOMATIC TRANSMISSION – 

A/T-ECU/4WD Indicator Control Unit

23-60

A/T-ECU

REMOVAL AND INSTALLATION

Caution
Do not strike the G sensor when removing and installing the A/T-ECU.

Pre-removal and Post-installation Operation
Rear Floor Console Removal and Installation

1

2

Removal steps

1. Floor console bracket
2. A/T-ECU

4WD INDICATOR CONTROL UNIT

REMOVAL AND INSTALLATION

Refer to GROUP 22.

23-1

AUTOMATIC

TRANSMISSION

CONTENTS

GENERAL

2

. . . . . . . . . . . . . . . . . . . . . . . . . . . . . . . . . 

Outline of Changes

2

. . . . . . . . . . . . . . . . . . . . . . . . . . . 

TROUBLESHOOTING <A/T>

2

. . . . . . . . . . . . . . . . 


Content   ..  185  186  187  188   ..