Mitsubishi Pajero Pinin. Manual - part 170
 

  Index      Mitsubishi     Mitsubishi Pajero Pinin - service repair manual 2001 year


Search            


Content   ..  168  169  170  171   ..


Mitsubishi Pajero Pinin. Manual - part 170


MANUAL TRANSMISSION


On-vehicle Service

22-3

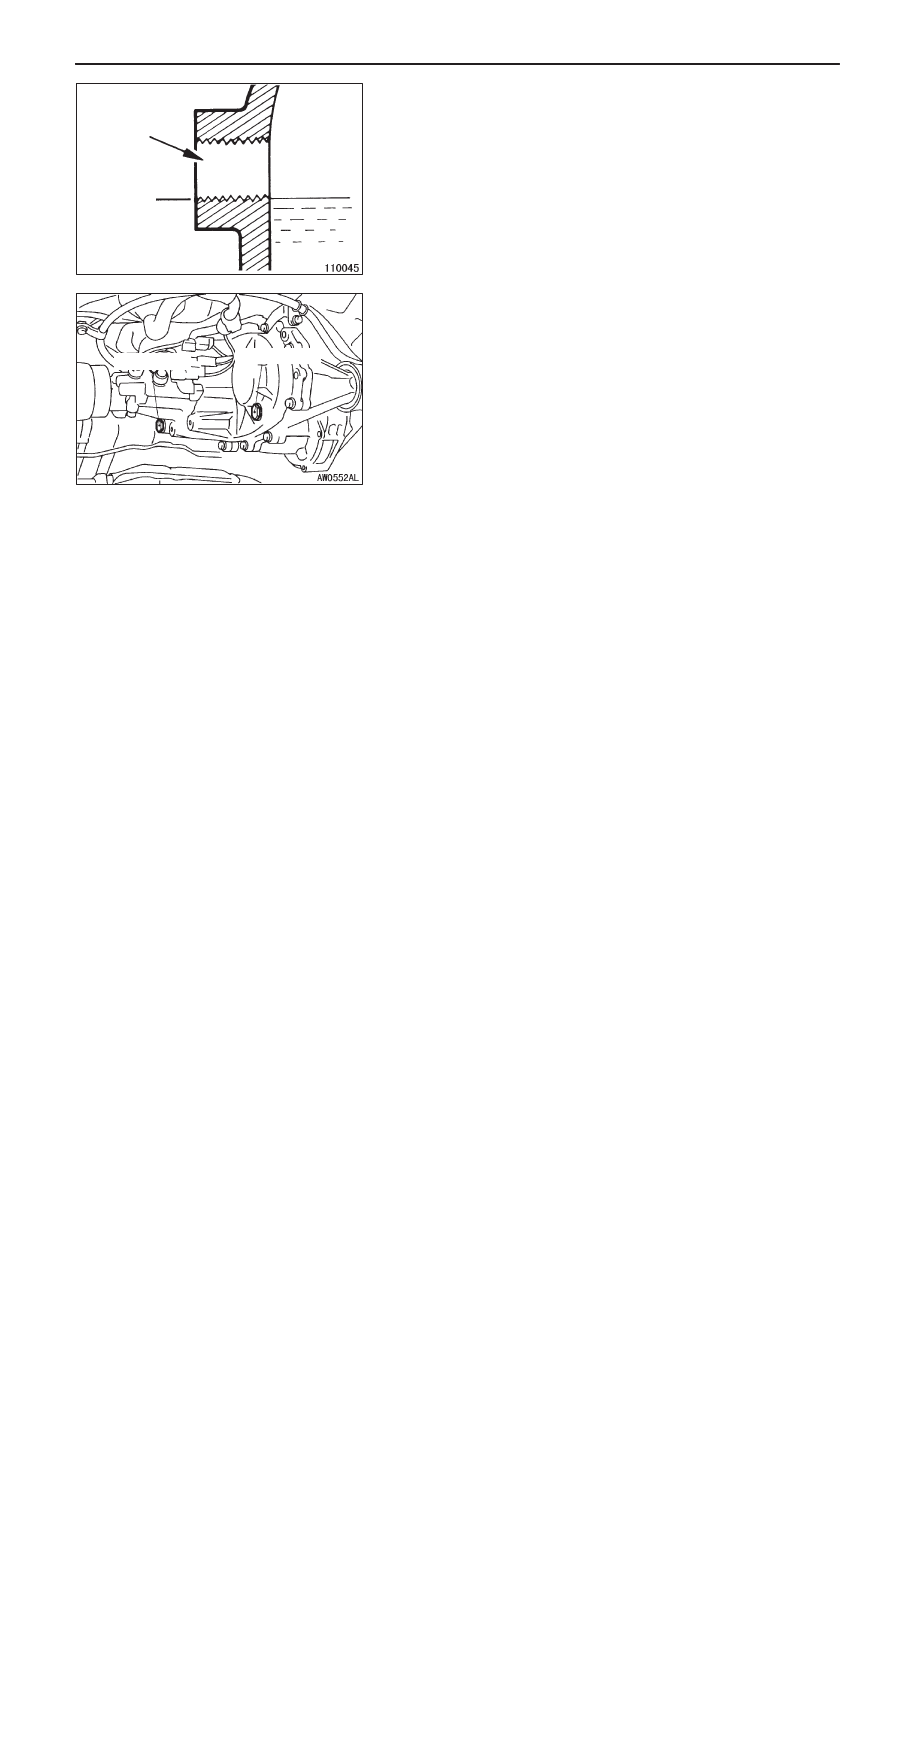
TRANSFER OIL CHECK

1.

Remove the oil filler plug.

2.

Oil level should be at the lower portion of the oil filler
plug hole.

3.

Check that the transfer oil is not noticeably dirty, and it
has a suitable viscosity.

4.

Install the oil filler plug, and then tighten it to the specified
torque.

Tightening torque: 29 – 34 Nm

TRANSFER OIL CHANGE

1.

Remove the oil drain plug to drain oil.

2.

Install the oil drain plug, and then tighten it to the specified
torque.

Tightening torque: 29 – 34 Nm

3.

Remove the oil filler plug, and then fill with specified oil
till the level comes to the lower portion of oil filler plug
hole.

Specified oil:

Hypoid gear oil SAE 75W – 90 or 75W – 85W
conforming to API GL-4

Quantity: 2.2 

ȏ

4.

Install the oil filler plug, and then tighten it to the specified
torque.

Specified torque: 29 – 34 Nm

Oil level

Oil filler
plug hole

Oil filler plug

Oil drain plug

MANUAL TRANSMISSION


Transmission Control

22-4

TRANSMISSION CONTROL

REMOVAL AND INSTALLATION

Pre-removal Operation
Move the transmission control lever and transfer control
lever to the following positions.

D

Transmission control lever: Neutral

D

Transfer control lever: 4H

Post-installation Operation
Check that the transmission control lever and the
transfer control lever are moved to each position
smoothly and correctly.

1

2

3

4

5

6

7

9

10

13

8

11

19 Nm

12

14

19 Nm

19 Nm

19 Nm

Transmission control lever
assembly removal steps

D

Front floor console and rear floor
console (Refer to GROUP 52A.)

1. Harness connection
2. Retainer
3. Shift lever cover

A

A

"

4. Transmission control lever 

assembly

5. Control lever bushing

"

C

A

6. Stopper bracket assembly
7. Transmission control lever

Transfer control lever assembly
removal steps

D

Rear floor console (Refer to GROUP
52A.)

8. Retainer
9. Transfer lever inner boots

"

B

A

10. Transfer control lever assembly

11. Gasket

"

A

A

12. Stopper plate
13. Gasket
14. Transfer control lever

MANUAL TRANSMISSION


Transmission Control

22-5

SEALANT APPLICATION POINTS

Sealant: 

3M ATD Part No.8660 or equivalent

Both sides of gasket

Sealant: 

3M ATD Part No.8660
or equivalent

A

B

A: Sealant: 

3M ATD Part No.8660 or equivalent

B: Sealant: 

3M Stud Locking No.4170 or 
equivalent

Sealant: 

3M Stud Locking
No.4170 or equivalent

MANUAL TRANSMISSION


Transmission Control

22-6

REMOVAL SERVICE POINT


A

TRANSMISSION CONTROL LEVER ASSEMBLY
REMOVAL

1.

Support the transfer with a transmission jack, and then
remove the transmission mount crossmember installation
bolt.

2.

Lower the transmission until the transmission control lever
assembly installation bolts can be removed.

3.

Remove the bolts, and then remove the transmission
control lever assembly.

INSTALLATION SERVICE POINTS

A


STOPPER PLATE INSTALLATION

Install the stopper plate as shown in the illustration.

B


TRANSFER CONTROL LEVER ASSEMBLY
INSTALLATION

1.

Eliminate adhesive adhered to the transfer control lever
assembly installation bolts.

2.

Use a tap (M8 


 1.25) to eliminate adhesive adhered

to the threaded holes of the control housing, and then
clean the holes with a compressed air.

3.

Apply the specified adhesive to the transfer control lever
assembly installation bolts, and then install the transfer
control lever assembly.

Specified adhesive:

3M Stud Locking No.4170 or equivalent

Transmission
mount cross-
member instal-
lation bolt

Front of
vehicle


Content   ..  168  169  170  171   ..