Mitsubishi Eclipse / Eclipse Spyder (2000-2002). Service and repair manual - part 659


  Index      Mitsubishi     Mitsubishi Eclipse / Eclipse Spyder (2000-2002). Service and repair manual


Search            


Content   ..  657  658  659  660   ..


Mitsubishi Eclipse / Eclipse Spyder (2000-2002). Service and repair manual - part 659


MARK

TSB Revision

EXTERIOR

51-23

M A R K

SPECIAL TOOL

M1511000600315

REMOVAL AND INSTALLATION

M1511011800067

Required Special Tool: 

MB990528: Stripe Tape Spatula

INSTALLATION SERVICE POINT

>>A<< MARK INSTALLATION
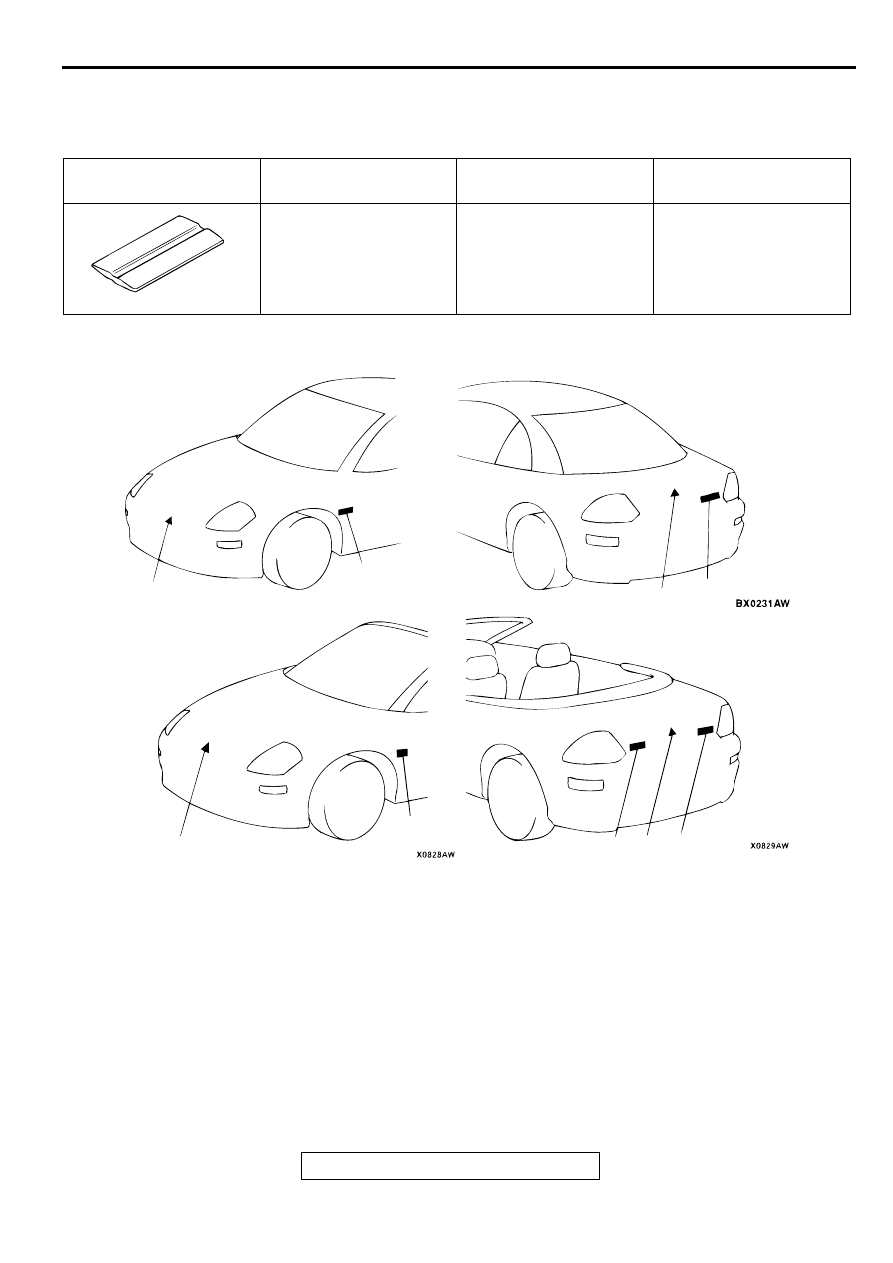
1. APPLICATION LOCATION 

The distance A (from the mark right end to the notch) should 
be identical to the distance A' (from the front door opening 
line to the mark right end).

TOOL

TOOL NUMBER AND 
NAME

REPLACED BY MILLER 
TOOL NUMBER

APPLICATION

MB990528 Stripe tape 
spatula

Bonding of the mark

MB990528

AC003660

< ECLIPSE >

< ECLIPSE SPYDER >

AB

1

2

3

1

4

1

2

3

1

1. TOP MARK

>>A<<

2. ENGINE SPECIFICATION MARK 

>>A<<

3. GRADE MARK (GT, RS, GS)

>>A<<

4. SPYDER MARK

MARK

TSB Revision

EXTERIOR

51-24

CAUTION

Work in a dust-free workplace with temperature of 20 - 
38

°

C


(60 - 100

°

F).

If workplace temperature is under 20

°

C


(60

°

F), warm 

tape and vehicle body (adhesion area) to 20 - 38

°

C


(60 - 

100

°

F).

2. Install the tape by the following procedure.

(1) Use 3M

 AAD Part number 8906 or equivalent to wipe 

off oil from stripe tape adhesion area.

(2) Remove protective paper from back of stripe tape and 

adhere entirely to indicated area.

AC003661

FRONT FENDER PANEL 

PRESS LINE

A

A'

FRONT DOOR

OPENING LINE

ALIGN THE MARK BOTTOM END

WITH THE LIFTGATE BOTTOM END.

ALIGN THE MARK NOTCH WITH

THE LIFTGATE RIGHT END.

ALIGN THE MARK BOTTOM END WITH

THE TRUNK LID BOTTOM END.

 TRUNK LID END LINE

ALIGN THE MARK LINE END WITH

THE TRUNK LID LIFT END.

AB

SPYDER MARK

GRADE MARK
GT (also applicable for GS)

ENGINE SPECIFICATION MARK
LH SIDE

NOTE

RH side is symmetrical on LH side.

MARK

TSB Revision

EXTERIOR

51-25

CAUTION

Pressing the mark horizontally may lead to a slack, 
clinching or improper position.

If the mark is pressed improperly, the mark may be 
easily peeled off.

(3) Make sure that air bubbles are not trapped in the 

application surface. When applying the mark, use special 
tool MB990528 to press the mark from its center to top 
and bottom gradually.

(4) Peel off an application tape (top protection paper) 

horizontally and carefully from one end. If an air bubble is 
left in the mark, open a hole by using a needle, and then 
use special tool MB990528 to expel the air bubble.

AC000548 AB

30 - 45˚

MB990528

APPLICATION TAPE

AC000549

CORRECT INCORRECT

AB

APPLICATION TAPE

DOOR MIRROR

TSB Revision

EXTERIOR

51-26

D O O R  M IR R O R

SPECIAL TOOL

M1511000600326

REMOVAL AND INSTALLATION

M1511006400063

TOOL

TOOL NUMBER AND 
NAME

REPLACED BY MILLER 
TOOL NUMBER

APPLICATION

MB990784 
Ornament remover

General service tool

Removal of remote con-
trolled mirror switch 

MB990784

AC003328

8

7

6

5

3

View A

View A

2

4

6

8

1

B

B

A

A

CLAW

SECTION A – A

6

2,3

2,3

6

SECTION B – B

View A

2,3

(ELECTRIC)

(DIRECT)

AB

NOTE
      : Claw position

1.

REMOTE CONTROLLED MIRROR 
SWITCH

DOOR MIRROR REMOVAL STEPS

DOOR TRIM (REFER TO GROUP42 

P.42-71

.)

2. DELTA COVER, INNER
3. TWEETER COVER

4. PAD
5. TWEETER
6. DELTA COVER BASE
7. HARNESS CONNECTOR 

<VEHICLES WITH REMOTE 
CONTROLLED MIRROR>

8. DOOR MIRROR ASSEMBLY

DOOR MIRROR REMOVAL STEPS 


Content   ..  657  658  659  660   ..